If your garage feels cluttered, start by mapping the space and your goals, then sort what you actually use and what can go. Install wall-mounted systems to free floor area, and choose durable, flexible modules that grow with you. Don’t overlook lighting, flooring, and accessibility—small upgrades make big differences. With a practical plan in place, you’ll gain momentum—and a clearer space that still adapts as you work. Your move isn’t as far as you think.
Assessing Your Space and Goals
Evaluating your space and goals starts with a simple, honest inventory. You’ll map what you have, what you use, and how often you reach for each item.
Start with dimensions: ceiling height, wall lengths, door size, and existing supports. Identify items you actually need access to weekly versus rarely used gear.
Consider how you move through the space—envision a workflow from entry to storage to work zone.
Assess environmental factors like temperature, moisture, and noise that affect storage choices. Garage door insulation becomes part of your plan if you’ll spend time here year-round, reducing heat gain or loss.
Explore ceiling storage options that maximize vertical space without impeding overhead clearance or safety.
Prioritize modular, scalable systems that adapt as goals shift.
Sorting and Categorizing Belongings
Sorting and categorizing belongings is about acting with purpose: group items by how you actually use them, then separate essentials from clutter. You’ll gain clarity by sorting into clear categories: frequently used, occasional, and seasonal. Start with a quick audit, then create a simple map: keep, donate, or recycle.
When items share a space, label boldly and consistently so you can return them without guesswork. Use seasonal storage for items you only need part of the year, and store off-season gear separately from daily tools.
Build practical groupings by function—tools, garden, sports, hobbies—so your garage becomes a workflow zone, not a storage maze. Implement a labeling system that’s durable and easy to update, and revisit quarterly to prevent drift.
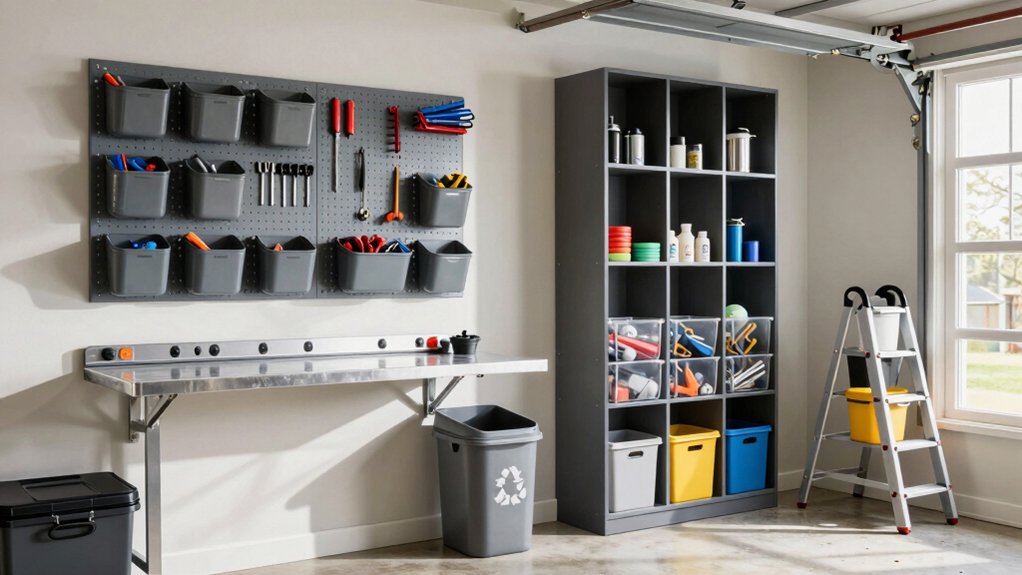
Wall-Mounted Solutions for Quick Access
Set up Quick-access Rail Hooks to hang frequently used items within arm’s reach, so you grab what you need in seconds.
Slim Track Shelves keep small tools and fasteners organized without crowding your wall, freeing up floor space.
Magnetic Tool Panels attach powerful, steady storage for knives, wrenches, and drill bits, so the essentials stay visible and ready.
Quick-access Rail Hooks
Quick-access rail hooks on a wall keep frequently used tools within reach and organized without taking up shelf space. You snap hooks along a sturdy rail, allowing instant access to every task you grab daily.
Place hammers, measurement tapes, pruners, and small utility knives at your eye level for speed and efficiency. Use double hooks for cordless batteries and chargers, so cords don’t coil on countertops.
Adjust spacing as you rotate seasons and tools, keeping garden organization tidy and ready for tasks. For seasonal storage, remove out-of-season implements and tag stations so you know what’s in reach when the weather changes.
Keep rails clean with a quick wipe-down, preserving grip and reducing wear. This setup minimizes clutter while maximizing workflow.
Slim Track Shelves
Ever wish you could glide items from wall to workspace in one smooth motion? Slim track shelves give you that flow without sacrificing space. Mount low-profile rails along your wall, then slide lightweight shelves in and out as needed.
Since they’re adjustable, you tailor height and spacing to suit tools, containers, or spare parts, making quick access hassle-free. This setup keeps your work zone clear while boosting garage organization, because shelves stay out of the floor’s way and items are visible at a glance.
Use them for frequently used supplies, adhesives, or paint cans, freeing benchtop space for projects. With minimal footprint and practical reach, space optimization becomes second nature.
Magnetic Tool Panels
Magnetic tool panels put essential implements in plain sight, right where you work. You mount them at eye level or near your benchtop, keeping frequently used drivers, wrenches, and scissors accessible without digging through drawers. This wall-mounted solution speeds up projects and reduces countertop clutter, a key to garage organization.
Use strong magnets that won’t chip heads or attract screws you don’t want nearby; arrange by function to minimize searching. Pair panels with an uncluttered workspace and a fixed hammer or pliers zone to avoid magnetic drifts into power tools.
Remember tool safety: remove ferrous hazards before work, keep metal shavings off sensitive surfaces, and store heavy items low to maintain balance. Magnetic panels simplify access while maintaining neat, safer, more efficient spaces.
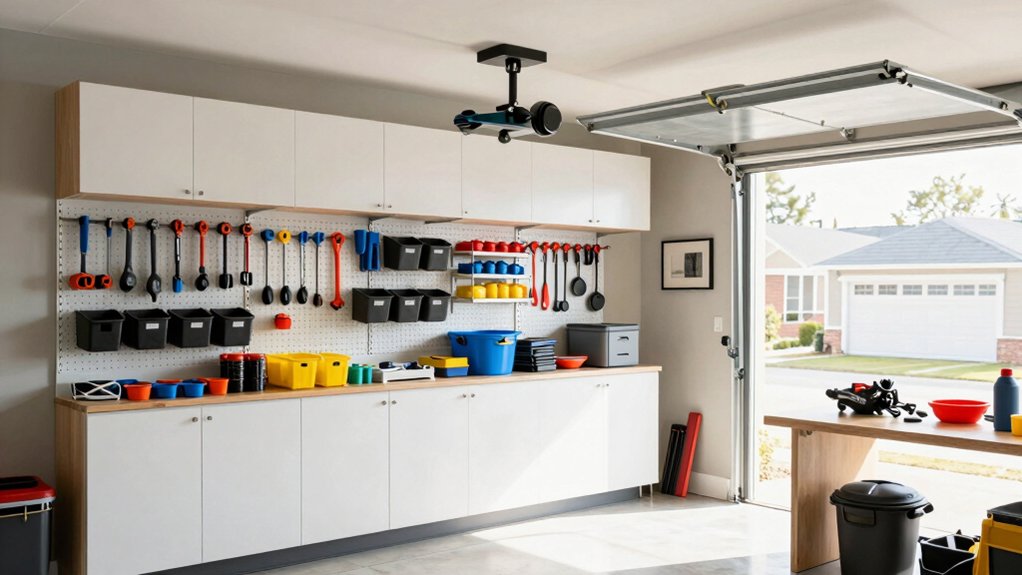
Durable, Flexible Storage Modules
Durable, flexible storage modules start with tough materials that stand up to garage use, from impact-resistant plastics to laminated composites.
You’ll benefit from designs that adapt—modular cubes, adjustable dividers, and stackable bays—so you can reconfigure as gear changes.
This approach keeps your space organized, minimizes clutter, and supports quick access without sacrificing strength.
Durable Materials Guide
Durable storage modules matter because they keep tools organized and ready when you need them. In this guide, you prioritize materials that tolerate tough environments and daily use. Choose solid bases and reinforced joints for long life, and avoid cheap plastics that warp or crack.
Focus on metal frames with corrosion resistant coatings or powder finishes that resist moisture and chemicals. For interiors, select abrasion-resistant surfaces that wipe clean and resist staining. If you opt for composites, ensure they don’t degrade under sun exposure or temperature swings.
Proper ganging and modularity improve strength without crowding spaces. Finally, verify manufacturer specs for load limits and warranty—durability withstands in fewer replacements and steadier workflows. Weather resistant materials and corrosion resistant coatings stabilize performance over time.
Flexible Configurations Pros
Flexible configurations shine when you need versatility without sacrificing strength. With durable, flexible storage modules, you adapt to changing gear without moving entire setups. You can reconfigure shelves, bins, and racks in minutes, keeping heavy items secure and accessible.
This agility supports more efficient garage organization, letting you tailor space for seasonal tools, sports equipment, and shutdown-day clutter alike. Modular units enable partial upgrades instead of total overhauls, reducing cost and downtime.
You’ll appreciate glide-out drawers for small parts and adjustable dividers that prevent shifting during use. By prioritizing robust connectors and stable foundations, you maintain safety while expanding capacity.
In short, flexible configurations boost storage optimization, making cluttered spaces manageable and your workflow smoother.
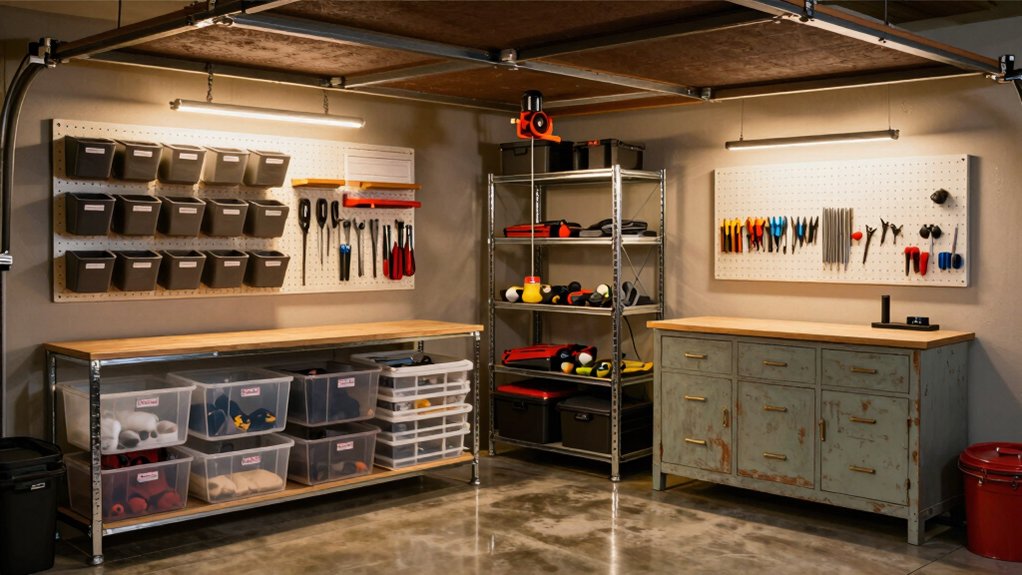
Flooring, Lighting, and Accessibility Considerations
If you’re planning garage storage, choosing flooring, lighting, and accessibility options upfront saves time and money later; the right mix improves safety, usability, and longevity.
You’ll want durable, slip-resistant flooring that resists oil spills and temperature swings, plus clear zones for tools and vehicles.
Lighting should be bright, evenly distributed, and switchable by task—the right glare-free setup makes precision work safer.
Accessibility means level entry, wide aisles, and knee-friendly storage heights so you don’t strain your back reaching for bins.
Plan ventilation options early; direct exhaust for fumes and proper air exchange reduce heat and odor buildup.
Consider garage insulation as a baseline to stabilize temps and protect stored items, then layer in smart vents or fans for airflow control.
This foundation keeps storage lasting and usable.
Budget-Friendly Upgrades and Maintenance
Starting with the basics you already set—sturdy flooring, solid lighting, and clear access—budget-friendly upgrades focus on practical, high-value improvements you can tackle now. You’ll prioritize efficiency over extras, using smart budget planning to avoid waste.
Begin by pairing inexpensive storage with clear labeling and a simple inventory system to boost garage organization. Reallocate underused wall space with adjustable shelving and pegboards, keeping tools visible and reachable. Consider modular cabinets that expand as your needs grow, avoiding overbuying.
Maintain the system with a routine: quarterly checks, quick cleanups, and replacement of worn seals or fasteners. Invest in durable, low-cost upgrades like weatherproof bins and sealant to reduce moisture.
Small, deliberate fixes compound into lasting order, saving time and money.
Frequently Asked Questions
How Can I Measure Garage Height for Tall Storage?
To measure garage height for tall storage, you’ll measure ceiling height with a tape measure, then account for clearance. Use a ladder for accuracy, mark your studs, and plan before installing tall shelving to maximize space.
What Are Best Practices for Safety During Upgrades?
Absolutely, safety first: wear personal protective gear and practice proper tool handling during upgrades. You should plan, assess risks, and stay organized; one mistake could derail everything—stay focused, keep paths clear, and use guards and locks.
Which Materials Resist Oil and Solvent Spills Best?
Chemical resistance matters most; go with spill proof materials like high-density polyethylene or PVC shelves, plus epoxy-coated panels. They resist oil, solvents, and abrasion, keeping surfaces safer while you organize and easily wipe spills away.
How Do I Prevent Moisture Damage in Low Areas?
Place moisture barriers on the floor and walls, then run a dehumidifier with ideal placement toward the center or elevated areas. Regularly monitor readings, seal cracks, and elevate valuables to prevent moisture damage in low spots.
Can I Reclaim Space From Attic or Loft Storage?
Birds reclaiming the sky, you can reclaim attic space by shelving, decluttering, and installing a loft ladder. Prioritize attic insulation, organize with labeled bins, and guarantee safe access for practical, efficient storage that frees higher corners.
Conclusion
You’ve mapped the space, sorted what you actually use, and hung what you reach for daily. With wall panels, modular bins, and durable shelving, your garage stops fighting you and starts supporting you. Stay flexible, scale as needs shift, and keep maintenance habits simple to prevent clutter from creeping back. Remember, clarity is a catalyst—every tool in its place sparks momentum, not mess. Start small, build steady, and watch your storage become a source of efficiency and pride.