

A lean-to conservatory can feel cramped and drafty at once, yet a budget makeover proves you don’t need a big budget to improve it. You’ll assess scope, set a clear plan, and track every pound as you upgrade insulation, light, and storage. Practical steps follow, with cost-conscious choices that still deliver real impact. The challenge is staying focused on essentials while avoiding unnecessary add-ons—and that balance is what keeps you moving forward. Let’s start with a concrete plan you can implement this season.
Assessing Your Lean-To: Scope and Goals
Evaluating your lean-to starts with a clear scope and specific goals. You’ll begin with a structured structural assessment to map what exists, what’s sound, and what needs attention. Identify load paths, window and door alignments, roof integrity, and drainage.
Clarify your intent: will you improve insulation, extend daylight, or add access? Define measurable targets, such as a brighter room with a minimum R-value, or a gapped seal that eliminates drafts. Your goal setting should translate into concrete tasks, deadlines, and required materials.
Prioritize safety and compliance, noting any structural constraints early. Document findings succinctly to inform decisions and budgeting later. This focused assessment prevents scope creep and anchors planning in practical, actionable steps for a successful makeover.
Budgeting 101: How to Plan for a Budget Makeover
Budgeting for a lean-to makeover starts with clear financial boundaries and a practical plan you can follow. First, set a ceiling you won’t exceed and allocate funds by category: materials, labor, and contingencies. List must-haves versus nice-to-haves, and assign realistic costs to each item.
Next, research prices online and in local suppliers to refine your estimates, then track every dollar as you purchase. Prioritize durable, low-maintenance choices to reduce future expenses.
When choosing decorative lighting, compare LED options for efficiency and longevity, aligning with your overall budget.
For paint color, select a neutral base and one accent tone to minimize repainting later.
Build a phased timeline with milestones, leaving room for unexpected costs or weather delays.
Finally, review your plan weekly and adjust as needed.
Maximizing Light: Window and Glass Upgrades
Maximizing light means prioritizing window and glass upgrades that brighten the space without breaking the budget. To start, assess existing glass for insulation and glare.
Choose energy-efficient panes with low-emissivity coatings to cut heat loss while preserving daylight. Consider window upgrades that maximize natural light, such as larger fixed panes or a light-transmitting, thermally broken frame.
Use clear or soft-tinted glass to reduce UV fading and glare without darkening the room. Install reflective window films only if needed to curb heat in peak sun, and ensure proper ventilation through operable vents or louvers.
Prioritize simplicity: avoid heavy muntins that break sightlines. Document costs, measure impacts on comfort, and compare supplier warranties.
This approach guarantees brighter mornings and consistent daylight without overspending.
Flooring on a Dime: Affordable Surface Options
Flooring costs can quickly eat into your budget, but you don’t have to compromise on looks or durability. Start with a plan that matches your climate and traffic.
Practical options include vinyl plank that mimics wood, offering water resistance and easy maintenance, and ceramic tile for longevity in high-traffic areas.
If you want warmth underfoot, consider laminate with a durable wear layer or engineered wood, provided you seal against moisture.
Runners or mats protect high-traffic zones without committing to a full replacement.
Install a cohesive base by choosing a neutral tone and, where possible, seamless progression between indoors and out.
Don’t neglect solar shading and decorative trim; these details finish the space and reduce glare, extending comfort and protecting flooring from sun-related wear.
Wall Treatments That Lift the Space
Light-reflecting paints can brighten every inch of your lean-to, making the space feel larger and airier.
Add texture with paneling to create horizontal or vertical movement that guides the eye up and around the room.
Use contrast color accents sparingly to energize focal points without weighing down the view.
Light-Reflecting Paints
Choosing the right light-reflecting paints can instantly brighten a lean-to conservatory, making the space feel larger and more inviting. Start with finishes that bounce light without glare, such as eggshell or satin.
Opt pale neutrals like soft whites, beiges, or cool grays to maximize daylight. Avoid high-gloss coatings that create reflections on windows and trims. If you have limited natural light, choose slightly warmer tones to compensate.
Apply multiple thin coats for even coverage and record each step to ensure consistency. Consider undertones that harmonize with existing decor and furniture.
Pair paint choices with decorative lighting to extend brightness after sundown, and plan ventilation solutions to prevent dampness from affecting finish quality.
With careful selection, walls stay durable and visually open.
Texture With Paneling
Texture with paneling can transform a lean-to conservatory by adding depth and architectural interest without sacrificing brightness. You’ll choose paneling that’s lightweight and easy to install, such as plywood or MDF boards cut to uniform widths. Install vertically for an elongating effect or horizontally to emphasize width, then seal with a clear finish to protect against humidity. Keep seams tight and caulk gaps to prevent drafts.
Pair with simple wall panels that reflect light, avoiding heavy textures that trap warmth. Integrate window treatments that complement the paneling—thin blinds or sheer curtains for privacy without dulling daylight. For lighting options, install recessed or rail lighting to highlight panel lines and create even illumination. Finish with a consistent trim to unify the space.
Contrast Color Accents
Could a bold color punch lift the mood of a lean-to conservatory anyway you look at it? Yes, with contrast color accents. Start with a controlled palette: choose two complementary paint colors for walls and trim, then reserve one hue for focal points. Use lighting fixtures to highlight these accents, not overwhelm them; position sconces and track lighting to cast directional shadows that deepen color depth.
Keep ceilings light to prevent claustrophobia and reflect natural light. Introduce a bold accent on a single wall or behind seating, then balance with neutral upholstery. Apply color in small, repeatable bursts—pillows, vases, or a throw—so shifts read as deliberate design, not chaos.
Tie everything together through consistent undertones across lighting fixtures and paint colors.
Insulation and Thermal Tricks for Year-Round Comfort
You’ll start by sealing drafts to keep year-round comfort steady. Consider your insulation material choices with practicality in mind, balancing cost, thickness, and performance.
We’ll also address thermal gain management to prevent overheating in sun and loss on cold days, using clear, action-focused tips for each area: Draft-Free Sealing, Insulation Materials, and Thermal Gain control.
Draft-Free Sealing Tips
To keep a lean-to conservatory warm year round, start with airtight draft-free sealing: inspect all joints, seams, and gaps around doors, windows, and the roof, then seal with the right combination of weatherstripping, caulk, and sealant.
Prioritize compression seals at movable joints, and select low-expansion sealant for narrow gaps to avoid cracking.
Check glazing edges for micro-gaps and apply clear silicone or acrylic caulk to stop convection loops.
Install door sweeps and frame seals to block drafts at entry points.
Add draft blocks under vents or vents’ flaps when feasible.
Integrate solar heating by allowing sun access through glass while reducing convection losses with exterior shading to keep interiors steady.
Seal once, test, then recheck after a few weeks of use.
Insulation Material Choices
Choosing the right insulation materials is essential for steady warmth in a lean-to conservatory. You’ll prioritize materials with high R-values per thickness and minimal moisture risk.
Start with a breathable moisture barrier behind any interior paneling to block condensation without trapping humidity.
For the roof, consider reflective insulation or radiant barriers that deflect solar heat in summer while retaining warmth in cooler months.
In walls, select multi-foil or rigid foam boards with a continuous flat surface to reduce thermal bridging.
Seal all joints securely to prevent air leaks; use gasketed panels where possible.
Integrate solar shading to limit heat gain during sunny periods, and ensure barriers work with ventilation.
Choose easy-install options to fit your budget and DIY timeline.
Thermal Gain Management
Smart use of insulation and targeted thermal tricks keep a lean-to conservatory comfortable year-round. You’ll balance heat loss and gains with precise layering, sealing, and airflow.
Begin with high-performance cavity insulation and airtight seals at doors and joints to minimize drafts. Choose breathable, yet moisture-resistant underlayment to reduce condensation and improve comfort.
Use reflective or diffuse solar shading to cut glare and heat from direct sun without sacrificing light. Employ ventilation strategies that suit your climate: operable vents, edge-to-edge trickle ventilation, and a controllable ceiling fan to move air efficiently.
Pair skylight blinds or films with zoned heating or cooling to maintain stable temps. Monitor interior temperatures, adjust shading, and fine-tune insulation for year-round comfort.
Heating and Cooling on a Budget
Heating and cooling a lean-to conservatory on a budget means prioritizing practical, low-cost options that yield noticeable comfort without overspending. You optimize airflow by cross-ventilating: open doors to shaded zones, use ceiling fans, and install a simple vent or louvered window if possible.
For cooling, solar shading reduces heat gain; position blinds or screens to block midday sun while preserving daylight. Insulation improvements, like draft seals around doors, lower cooling needs and stabilize temperatures.
In winter, use thermal curtains to retain heat when indoors, and leverage passive gains from sunlit panes. For heating, rely on outdoor heating when outdoor temps permit, such as portable stabilizers or heaters placed away from fabrics.
Pair with an energy-efficient heat source to maintain comfort with minimal expense.
DIY Glazing and Skins: Quick-Fix Solutions
If you’re after quick, wallet-friendly improvements, start with DIY glazing and skins that cut heat gain and boost comfort without a full rebuild. You’ll target panels for simple shade and insulation, using ready-made films or temporary sheathing to reduce solar load. Choose breathable, reversible options so you can revert if needed.
For a tighter budget, consider upcycling furniture pieces as discreet frame supports or backing boards, then secure with removable fasteners to avoid wall damage. DIY painting on adjacent timber frames brightens the area while you install skins, keeping project time short.
Prefer low-emissivity films for glare reduction, and vented panels for airflow. Document adjustments, test temperature shifts, and store unused materials for future tweaks.
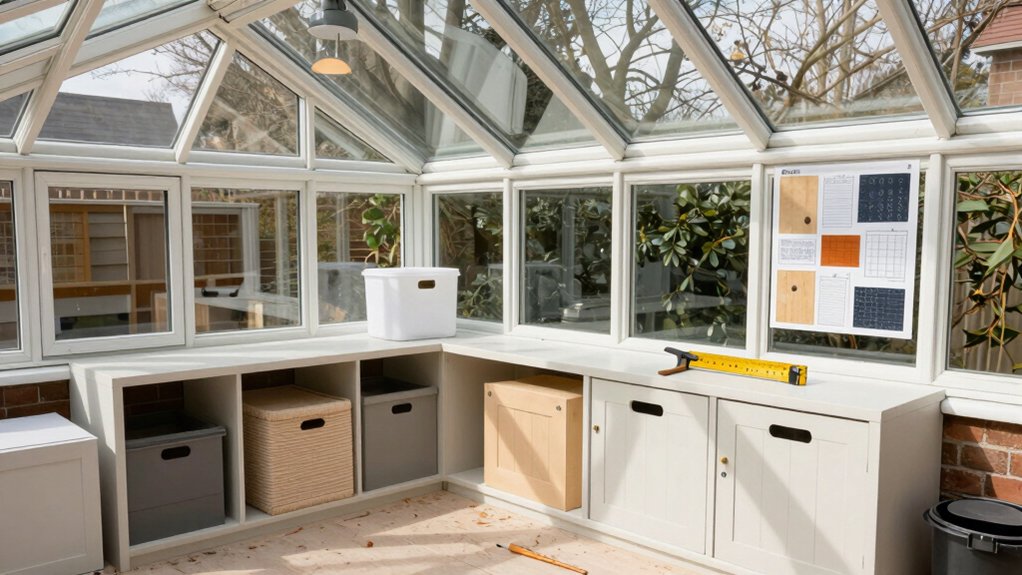
Smart Storage for a Narrow Layout
To make the most of a narrow Lean-to Conservatory, prioritize vertical and modular storage that stays tucked out of the way. You’ll gain floor space by using tall shelves, wall-mounted cabinets, and slim rolling carts that fit beside seating or near doorways. Choose units with adjustable shelves and integrated bins to keep clutter contained.
Install shallow pull-out drawers for small items, plus hooks or pegboards for tools and accessories. Use corner nooks for compact storage, and mount lighting that helps visibility without occupying more space. Label containers to speed retrieval and maintain order.
Aim for symmetry in placement to avoid visual clutter. These storage solutions support space optimization, making a narrow layout feel organized and functional without bulk.
Color Schemes That Expand a Small Area
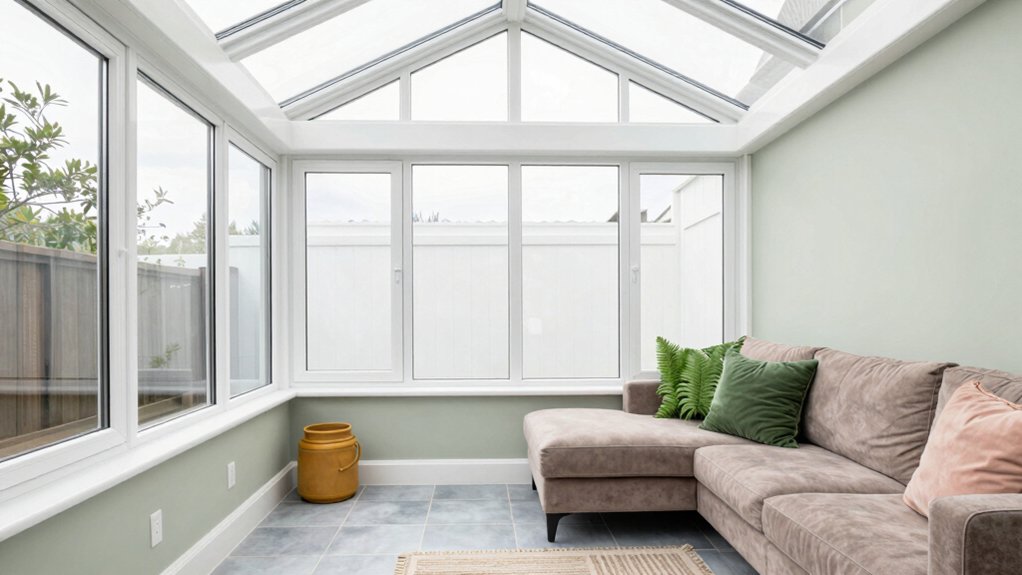
A light, cohesive color scheme can make a small lean-to feel more expansive. You’ll choose a bright base and subtly lighter ceilings to create perceived height, then add restrained accents to avoid visual clutter.
Use color psychology to guide choices: cool neutrals in the walls open sightlines, while tiny pops of warm tones near seating add inviting warmth without shrinking space.
Paint finishes matter: matte ceilings reduce glare, satin walls reflect light, and semi-gloss trim defines edges without shouting.
Keep doors and frames in the same family as the walls to maintain flow.
Test samples in natural light for several days, observing how colors shift.
Finally, minimize contrast between adjoining surfaces so the room reads as one continuous field, enhancing perceived area.
Furniture That Fits a Lean-To
A lean-to benefits from furniture that fits the space without crowding it. You’ll choose pieces that maximize function while minimizing footprint. Start with compact seating, like a narrow bench with hidden storage or a slim loveseat, so you gain seating without losing floor area.
Opt for space saving furniture that doubles as storage, such as a coffee table with drawers or a wall-mounted swivel table that folds when not in use. Multi functional pieces save wall real estate and simplify layout.
Consider modular seating you can reconfigure for gatherings or everyday lounging. Use vertical storage: tall shelves or wall hooks to keep surfaces clear.
Avoid bulky upholstered options; choose sleek lines, light finishes, and feet that elevate visibility. Prioritize practical accessibility and easy cleaning for a brighter, more usable space.
Soft Furnishings and Textiles With Impact
Soft textiles set the tone, so start with durable, easy-care fabrics in colors that echo your décor goals.
Use accessories to create impact, pairing bold cushions or throws with understated curtains and rugs for balanced contrast.
This approach keeps the space practical and visually sharp while letting textures drive the room’s character.
Soft Textiles Choice
When choosing soft textiles for a lean-to conservatory makeover, focus on durability, light diffusion, and easy maintenance to keep the space comfortable year-round. You’ll prioritize fabric selection that balances resilience with aesthetics, ensuring daily use doesn’t show wear quickly.
Start with upholstery-grade curtains or blinds that soften glare while resisting fading. Choose cushions and throws in machine-washable fabrics to simplify cleanup after spills or weather exposure. Consider tight weaves and stain-resistant finishes for high-traffic seating areas.
For textiles sheathing furniture, opt for performance fabrics that maintain shape and color. Test colorfastness under sun exposure to prevent rapid fading. Plan for cohesive tones that amplify daylight without overpowering the room.
Impact Through Accessories
Want to make a lean-to feel brighter and more cohesive? Focus on accessories that enhance light, texture, and color without clutter.
Start with decorative lighting to shape atmosphere: a mix of ambient ceiling glow, task lamps, and subtle uplighting near seating. Choose fixtures with adjustable brightness and a cool or warm white to suit your paint color.
Layer textiles to add warmth and definition: cushions, throws, and a runner in coordinated tones that echo wall color. Select textiles with medium-contrast patterns to avoid visual noise.
Keep trims, borders, and hardware in a consistent finish.
Tie the space together using a unifying palette across fabrics and small decor items.
Tie back curtains to maximize daylight while maintaining privacy and harmony.
Greenery and Atmosphere: Plants on a Budget
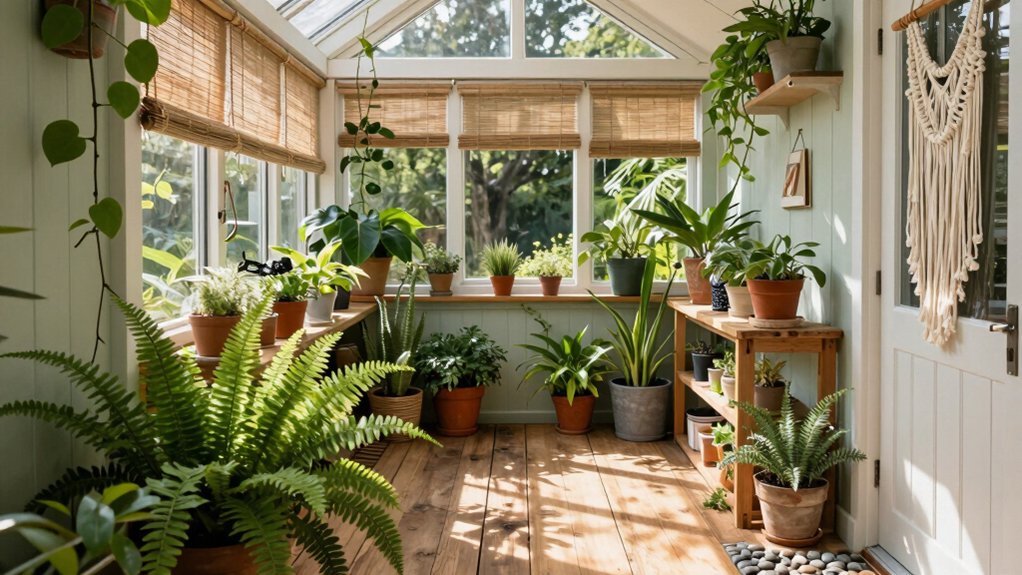
To create a lush look on a budget, start with plants that thrive in a conservatory’s light and humidity, then mix inexpensive varieties with a few showpieces.
You’ll prioritize easy-care greens, herbs, and low-cost flowering species that tolerate bright conditions. Group by light needs, rotate pots seasonally, and use uniform containers to keep the space cohesive.
Choose foliage textures and color contrasts to create depth without expensive purchases. Integrate garden lighting to highlight focal plants and use timers to manage energy use.
Add outdoor art as a living backdrop—compact sculptures or wall panels that resist humidity and enhance ambiance without breaking the budget. Maintain air circulation with a simple fan and monitor humidity for steady growth.
Weatherproofing and Longevity Hacks
Keeping that budget-friendly green vibe in mind, weatherproofing and longevity hacks focus on protecting your lean-to conservatory from humidity, heat, and wear so it stays usable year after year. You’ll implement a structured plan: seal joints with caulk, check flashing, and apply a breathable waterproof membrane beneath the roof.
Use UV-resistant paint or stain to guard timber, and upgrade rotten seals promptly. Install solar shading to reduce heat buildup and glare, preserving interior finishes. Improve ventilation with controlled vents or a passive system to limit condensation.
Maintain gutters and downspouts, clearing debris monthly. Schedule pest prevention measures, like sealing entry gaps and inspecting for infestations. Finally, document maintenance dates and replace worn components before failures occur.
Real-Life Makeover Timeline and Tips
Plan a practical, step-by-step schedule that fits your budget and climate. You’ll map a logical sequence: assess priorities, set milestones, and tie tasks to seasons.
Week 1, clear goals and measurements; week 2, reseal joints and optimize insulation; week 3, replace or refresh garden furniture for comfort and durability; week 4, install or upgrade outdoor lighting to extend usability after dark.
Schedule trades or DIY steps with buffer days for weather delays. Keep a running cost tally and seek lightweight, multi-use tools to save space and expense.
Throughout, document progress with photos and notes to refine plans. When you pause, test comfort in your finished spaces, adjusting layout and flow.
End with inviting, functional zones, emphasizing garden furniture placement and safe, layered outdoor lighting.
Frequently Asked Questions
How to Prioritize Upgrades for Maximum ROI on a Lean-To?
Prioritize insulation and glazing first, then solar heating and decorative lighting. You’ll maximize ROI by reducing heat loss, lowering bills, and boosting ambiance; install energy-efficient glass, compact heaters, and dimmable LEDs, coordinating shading, controls, and airflow for optimum comfort.
What Budget-Friendly Window Options Preserve Light?
Yes—budget-friendly options keep light streaming in: choose window films that darken glare yet preserve brightness, and inexpensive window frames that fit snugly. You’ll preserve light, reduce glare, and maintain a crisp, practical look throughout your space.
Can I DIY Insulation Without Professional Help?
Yes, you can DIY insulation, but assess risks first; for reliability, compare DIY insulation with professional insulation, and know what each entails. Plan, measure, and follow safety steps to avoid moisture issues, fire hazards, or poor performance.
Which Low-Cost Flooring Options Work Best?
Upcycling materials proves sturdy, low-cost flooring works best when you pick durable, easy-care options. You want practical coverage: vinyl plank, laminate, or pressed bamboo. DIY decor ideas keep costs down, and you’ll install confidently, staying within budget.
How to Maintain Weatherproofing on a Tight Budget?
Keep up seasonal maintenance and seal gaps promptly to maintain weatherproofing on a budget; inspect seams and flashing, clear gutters, and schedule roofing repairs when needed to prevent leaks. Prioritize durable seals and simple, repeatable DIY steps.
Conclusion
You’ve laid the groundwork: cheap upgrades with big impact. Think of your lean-to as a bright, blank canvas you seal, light, and layer with smart choices. Seal gaps, warm walls, and drizzle in light with budget glazing tricks. Add rugs, paint, and textiles that bounce brightness around, then crown with greenery and tidy storage. Stay disciplined on the budget, schedule, and DIY steps, and watch a cramped shell become a warm, usable room you’ll actually enjoy using.

