You may not realize you can double your usable width in a narrow toilet with a wall-mounted or corner fixture. This approach frees floor space and visually expands the room, while still meeting comfort and code needs. Consider precise measurements, recessed storage, and a sliding door to avoid swing clearance. The next steps show exact layouts and budget options that make small rooms genuinely functional without sacrificing style. Let’s map out the best compact setup for your space.
Maximizing Width With Compact Fixtures
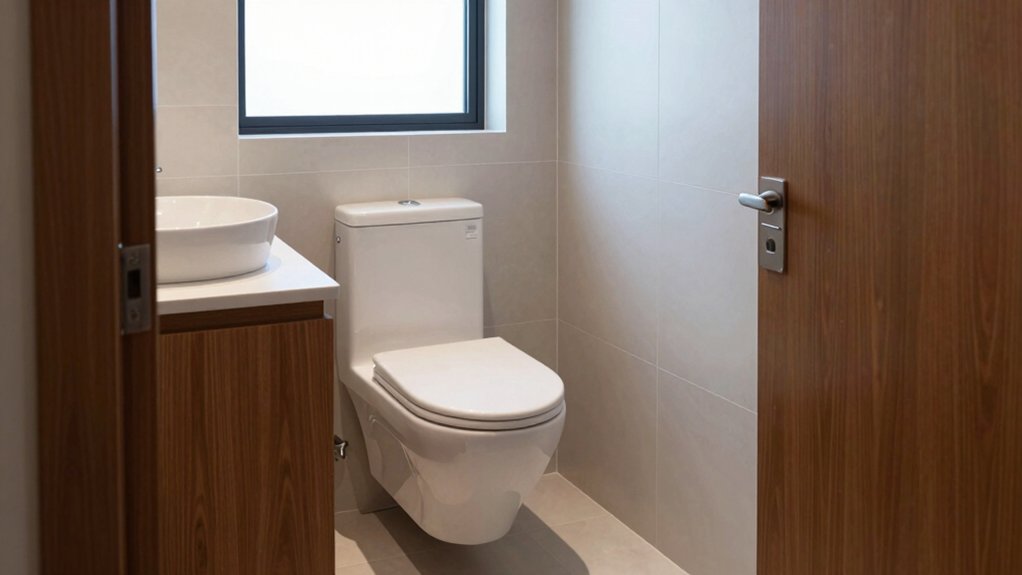
Maximizing width with compact fixtures starts by prioritizing wall-hung or corner models that free floor space and visually widen the room. You optimize geometry by selecting slim profiles and recessed tanks, reducing bulk without sacrificing flush performance.
Choose compact fixtures with minimal projection and dual-flush options to maintain circulation paths and reduce clutter. Measure clearances around doors, elbows, and lunge zones to ensure comfortable use; a tight corridor benefits from 600–700 mm width, with 450–500 mm set for the toilet footprint if possible.
Material choices matter: glossy or light-toned surfaces reflect light and enhance perceived width. Install anchors, insulation, and shut-off valves in accessible locations for maintenance. These space-saving solutions enable better traffic flow while preserving usability and hygiene.
Wall-Mounted Toilets for Small Budgets and Space
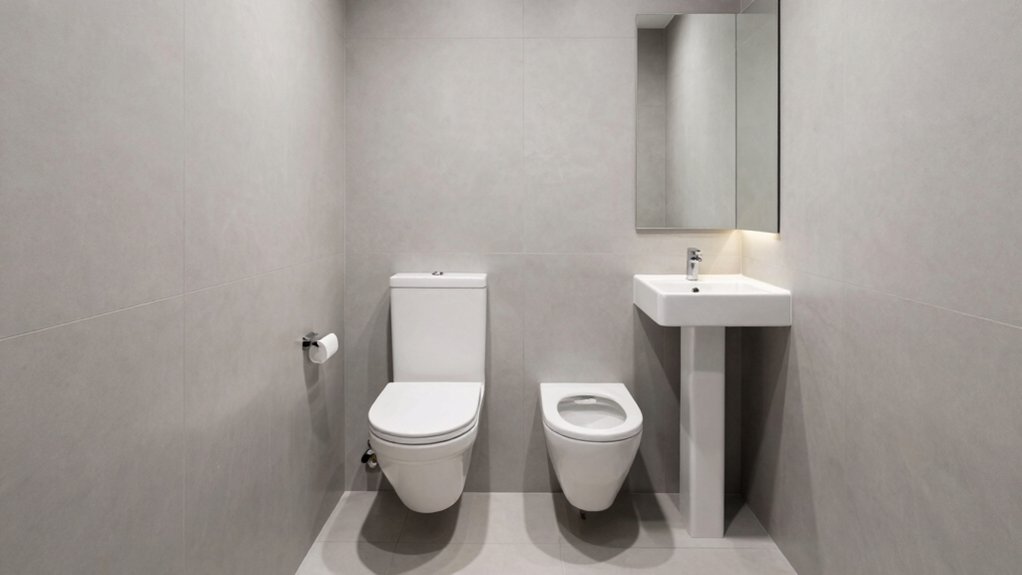
Are wall-mounted toilets the smart move when budget and space are tight? Yes, they maximize floor area by eliminating bulky tanks, creating a streamlined footprint that suits narrow layouts.
For small budgets, weigh plastic-in-tiller vs. ceramic options, and choose a unit with a robust carrier system rated for daily use.
Installers should assess wall stud spacing and access panels, since concealed tanks require precise framing and future serviceability.
Plumbing connections should be kept low and compact to minimize disruptive rerouting.
Pair with wall-recessed tanks to maintain a clean line, and select compatible flushing mechanisms for consistent performance.
Finish with purposeful lighting fixtures and durable flooring materials that extend flush aesthetics, reduce maintenance, and optimize wet zones.
Corner and Recessed Storage Solutions
Corner and recessed storage can reclaim valuable square footage without encroaching on usable space. You maximize tight footprints by integrating corner shelving along walls, letting toiletries and towels stack vertically without crowding the bowl.
Recessed niches provide slim, depth-conscious receptacles for daily-use items, reducing surface clutter and improving wipe-down efficiency. Place a shallow recessed niche beside the vanity for hand soap and a compact mirror, then install deeper niches above the toilet for extra rolls and cleaners.
Materials should be moisture-resistant, with tight joints and sealed backs to prevent off-gassing or mold migration. Access remains straightforward: doors stay closed or swing minimally. Use removable baskets within shelves for quick reorganization.
Precision mounting ensures weight viability without compromising floor space or flow.
Sliding or Bi-Fold Doors to Save Swing Space
Sliding or Bi-Fold doors maximize clearance in tight layouts, so you gain usable floor space without sacrificing access.
Bi-Fold options are versatile for narrow doorways and can better align with plumbing setbacks, improving movement and sightlines.
Consider track quality, door hardware, and clearance when evaluating against traditional swing doors to balance cost with space savings.
Sliding Space Benefits
Sliding or bi-fold doors offer a practical solution to save swing space in tight downstairs toilet layouts. You gain usable floor area by eliminating full-door arcs, letting you place compact seating or a slim vanity where a conventional door would obstruct.
Bi-folds maximize wall access, aiding positioning for cleaning and maintenance without encroaching on critical zones. Choose hardware with low-friction tracks to minimize effort and noise, especially in narrow corridors.
When evaluating space saving fixtures, consider door height and sealing to reduce drafts and moisture transfer. Note that folded panels stack neatly along the wall, preserving visual openness while enhancing accessibility for limited-width stalls.
This approach supports precise layouts, predictable clearance, and straightforward installation timelines.
Bi-Fold Door Options
Bi-fold doors offer a compact, practical solution for saving swing space in tight downstairs toilets, letting you reclaim floor area without sacrificing access.
You evaluate bi-fold versus sliding options by door movement, clearances, and installation ease. Bi-folds excel where ceiling height is limited or door swings would collide with fixtures; they stack neatly, leaving a larger, usable footpath.
Consider track quality, weatherstripping, and the impact on wall space for towel rails and sterilisers.
For installation, confirm alignment tolerances and anchoring strength to handle repeated folding. Space saving door mechanisms should permit smooth, low-friction folding without binding.
When planning, confirm the door frame supports recessed tracks if you prefer a flush, minimal profile.
Compare maintenance needs and long-term wear before committing to bi fold door installation.
Slimline Vanity and Narrow Basins
Slimline vanity sizing helps you optimize floor space without crowding the doorway, so you can choose compact widths and depths that fit your toilet area.
Narrow basin fit ensures you maintain usable counter space and adequate faucet reach, even in tight configurations.
Wall-mounted options offer clean lines, easier cleaning, and flexible height or alignment to suit plumbing and user comfort.
Slimline Vanity Sizing
How you size a slimline vanity and narrow basin matters for both function and space efficiency. You’ll balance depth, width, and clearance to avoid crowding the toilet area while preserving usable surface.
Start with a compact footprint: select a vanity that minimizes overhang, yet accommodates a standard basin for reliable drainage and trap access. Consider a shallow depth (about 150–180 mm) to maximize legroom without sacrificing storage.
Height matters too; aim around 800–850 mm for comfortable elbow space. When integrating storage, prioritize recessed or toe-kick drawers to keep floor clutter low.
Choose compact fixtures and a slim backsplash to maintain visual openness. Opt for space-saving hardware with flat-fronted doors and soft-close hinges to reduce mechanical intrusion and noise, ensuring a tidy, efficient basin zone.
Narrow Basin Fit
To fit a narrow basin with a slimline vanity, start by matching the basin width to the vanity’s inner cabinet opening and the available wall space. Ensure at least 20–40 mm of clearance on each side for alignment and plumbing access.
Measure plumbing clearance behind the vanity and plan trap routing before selecting components.
Choose a compact faucet that fits under the vanity’s lip without interference and maintains sufficient elbow room for use.
Favor a narrow sink with integrated overflow or a rear-access waste to simplify plumbing progression.
Confirm compatibility with underside mounting brackets and supply line positions, avoiding protrusions that reduce toe space.
Prioritize solid mounting, watertight seals, and easy access for maintenance.
Wall-Mounted Options
Wall-mounted configurations pair a slimline vanity with compact basins to maximize footprint while preserving usable toe space. You’ll gain cleaner sightlines and easier cleaning beneath the fixtures, which helps when space is tight.
Choose a slimline vanity with a recessed or narrow drawer for essential items, minimizing overhang that intrudes on the room’s width. Pair it with a narrow basin that preserves leg room without sacrificing water volume.
Opt for wall-mounted controls and a discreet waste pipe to maintain a streamlined profile. Dual flush systems reduce water use without compromising performance, a practical fit for smaller homes.
Eco-friendly materials, like recycled ceramic and sustainably sourced vanities, support durability and lower environmental impact. Guarantee precise mounting to avoid wobble and ensure accessibility of all connections.
Clever Toilet Surrounds and Tankless Options
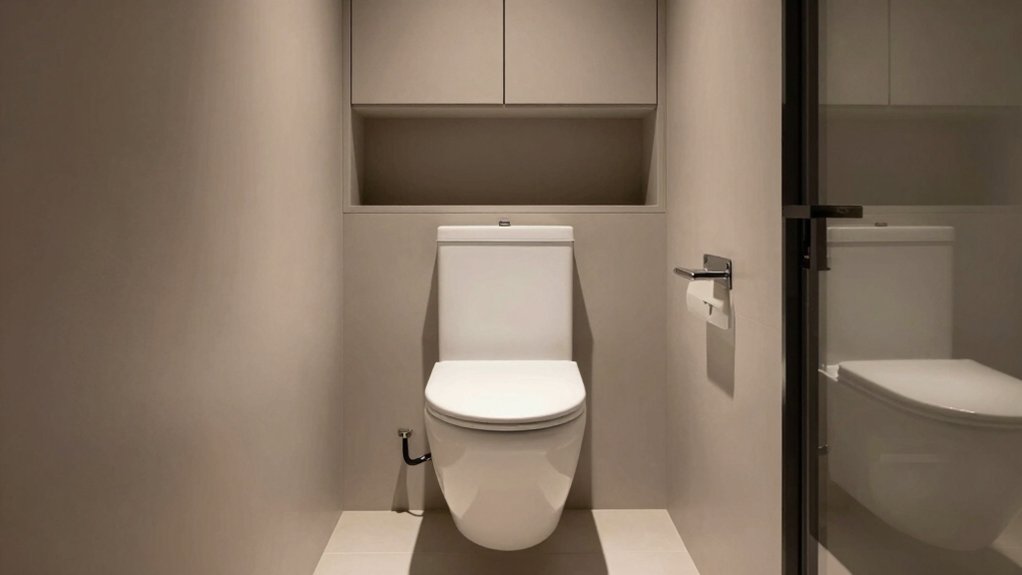
When choosing clever toilet surrounds and tankless options, prioritize installation practicality and water efficiency. Tankless designs reduce bulk and simplify cleaning, while surrounds can conceal rough plumbing and provide a cohesive finish.
You’ll gain a cleaner line, easier access for maintenance, and simplified future upgrades. Opt for compact fixtures that fit narrow footprints without sacrificing usability, ensuring comfortable clearance around the bowl.
Wall mounted toilets pair well with surrounds for a sleek, modern look and streamlined cleaning access. Evaluate flush performance, refill rate, and noise levels to minimize disruption.
Choose durable materials with moisture resistance and cleanable surfaces. Verify mounting hardware compatibility and local code compliance, then document exact clearances for doors and cabinets to avoid interference.
Prioritize long-term efficiency and ease of service.
Vertical Storage and Shelving Ideas
Opt for slimline wall shelves and tall narrow cabinets to maximize vertical storage without encroaching on floor space.
These options keep essentials within easy reach while preserving a clean, uncluttered look.
Install height-adjustable units to accommodate changing needs and maintain precise, functional storage.
Slimline Wall Shelves
Slimline wall shelves offer compact, vertical storage that keeps toiletries and towels within easy reach without crowding the floor. You install slim units above eye level to maximize footprint efficiency, using studs for reliable load paths and a shallow depth to minimize bump risk.
Choose configurations that align with existing plumbing lines and door swing, ensuring clearance for towels and containers. Floating shelves work well if you need a minimalist look and easier cleaning access; decorative ledges offer small, stable display surfaces while maintaining functional storage.
Prioritize moisture-resistant materials and water-resistant finishes, plus removable brackets for hinge access or cleaning behind items. Label containers by usage and maintain a consistent spacing pattern to simplify replacement and reorganization over time.
Tall Narrow Cabinets
Tall narrow cabinets maximize vertical storage without widening the footprint, making them ideal for tight downstairs bathrooms. You gain usable shelves without sacrificing floor space, so you can keep essentials organized and accessible.
Prioritize units with adjustable shelves to accommodate varying item heights, from cleaners to extra toilet tissue. Opt for doors with soft-close mechanisms to reduce noise and wear in compact layouts.
Install a tall cabinet in a corner or between the toilet and sink, aligning with plumbing access where possible to minimize wall cuts. Material choice matters: melamine or PVC cores resist humidity, while a sealed veneer reduces warping.
Labeled or color-coded sections enhance retrieval speed, supporting efficient daily routines and improved maintenance of vertical storage. tall narrow cabinets, vertical storage.
Lighting Strategies to Open Up a Narrow Room
To make a narrow bathroom feel roomier, use lighting strategies that emphasize width and height without clutter. You’ll balance ambient lighting with targeted tasks to avoid harsh shadows that compress space.
Install recessed or thin-profile fixtures along the ceiling line to create a continuous plane, minimizing visual interruptions. Use wall-wash lighting to illuminate vertical surfaces, reinforcing perceived height while keeping glare off vanity mirrors.
Place task lighting at the mirror with a color rendering index above 90 to preserve true tile tones. Choose ambient lighting that radiates softly, avoiding cold, single-point brightness.
Incorporate decorative fixtures sparingly, selecting compact designs that fragment the room’s length rather than crowding it. Ensure dimmable controls for flexible mood and function.
Ventilation Tips for Small Bathrooms

You’ll optimize fresh air exchange with a compact exhaust or balanced system that matches your bathroom’s size and airflow needs.
Implement moisture control methods like humidity-rated fans, smart timers, and door/vent clearances to prevent mold and condensation.
For quiet operation, choose low-noise fans and consider duct routing, vibration reductions, and acoustic insulation to keep daily use discreet.
Fresh Air Exchange
How well does fresh air move through a small bathroom, and why does it matter? In tight spaces, effective air exchange dictates air quality and odor control. You’ll want a deliberate balance: sufficient exhaust to remove humidity and contaminants, yet gentle enough to avoid drawing in dust from adjacent rooms.
Place a low-profile exhaust fan near the toilet or shower, venting externally, with a timer or humidity sensor to sustain cycle reliability. Use a makeup path—a small passive vent or balanced ventilation—to prevent negative pressure.
Keep doors slightly ajar or install a louvered door for continuous flow when the exhaust runs. Sealing gaps around fixtures limits stale pockets. Regular fan cleaning and a quick check on duct trim maintain consistent airflow and odor control.
Moisture Control Methods
Moisture control starts with selecting the right ventilation strategy for a compact bathroom, balancing exhaust strength with a quiet, energy-efficient footprint. You’ll optimize humidity management by targeting air exchange only as needed, reducing heat loss and noise.
Implement humidity sensors to track moisture peaks and trigger ventilation automatically, avoiding run-on cycles that waste energy. Place the exhaust where it extracts humid air efficiently without drawing in colder room air from adjacent spaces.
Pair mechanical ventilation with strategic air sourcing to minimize condensation on walls and fixtures. Consider dehumidifier placement for localized control when humidity remains high after use; keep it near potential moisture pockets, not in walkways or doors.
Regular maintenance of filters and seals sustains performance and indoor air quality.
Ventilation Quietness Tips
A quiet bathroom starts with smart airflow planning. In a narrow space, choose a compact exhaust fan with sufficient CFM for size, and mount it near the source of moisture to minimize sound transmission.
Pair it with a tight, self-sealing door or a soft-close vent, reducing ripple noise and drafts. Route ducts with short, straight runs and smooth bends; avoid long, skinny ducts that trap air and amplify hum.
Select low-SPL fans and decoupled mounting to further quiet operation. Use a dedicated, cross-vented intake to balance pressure and maintain steady air exchange.
Regularly clean filters to sustain air quality and odor control, and consider an inline duct booster for stubborn layouts. Implement smart timers or humidity sensors for efficient, quiet ventilation.
Accessible Design in Tight Quarters
Are you maximizing usability in a compact bathroom? In tight quarters, accessibility hinges on clear sightlines, reachable controls, and maneuverable space. Prioritize a wall-mounted toilet with a dual-flush option to reduce reach and bulk, and ensure the seat height aligns with standard accessibility guidelines for ease of transfer.
Place the sink within a comfortable clearance circle and choose a lever or push-button faucet for one-handed operation. Use lighting accents strategically to illuminate essential zones without glare, aiding orientation.
Configure grab bars where needed, mounted to studs for reliable support, and avoid obstructions in door swing areas. Select decorative tiles with subtle contrast around the vanity edge to delineate zones while maintaining visual cohesion.
Maintain minimal clutter to preserve functional pathways and performance.
Materials and Finishes That Create a Perceived Space
Choosing materials and finishes that visually expand a compact bathroom starts with surface reflectivity and edge definition. You optimize light distribution by selecting high-gloss or satin finishes on walls and cabinetry, reducing contrast at edges to minimize visual clutter.
Use large-format porcelain or enamel panels to shorten grout lines, promoting a seamless plane that reads as deeper. Keep decorative details minimal; decorative wall tiles can serve as a restrained accent rather than a focal feature, preserving a sense of openness.
Prioritize translucent or frosted glass for shower enclosures to diffuse light without visual noise. For emphasis, integrate statement lighting that casts even illumination and creates perceived depth, rather than harsh hotspots.
Pair these choices with precise installation tolerances to sustain a coherent, airy perception.
Color Schemes for a Bright, Airy Feel
Color schemes that keep a downstairs toilet bright rely on light, neutral bases paired with subtle, reflective accents. You aim for a clean, airy canvas: white or soft gray walls, a pale floor, and gloss surfaces that bounce tiny daylight.
Introduce color accents sparingly—items like a pale blue towel, chartreuse soap dish, or muted teal storage bin—to add personality without overpowering space. Balance matters: higher luminance on walls, lower saturation on fixtures to prevent glare.
Use lighting contrasts to enhance depth: a bright ceiling light paired with focused task LEDs near the mirror, plus a dimmable option for evenings. Avoid heavy, dark contrast that compresses the room.
Keep textures varied but restrained, so reflections remain the primary amplifier of perceived space.
Noise Reduction and Comfort in Tiny Rooms
To minimize noise and maximize comfort in a tiny room, start with sound-absorbing materials that don’t crowd the space. You’ll reduce reverberation by using dense underlayment, acoustic panels, and soft, washable textiles on walls and doors. Prioritize edge-to-edge coverage to minimize gaps where sound leaks.
Implement targeted soundproofing techniques at shared walls, ceilings, and the door, focusing on mass plus decoupling to lower transmission. Select hinges and door seals that compress well, creating an airtight barrier without hindering access.
Use vibration-friendly fixtures and minimize echoes with cabinetry layouts that interrupt line-of-sight reflections. For acoustical privacy, pair noisematching products with strategic placement of storage.
Finally, test with a simple sound level meter, adjusting materials until you achieve a noticeable improvement in comfort.
Budget-Friendly Upgrades That Make a Difference
Even on a tight budget, you can boost the downstairs toilet’s functionality and feel with targeted, cost-effective upgrades. Prioritize compact, high-impact changes: choose a slimline vanity with integrated storage to maximize floor space and reduce clutter.
Install a low-profile mirror to enlarge the visual depth without crowding the room. Optimize lighting techniques with layered illumination—bright task light above the sink, soft ambient glow for evenings, and a small dimmer switch to adjust mood without waste.
Update hardware with matte finishes that resist fingerprints and simplify maintenance. Use decorative accents sparingly: a single, restrained color accent or a functional shelf to hold essentials.
Seal gaps at baseboards and around the toilet to prevent drafts and moisture intrusion, preserving long-term durability.
Step-by-Step Layout Planning for Narrow Areas
When planning a narrow-space layout, start by mapping the available footprint and critical clearances. Then prioritize flow from door to fixtures. You’ll sketch a simple plan showing door swing, entry clearance, and targeted turning radii to prevent pinch points.
Next, place plumbing fixtures with standard setback allowances, confirming that wall, floor, and ceiling utilities align to accessible runs. Consider radial sightlines from the doorway to key elements to ensure unobstructed visibility and ergonomics.
Choose bathroom lighting that eliminates shadows near the toilet and sink, pairing task and ambient layers for safety and ambience. Verify that access panels, venting, and cleanouts remain reachable without disassembly.
Document precise dimensions, materials, and installation notes to guide sequencing and quality control.
Frequently Asked Questions
How to Install a Wall-Hung Toilet in a Load-Bearing Wall?
To install a wall-hung toilet in a load-bearing wall, reinforce studs and sill with proper hardware, guarantee wall reinforcement, and create plumbing access doors; plan routing carefully, support tank frame, and consult an engineer for load calculations.
Can a Compact Toilet Fit Behind a Standard Door Swing?
Yes, a compact toilet can fit behind a standard door swing if you optimize space saving fixtures and guarantee door swing clearance, measuring clearance at the hinge and using a slim bowl to maximize available width.
What Clearance Is Required for Wheelchair Access in Tight Loos?
Clearance for wheelchair access in tight loos should be at least 60 cm (24 in) at the doorway and 90 cm (36 in) turning radius inside. Accessible design favors door-free paths and space saving fixtures for practicality.
Are There Odor-Control Options for Tiny Toilets?
Yes, you can reduce odors in tiny toilets with an air purifier and deodorizer sprays. Use a compact unit near the door for airflow, and refresh sprays regularly to maintain scent balance without masking essential bathroom smells.
How to Retrofit Plumbing Without Major Demolition?
You can retrofit plumbing without major demolition by using flexible, compact fixtures and concealed fittings. Coincidence guides you: you inspect, you measure, you adapt. Choose plumbing materials wisely, apply retrofit techniques, and test thoroughly before finalizing for reliability.
Conclusion
You’ll finish with flawless functionality and a fabulous feel. Focus on flexibility, fluctuation, and fit: fix fixtures in tight footprints, favor wall mounts, and funnel furniture-free floors. Favor fixtures, finishes, and fittings that fold, slide, or skim the wall. Light, layered lighting lifts linear limits, while clever color clarity keeps corners calm. Trim costs with careful planning, precise measurements, and moisture-minded materials. You’ll gain generous glow, neat niches, and a particularly nimble, navigable downstairs toilet.