
Turning a garage into a functional workspace starts with a clear plan you can act on now: assess your space, identify electrical and ventilation needs, and set a realistic budget that prioritizes safety and durability. Design smart zones, maximize vertical storage, and choose surfaces you can actually maintain. Then optimize insulation, climate control, lighting, and acoustics to sustain focus. Ready to map your layout and pick the right gear—keeping it organized will drive results, but the best setup often hinges on what you fix first.
Key Takeaways
- Assess space, goals, utilities, and safety to define zones for tools, materials, and waste with a clear plan and budget.
- Design a simple layout prioritizing workflow, vertical storage, labeled bins, and accessible, ergonomic workstations.
- Implement insulation, climate control, and sound management to create a comfortable, stable environment.
- Install safe electrical with subpanels, GFCI outlets, proper routing, and durable, easy-clean finishes for longevity.
- Maintain focus and adaptability with consistent lighting, acoustic treatment, organized storage, and regular workspace reviews.
Am I Ready? Assess Your Garage for a Workspace
Before you start converting your garage into a workspace, take a practical inventory of the space and your goals. You’ll evaluate square footage, ceiling height, lighting, and ventilation to confirm if conditions suit a functional shop.
Check access points for cords, dust, and fumes, and identify potential moisture or pests that could disrupt work.
Prioritize Garage organization from day one: designate zones for tools, materials, and waste, and plan a clear workflow from storage to project area.
Inspect electrical capacity and outlets, ensuring circuits support your planned equipment with safe, accessible placement.
Emphasize workshop safety by removing trip hazards, installing guards, and using proper PPE.
If basic recon reveals major gaps, pause and adjust plans before purchasing gear.
Set Your Budget and Priorities for a Garage Workspace
To set your budget and priorities for a garage workspace, start by defining a realistic ceiling on spend and then map that to essential needs. Begin with a quick inventory of tools, project scope, and storage demands, then separate must-haves from nice-to-haves.
Establish a capped total and allocate a fixed portion for safety, electrical improvements, and durable work surfaces. Prioritize Garage organization components that liberate ongoing efficiency, like modular storage, pegboard racks, and labeled bins, over decorative upgrades.
Use budget planning methods such as a line-item checklist and contingency fund (about 10%). Avoid overbuying bulky items; measure your space and choose compact, multi-use solutions.
Review quarterly to reallocate funds as your projects evolve, keeping the focus on practical usability and long-term reliability.
Plan, Layout, and Design Your Ideal Garage Workspace
A well-planned layout begins with a clear grasp of how you’ll use the space and what tools you rely on most, then translates that into zones for prep, work, and storage. Start by sketching a simple floor plan that includes door swings, work surfaces, and clear traffic paths.
Prioritize workflows: designate a prep area near a sink or utility faucet, a machining/assembly zone, and a finishing corner if needed. Choose durable surfaces and sufficient lighting to reduce errors.
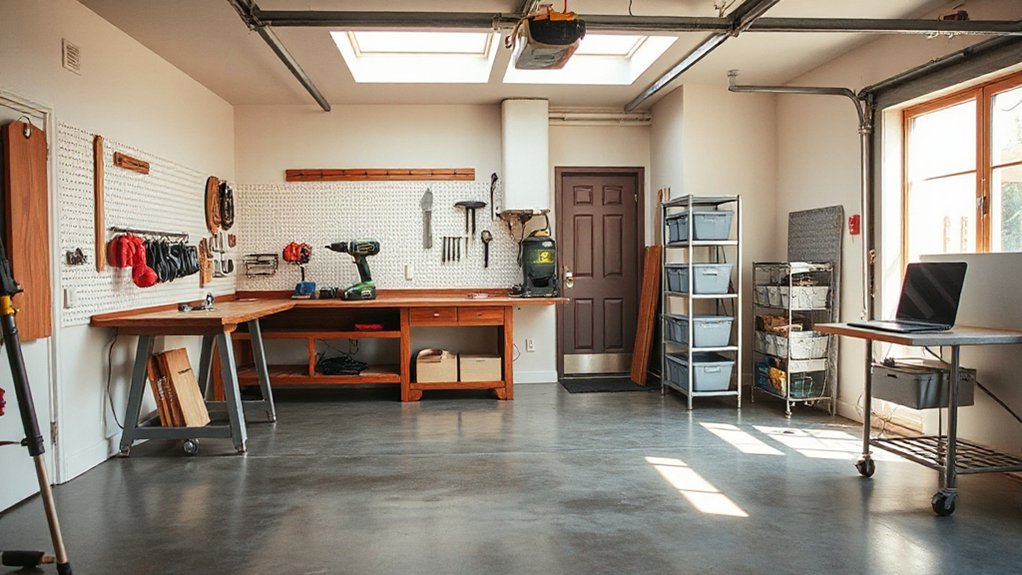
Implement vertical storage to maximize floor space, and mount frequently used tools within arm’s reach. For Garage organization, group similar items together and label bins and shelves.
For Tool storage, use a central pegboard, closed cabinets for small parts, and a secure drawer system for valuables. Keep access clear and adaptable.
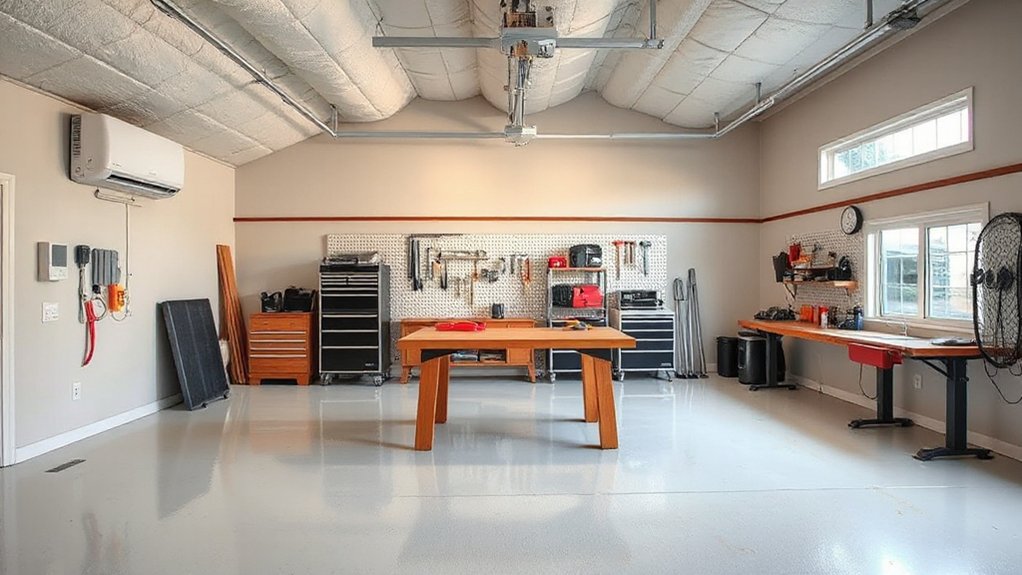
Insulation, Climate Control, and Electrical Setup
To start, you’ll choose insulation strategies that fit your climate and budget, prioritizing energy efficiency and comfort.
Then, you’ll compare climate control options and select the right system for year-round use, factoring noise, maintenance, and cost.
Finally, you’ll plan a safe, code-compliant electrical setup with practical layouts, outlets, and lighting to support a productive workspace.
Insulation Strategies
Insulating your garage-turned-workspace isn’t optional—it’s essential for comfort, energy efficiency, and consistent performance. You’ll want a layered approach that minimizes thermal bridging and air leaks.
Start with exterior or attic-like detailing to reduce heat transfer, then seal gaps around doors, windows, and utility penetrations with expanding foam or caulk. Use spray foam for high-insulation gaps and to create a continuous air barrier where studs meet sheathing.
For long-term performance, consider reflective barriers on the warm side of assemblies to minimize radiant heat gains in summer. Choose a combination that matches your climate, budget, and planned use, prioritizing vapor control where humidity is a factor.
Maintain ventilation to manage moisture without compromising insulation integrity.
Climate Control Options
You’ve set a solid insulation baseline; now you’ll choose climate control options that keep the space comfortable year-round while protecting your equipment and tools.
Start with heating options that fit your needs and budget, prioritizing efficiency and heat retention. A forced-air or baseboard approach can work, but add a programmable thermostat to optimize cycling and energy use.
For cooling solutions, match your space size and heat load with a ductless mini-split or window unit, ensuring proper venting and filtration.
Seal penetrations and install reflectors or insulated panels to minimize heat gain in summer and heat loss in winter.
Consider humidity control to prevent rust and mold.
Plan electrical readiness in tandem with climate devices, ensuring dedicated circuits and safety clearances.
Electrical Setup Essentials
If you’re converting a garage to a usable workspace, start with a solid electrical plan that complements your insulation and climate controls. You’ll want a dedicated subpanel if you’re adding power tools or HVAC, with properly sized breakers and straightforward circuit labeling.
Prioritize circuit safety by separating high-draw equipment from lighting and outlets, and include GFCI protection where appropriate. Upgrade wiring only as needed, focusing on updated gauge conductors, conduit where required, and secure routing away from moisture and heat sources.
Plan convenient receptacle placement for tools, chargers, and heaters, plus ceiling-mounted lighting for clear visibility. Consider future needs, like a wall outlet at workbench height and a spare circuit for expansions, ensuring a clean, code-compliant installation.
Wiring upgrades completed, your workspace stays efficient and safe.
Space-Saving Storage You Can Actually Use
Vertical storage frees floor space and keeps tools within reach, so you can work without clutter. Start with tall, secure wall-mounted units and staggered shelves to maximize every inch. Then pair with multi-use cabinets that hide as much as they reveal.
This approach balances accessibility with organization, letting you customize a practical workflow around the [POINTS].
Vertical Storage Solutions
Need more floor space or easy-access tools? Vertical storage solves clutter without sacrificing workspace. You’ll leverage wall real estate to keep essentials visible and reachable, maintaining garage organization with purpose-built solutions like vertical shelving.
- Install wall-mounted racks for frequently used items within arm’s reach, minimizing floor tangles.
- Use pegboards with hooks and trays to customize tool layouts and instant access.
- Choose tall, narrow cabinets or magnetic strips to maximize density without crowding floor area.
- Label bins and shelf sections to sustain order and speed up workflows.
Adopt a consistent height system and dedicate zones for tools, supplies, and hardware. This approach preserves space, enhances safety, and keeps your shop efficient.
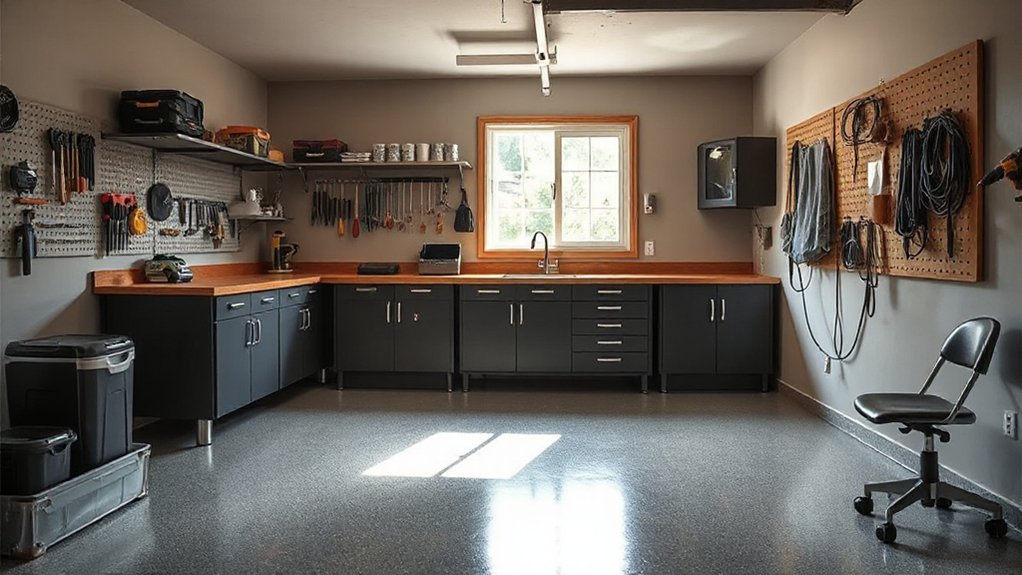
Multi-Use Cabinets
Opt for a tall, narrow footprint to maximize wall storage without sacrificing floor space, and pair with a sturdy work surface for rapid project setup.
Prioritize closed cabinets to hide clutter and maintain a clean workflow, while open shelves or labeled bins boost quick accessibility for frequently used items.
For garage organization, select units with durable exterior finishes and dampened doors to withstand dust and temperature swings.
Integrate this system with pegboards and drawers to create cohesive storage solutions that adapt as your needs change.
Lighting, Acoustics, and Comfort for Focused Work
Good lighting, low ambient noise, and a comfortable setup are essential for sustained focus in a garage-to-workspace conversion. You’ll optimize focus by balancing light, sound, and posture, then test and adjust until you feel steady and productive. Use these fundamentals:
- ambient lighting: pair bright, diffuse ceiling fixtures with task lamps to reduce glare and shadows.
- soundproofing materials: treat walls with dense panels or acoustic foam to minimize reflections and outside disturbances.
- comfort controls: choose an ergonomic chair, correct desk height, and a subtle footrest for prolonged sessions.
- ambient cues: establish a calm color, consistent temperature, and a simple layout that minimizes interruptions.
Durable, Budget-Friendly Gear and Finishes for Your Garage Workspace
Durable, budget-friendly gear and finishes keep your garage workspace reliable without breaking the bank. Start with solid storage cabinets, pegboard walls, and labeled bins to support garage organization, reducing tool misplacement and workflow friction.
Choose steel or powder-coated options for longevity, and pair with reinforced shelving rated for heavier loads. For work surfaces, opt for scratch- and impact-resistant laminates or epoxy coatings that resist chemicals and stains.
Flooring should be durable, easy to clean, and slip-resistant; consider scored epoxy or interlocking tiles for quick repairs. Doors and racking deserve minimal maintenance; rust-resistant hardware and UV-protected finishes extend life.
Prioritize modular pieces that adapt as projects evolve, ensuring durable finishes stay intact while you grow your workspace.
Frequently Asked Questions
How Long Does It Take to Complete a Garage-To-Workspace Conversion?
A typical garage-to-workspace conversion takes about 2 to 6 weeks, depending on scope and permits. You’ll start with insulation and wiring, then install lighting solutions and HVAC, if needed.
You’ll frame walls, seal air leaks, and add flooring. You’ll finish with cabinetry and a workspace setup, plus door and window adjustments.
Plan for delays from inspections or material shortages. You’ll save time by coordinating trades and sourcing garage insulation and lighting solutions early.
What Permits or Codes Do I Need to Check for Rental Garages?
You’ll need to check zoning regulations and obtain building permits before renting a garage space. Start by contacting your local zoning office to confirm allowable uses for a garage on residential property.
If required, apply for any building permits, inspections, and code compliance proofs. Make certain egress, ventilation, electrical, and insulation meet current standards.
Finally, document compliance with your landlord or rental agency, and keep permit numbers and inspection records on file.
Can I Convert a Single-Car Garage Without Losing Vehicle Access?
Yes, you can convert a single-car garage without sacrificing vehicle access. You’ll plan carefully, avoiding room-wide partitions and keeping a clear, drive-through path.
Use euphemistic rhythm to ease the language as you outline trade-offs. Focus on Garage insulation and Lighting solutions to maintain comfort and safety.
You’ll preserve space for a vehicle while adding efficient storage, a compact workstation, and proper ventilation. Guarantee compliance with local codes and door clearance during design and execution.
What Are the Cheapest Durable Flooring Options for Garages?
Cheapest durable flooring options for garages include epoxy coatings, interlocking rubber tiles, and painted concrete. These options resist stains, tolerate car traffic, and last years with proper prep.
For longevity, choose high solids epoxy and seal joints.
Focus on Garage organization and Storage solutions to maximize space under the new floor.
Regular maintenance, quick-cleanups, and a non-slip finish keep it practical and durable, ensuring you preserve value while staying budget-conscious.
How Do I Address Dust and Moisture Without a Dedicated Workshop Space?
Dust and moisture won’t win if you tackle them head-on. You need proper ventilation solutions and solid dust control.
Start with a dehumidifier, then add a wall-mounted exhaust or a garage fan to keep air moving.
Seal gaps and use weatherstripping around doors.
Install a simple air filter and a vented dust separator for power tools.
Regularly empty bins, sweep often, and damp-mop to minimize moisture buildup.
Conclusion
You’ll discover the perfect balance when practical meets personal. As you finish the rebuild, two coincidences align: your first tool clatters into place exactly where you’d planned, and a long-sealed draft of dusty plans proves you were right to start now. The space becomes a natural extension of your workflow—ergonomic, organized, and calm. Keep tuning, stay disciplined, and the garage will keep delivering efficient, reliable work—every project, every day.

