You’re planning a basement bar that adapts from basic practicality to luxury, so you’ll map goals, budget, and space constraints with precision. Think through layouts, moisture controls, and reliable finishes that resist humidity, then pair smart storage with a comfortable flow that invites conversation. From entry-level foundations to high-end upgrades, each choice should reinforce durability and service efficiency. The path you choose will shape ambiance and function, and the next step reveals the specifics you’ll need to justify every detail.
Defining Your Basement Bar Goals and Budget
Setting clear goals and a realistic budget is the foundation of a successful basement bar project. You start by defining must-haves, nice-to-haves, and hard limits, then translate them into measurable targets: square footage allocation, power needs, and ventilation requirements.
Identify your entertainment goals—gamers, cocktail enthusiasts, or social hosts—and map them to functional zones: prep, service, seating, and display.
Establish a budget tier for materials, finishes, and equipment, plus contingency (10–15%). Determine financing or savings strategy to avoid mid-project debt.
Document decision criteria for lighting options and color schemes early, so future purchases align with the aesthetic and efficiency goals.
Track progress with a milestone calendar and risk register. Regularly review scope, adjust priorities, and maintain traceable cost records.
Analyzing Space: Layouts That Maximize Square Footage
Efficient basement bar layouts begin with a precise assessment of the available footprint and fixed constraints, then translate those measurements into functional zones that maximize usable square footage. You map traffic patterns, sightlines, and service corridors to prevent bottlenecks, placing beverage storage adjacent to prep surfaces and service chafer near the pass-through.
Consider a compact L- or U-shaped footprint to optimize corner use while preserving open social zones. Prioritize modular furniture and built-ins that align with column locations, ceiling heights, and HVAC ducts. Lighting design should be integrated with task zones and ambient layers, ensuring glare-free work areas.
Acoustic treatment reduces clatter without sacrificing ambiance, supporting conversations and bar activity. Finalize dimensions, clearance, and load paths before selecting fixtures and finishes.
Essential Foundations: Plumbing, Electrical, and Ventilation
Starting with a solid backbone, you’ll lay out plumbing, electrical, and ventilation to support all bar functions and future upgrades. You’ll map a dedicated beverage line, sink, drain, vent, and shutoffs, with cleanouts accessible from a utility crawl or basement.
Electrical planning targets GFCI protection near sinks, dedicated circuits for refrigeration, lighting, and entertainment, and a centralized panel layout that minimizes conduit length. Choose 12–20 amp circuits for small appliances, and 20–30 amp for refrigeration and drafts.
Ventilation must handle humidity and odors; install a continuous exhaust with backdraft dampers and a makeup-air path. For bar decor and lighting fixtures, prewire for dimming, multiple zones, and ambient sconces without overloading.
Document run colors, junction locations, and future upgrade points to avoid retrofits. Guarantee code-compliant clearances, access, and inspection readiness.
Core Materials: Humidity-Resistant Surfaces and Finishes
Core materials for a basement home bar must withstand high humidity, temperature swings, and frequent use without warping or staining. You select substrates with dimensional stability, like high-density fiberboard or teak plywoods with closed surfaces, then apply moisture barriers to reduce capillary movement.
Humidity resistant surfaces are essential on exposed edges and joints, so you cap panels with edge-banding, vinyl, or PVC profiles that resist swelling. For countertops, install solid-surface or quartz composites sealed with waterproof finishes rated for continuous moisture exposure.
Finishes should be UV-stable and non-yellowing, with satin or low-gloss sheens to minimize water spotting. Fasteners and hardware must be corrosion-resistant, using stainless steel or coated alloys.
Regular maintenance involves resealing joints and inspecting for microcreep around fixtures to preserve stability and appearance.
Smart Storage Solutions for Small Rooms
For a basement bar that already prioritizes humidity-resistant materials, smart storage solutions for small rooms should maximize footprint efficiency without compromising accessibility or durability. You’ll implement modular layouts that align with the bar’s dimensions, using vertical stacking to reclaim surface area.
Integrate smart shelving adjustable in height and depth, with reinforced supports to handle glassware and bottles. Choose compact cabinets with full-extension drawers, soft-close hinges, and moisture-sealed gaskets to maintain climate control behind the doors.
Allocate a dedicated under-bar alcove for collapsible racks and wine inserts, minimizing spill risk. Use pull-out organizers for tools and coasters, and label bins for quick inventory.
Ensure each unit has integrated cable management and vent clearance to prevent humidity buildup near cooling elements.
Lighting Strategies for Ambience and Function
Effective lighting in a basement bar combines function and mood by layering sources, controlling color temperature, and guaranteeing consistent illumination at work surfaces. You’ll plan a layered scheme that includes general, task, and accent lighting, calibrated for an even baseline and targeted clarity.
Choose a color temperature around 2700–3000K for ambient illumination to preserve warmth, and higher temps (3500K–4000K) for task zones like the bar top and glassware prep area. Use dimmable fixtures to modulate intensity without changing color perception.
Favor recessed or linear LED strips for under-counter accents, plus a central ceiling layer with shielded downlights to minimize glare. Integrate smart controls to preset scenes for service, entertaining, and entertaining with low glare.
Ensure lighting design minimizes shadows on work surfaces and complements the bar’s finishes and contrasts.
Acoustic Considerations for a Quiet, Cozy Atmosphere
To optimize your basement bar for a quiet, cozy vibe, start with acoustic treatment basics like absorptive panels and bass traps placed to cover 60–80% of wall area while targeting problem frequencies.
Plan a quiet room layout that minimizes parallel surfaces and maximizes a centered seating zone, using softer furnishings to damp reflections.
Implement sound isolation techniques such as decoupled drywall, floating floors, and door seals to prevent ambient noise intrusion without sacrificing accessibility.
Acoustic Treatment Basics
If you want a quiet, cozy basement bar, start with the basics of acoustic treatment: control reflections, absorb excess energy, and prevent flutter with targeted materials and placement. You’ll deploy soundproofing techniques that address wall, floor, and ceiling surfaces without overburdening aesthetics.
Use low-frequency containment strategies near speaker and seating zones, verifying treatment density and thickness for your space. Choose acoustic panel options with performance ratings matched to room dimensions, ensuring coverage that minimizes flutter and slapback without dulling dialogue clarity.
Install diffusers behind seating to scatter residual energy, preserving live feel where appropriate. Test after installation with a simple frequency sweep, then adjust placement or density as needed to balance intelligibility, warmth, and overall atmospheric intimacy.
Quiet Room Layout
A quiet room layout begins with arranging boundaries and flows that drum up intimacy without crowding the space. You’ll define seating zones, bar percussion, and circulation corridors to minimize hot spots for sound travel. Treat walls, ceilings, and floor assemblies as continuous sound paths, then insert buffers to disrupt resonance.
Prioritize low-frequency management with mass-loaded vinyl or dense gypsum assemblies at key party walls. Use decoupled ceiling grids where possible to reduce flanking. Soundproofing options should be matched to room dimensions, ceiling height, and door performance, avoiding overconstruction.
Plan lighting and accessory placement to avoid reflecting surfaces that amplify chatter. Acoustic panel placement targets mid and high frequencies, positioned at ear height around seating, corners, and near reflective surfaces to curb flutter echoes without visual clutter.
Sound Isolation Techniques
Effective sound isolation starts with a layered approach: identify portable noise paths, then disrupt them with mass, decoupling, and damping. You’ll map transmission routes from equipment, HVAC, and footsteps, then implement targeted strategies.
Start with soundproofing barriers: dense drywall assemblies, mass-loaded vinyl, and sealed joints reduce direct sound transfer through walls and ceilings.
Next, apply decoupling techniques: staggered studs, resilient channels, or double studs minimize structural vibration coupling between the barrier and living spaces.
Incorporate damping compounds at key interfaces to absorb residual energy.
Prioritize acoustic panel placement for reflecting surfaces; position panels to treat early reflections without overloading a single area.
Complement with door seals, window plugs, and floor underlayment where needed.
Finally, test at standard frequencies, tweaking panel layout and barrier density for consistent ambience.
Bar Counter Styles: From Rustic to Sleek
You’ll weigh how Rustic Wood Tone, Contemporary Stone Edge, and Sleek Metal Trim each influence texture, durability, and maintenance in a basement bar counter.
This discussion starts by mapping how warm, organic timber interacts with moisture-prone environments.
How stone edges resist wear, and how metal trims resist indentation while affecting clean lines.
You’ll connect these material traits to style goals, functional needs, and long-term upkeep as you narrow from rustic to sleek options.
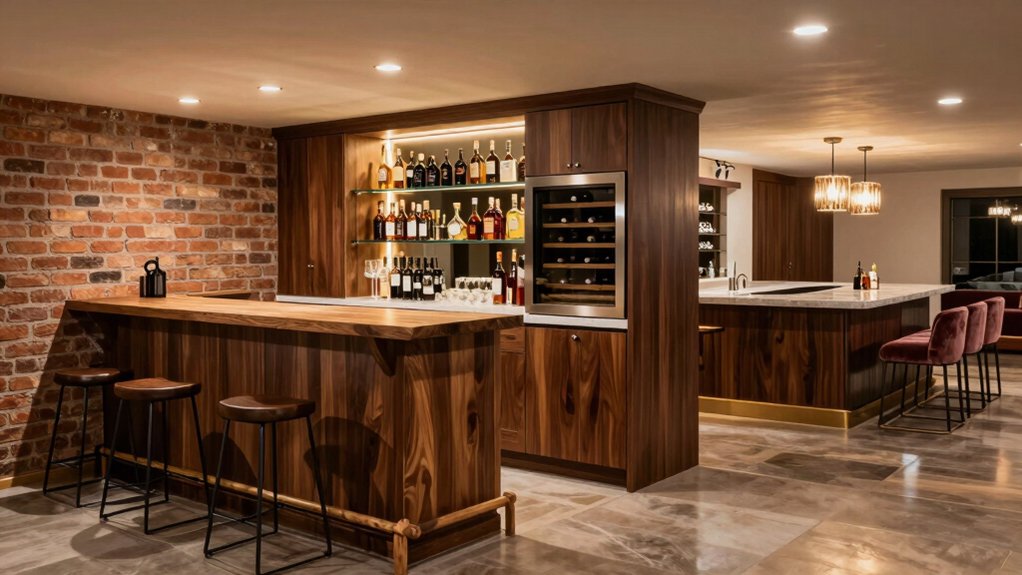
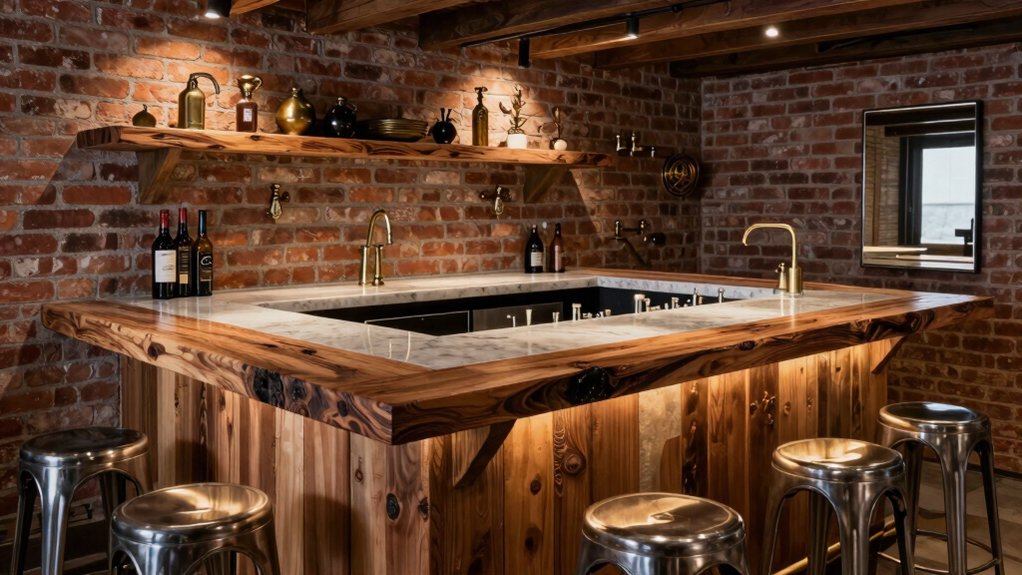
Rustic Wood Tone
When choosing a rustic wood tone for a bar counter, focus on the timber species, grain pattern, and finish that will endure high traffic and moisture exposure. You’ll prioritize species with natural resistance, such as oak or distressed maple, to minimize warping and staining over time.
Examine grain consistency under lighting; tight, irregular patterns read as textured rustic rather than busy. Choose finishes that balance protection with tactile warmth—urethane or hardwax oils provide durability without excessive sheen.
Sanding should remain meticulous, avoiding burnishing that dulls grain depth. Apply a UV-safe topcoat to prevent fading from ambient light.
Pair the tone with subdued, earthy cabinet colors to reinforce rustic charm and wood accents, ensuring the bar maintains legibility and ease of cleaning. This approach delivers dependable performance and timeless presence.
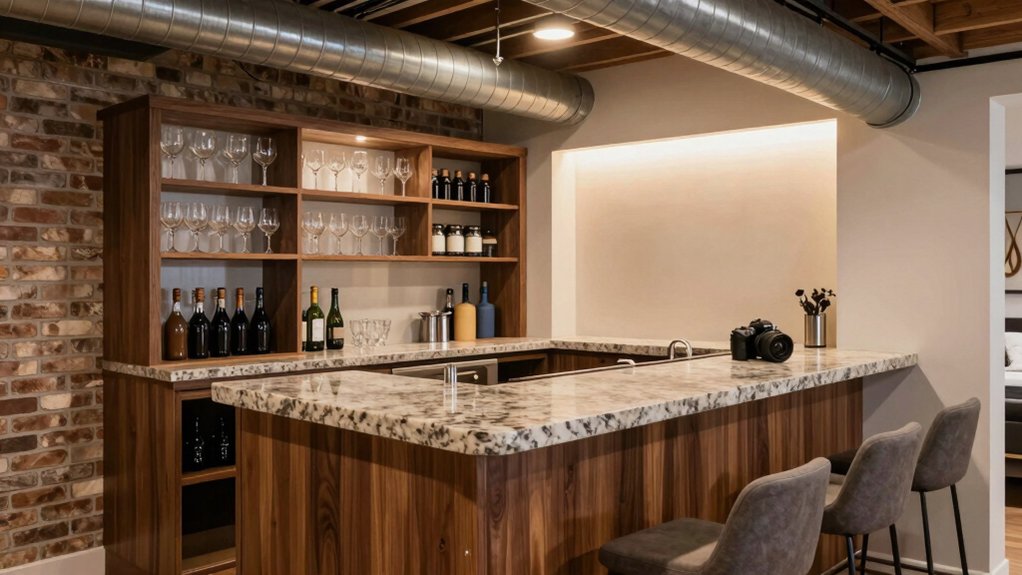
Contemporary Stone Edge
Contemporary Stone Edge introduces clean geometrics and tactile contrast to a bar counter, blending engineered stone or natural slabs with sharply defined profiles. You’ll select edge profiles that emphasize linearity, such as square, chamfer, or micro-bullnose, and pair them with field-finished surfaces for a seamless look.
The technique relies on precise templating and substrate preparation to prevent stone telegraphing and to ensure uniform edge resonance under lighting. In practice, stone veneer can be used as a decorative layer over a solid core, reducing weight while preserving visual depth. However, you must verify compatibility with edge finishing methods and zero-gap mounting.
Pay attention to seam placement, moisture control, and sealing schedules to maintain consistent edge color and texture across extended runs.
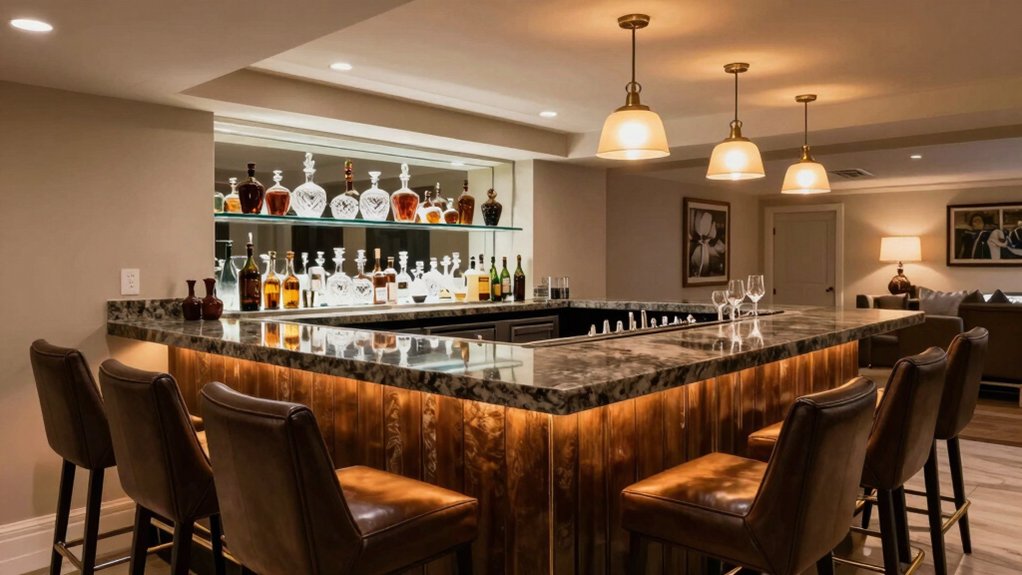
Sleek Metal Trim
Sleek metal trim elevates bar counters by delivering a precise, knife-edged boundary between surface and edge while supporting a broad range of finishes, from brushed stainless to powder-coated alloys. You’ll notice how metal accents define the boundary line, resisting chipping and wear better than wood alone.
Precision routing creates a uniform chamfer, minimizing snag points for glassware and sleeves. Trim finishes should align with the overall material palette, ensuring consistent reflectivity and color temperature across fixtures, rails, and caps.
Mounting scheme matters: hidden fasteners preserve a clean profile while resisting torsion under impact. Consider edge radii to balance finger safety with tactile discipline.
Finite tolerances empower seamless seam alignment at joints, enabling repeatable production and clean, professional detailing that elevates the entire basement bar concept.
Beverage Center Essentials: Coolers, Kegs, and Dispensing
To build an efficient beverage center, you’ll select coolers, kegs, and a dispensing setup that match your serving goals and space constraints. You’ll pair upright and under-counter chillers for controlled temperature zones, ensuring consistent 34–38°F beer and 36–40°F wine.
Plus, a dedicated keg cooler is recommended if you plan on drafting beer. Disk-outlet taps, CO2 systems, and dual-pressure regulators enable precise pours and foam control.
Choose a glycol or nitrogen system only if you’re serving nitro beverages or complex cocktails; otherwise, keep mono-tap setups for reliability.
Install a compact beer tower, a remote condenser for heat management, and a sanitary drain with clean-in-place capability.
Plan for airflow, ventilation, and accessibility to streamline maintenance.
Cocktail recipes, beverage history, and efficiency converge when your layout minimizes movement and optimizes service flow.
Storage and Organization: Glassware, Bottles, and Bar Tools
Organizing glassware, bottles, and bar tools starts with a defined workflow that minimizes movement and maximizes accessibility. You’ll implement a zoned layout: glassware closest to the sink and prep area, spill zones near the sink, and accessories near the work surface.
Choose a modular rack system to support glassware orientation by size, weight, and stem type, reducing chips and breakage.
For bottle storage tips, group by frequency of use, keep high-rotation spirits at eye level, and place bitters, syrups, and garnishes in a dedicated drawer with labeled dividers.
Bar tools should live in a magnetic strip or single-pull drawer, with an evidence-based sanitizer schedule and routine calibration of pour spouts.
Ensure labels are durable, and maintain clear sightlines for quick selection.
Seating and Flow: Creating a Social, Comfortable Floor Plan
You’ll map seating circulation to guarantee clear paths between the bar, seating nooks, and entry points, avoiding choke points.
Plan a social flow layout that pairs conversation zones with refueling stations, so guests move naturally without disrupting service.
Use precise sightlines and distance benchmarks to maintain comfort, accessibility, and functional zones for both mingling and seating.
Seating Circulation
A well-planned seating circulation centers on clear sight lines, smooth pedestrian flow, and flexible gathering zones that accommodate conversations and drinks without crowding. You design pathways that frame the primary bar face and seating clusters, preserving access to utilities, storage, and lighting controls.
Seat placement follows modular grids, enabling quick reconfiguration for parties or intimate chats. Prioritize barrier-free distances between chairs, counters, and doors to maintain circulation efficiency.
Choose bar stool ergonomics that support posture during extended social periods, with adjustable height, lumbar support, and footrests aligned to the counter. Pair this with seating upholstery options that resist wear, are easy to clean, and complement the finish palette.
Document seat locations, clearance, and reconfiguration rules to sustain consistent flow under varying occupancy.
Social Flow Layout
Social flow in a basement bar hinges on deliberate seating configurations that promote easy conversation and unobstructed movement. You’ll evaluate sightlines from every seating cluster, ensuring hosts can monitor the room while guests engage.
Prioritize circular or semi-circular arrangements around a focal point, such as a beverage station or TV, to reduce back-and-forth traffic. Implement clear pathways at least 36 inches wide between furniture groups to satisfy universal design principles and facilitate spontaneous mingling.
Seat heights should align with table heights to maintain comfortable eye contact and avoid awkward leaning. Use modular seating to adapt for gatherings, swapping in ottomans or low lounges as needed.
This approach supports layout optimization by balancing intimacy, circulation, and accessibility within the bar’s footprint. social flow, layout optimization.
Decorative Touches: Vintage Accents and Modern Accents
Decorative touches on a basement home bar blend vintage charm with modern function, creating a layered aesthetic that’s both evocative and practical. You harness vintage accents to evoke era-specific textures—bakelite bar rails, brass hardware, etched glass—and pair them with contemporary lines that keep sightlines open and maintenance minimal.
Focus on material parity: dark hardwoods or reclaimed panels meet matte black metal for structural cohesion, while glass shelves with integrated LED lighting showcase curated bottles without glare. Implement modern accents via hidden cable management, touch-activated lighting, and antimicrobial finishes on high-touch surfaces.
Balance scale and proportion: compact, high-contrast pieces against larger, subdued silhouettes maintain rhythm. Finally, curate a cohesive color story that ties aged patina to current palette trends, ensuring timeless coherence across lighting, hardware, and display zones.
High-End Upgrades: Commercial-Grade Appliances and Features
When upgrading a basement bar with commercial-grade appliances, you’ll prioritize performance, efficiency, and durability that withstand daily use. You’ll select professional refrigeration with precise temperature control, variable-speed compressors, and reinforced gaskets for consistency.
Under-counter ice machines, beer dispensers, and wine coolers should meet NSF/UL standards, with staggered defrost cycles to minimize energy draw.
Ventilation must be designed around heat loads, avoiding cross-contamination between kitchen-grade and living areas.
Build a dedicated electrical subpanel with dedicated circuits, GFCI protection, and surge suppression for all high-demand units.
Integrate custom lighting to illuminate work zones without glare, and install soundproofing techniques to reduce noise transfer to living spaces.
Choose stainless, corrosion-resistant surfaces and accessible service panels for maintenance, ensuring long-term reliability and minimal downtime.
Maintenance and Longevity: Keeping Your Bar Looking Fresh
Regular upkeep guarantees your basement bar remains functional and attractive over time. You’ll implement a disciplined routine that minimizes corrosion, staining, and hardware fatigue.
Begin with bar cleaning after each use, targeting spill zones, chrome fixtures, and glass surfaces with a nonabrasive cleaner to prevent residue buildup. Dry all components to prevent water damage and mold growth in hidden cavities.
Schedule shelf maintenance quarterly: tighten fasteners, inspect brackets for flex, and reseat shelves to prevent sagging. Check moisture barriers behind rack mounts to deter wood warping.
Apply UV-rated finishes to exposed trim to slow color fading and wood checking. Record maintenance logs for components and sealants, and replace seals before leaks appear to preserve cabinet integrity and aesthetic.
Maintain consistency to extend longevity and keep appearance pristine.
Frequently Asked Questions
How Much Is the Typical Basement Bar Renovation Budget?
A typical basement bar renovation costs between $20,000 and $60,000, depending on scope. You’ll optimize bar lighting and seating arrangements, choose premium materials, and integrate electrical and plumbing upgrades for reliable, visually cohesive, and durable results.
What Permits Are Required for Basement Bar Builds?
Yes, it depends on your locale, but permits typically include electrical, plumbing, and structural approvals; obtain a basement finish or occupancy permit, and fire/safety clearances. Lighting design and soundproofing methods often require inspections and compliance checks.
Which Humidity Level Is Ideal for a Home Bar?
Aim for 40-60% humidity for your home bar; this range best supports humidity control and minimizes condensation. Maintain steady levels to prevent mold prevention, control temperature, and regularly monitor with a digital hygrometer.
How Long Does a Basement Bar Installation Take?
Expect a straightforward timeline: a basement bar installation takes roughly 2–4 weeks, depending on finishes and electrical work. You’ll prioritize lighting design and seating arrangements, coordinating trades smoothly while I handle structural, waterproofing, and cabinet details.
What Maintenance Schedule Extends Bar Life?
Maintain a strict maintenance schedule: clean regularly, seal surfaces, and inspect plumbing. Adhere to Cleaning routines and Material selection guidelines, documenting wear. Schedule quarterly deep cleans, annual resealing, and component checks to extend bar life and prevent damage.
Conclusion
You’ve learned to tailor your basement bar from practical to premium, without overreaching. With careful budgeting and space planning, you’ll avoid overkill while achieving polish. Thoughtful storage, durable surfaces, and smart service flow keep daily upkeep light, even as you elevate with refined upgrades. Embrace the right mix of vintage charm and modern tech, so atmosphere feels welcoming rather than flashy. In short, design discipline now pays dividends in lasting, low-friction entertaining future.