


Steam fogs the window as you step inside, and you notice cold patches that won’t quit. You’ll assess signs like damp, mould, drafts, or unusually high bills, then weigh whether the insulation is failing or simply poorly installed. The decision to remove isn’t automatic; costs vary, and fixes can be cheaper than full extraction. You’ll want a clear sense of when removal is necessary and what safer, cheaper alternatives exist, before you commit.
Common Causes of Cavity Wall Insulation Problems
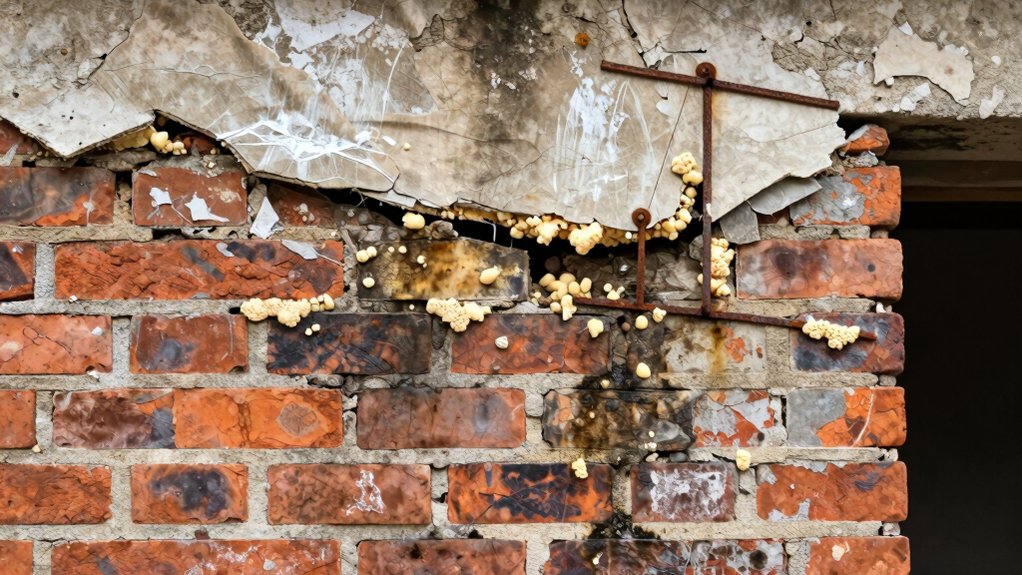
Common cavity wall insulation problems typically arise from improper installation, moisture ingress, or material degradation. You’ll notice how minor gaps or misaligned components create pathways for air and moisture, undermining performance.
Moisture penetration occurs when barriers fail, allowing water to bypass the insulation and condense within the cavity, promoting mold and timber risk.
Insulation settling changes the cavity’s thermal balance, creating cold spots and reduced R-values.
Poor void management during installation leaves unfilled pockets that trap moisture and debris, accelerating degradation.
Inadequate vibration or movement tolerance can loosen fastenings, causing separation between layers and flashing failures.
Material degradation—whether due to aging, incompatible products, or chemical exposure—diminishes resistance to moisture and heat transfer.
You should assess installation quality, product compatibility, and environmental exposure to anticipate these failures.
Early Warning Signs to Look For
Watch for early indicators that cavity wall insulation isn’t performing as expected. You may notice cooler indoor spots near external walls, uneven room temperatures, or drafty windows that don’t align with weather conditions.
Thermal bridging can reveal itself as local cold patches, especially around mullions, electrical outlets, or corner junctions. Heuristic clues include a rise in heating costs without a commensurate drop in outdoor temperatures, or you feeling a persistent chill when cool air infiltrates via small gaps.
Look for inconsistent wall surface behavior: changes in performance after redecoration or after renovations. Moisture barriers behind finishes can fail silently, so watch for condensation buildup on internal surfaces and suspect compromised barriers if you observe unexpected dampness during cold spells.
Maintain records for potential removal decisions.
Damp and Mould: What It Means for Your Walls
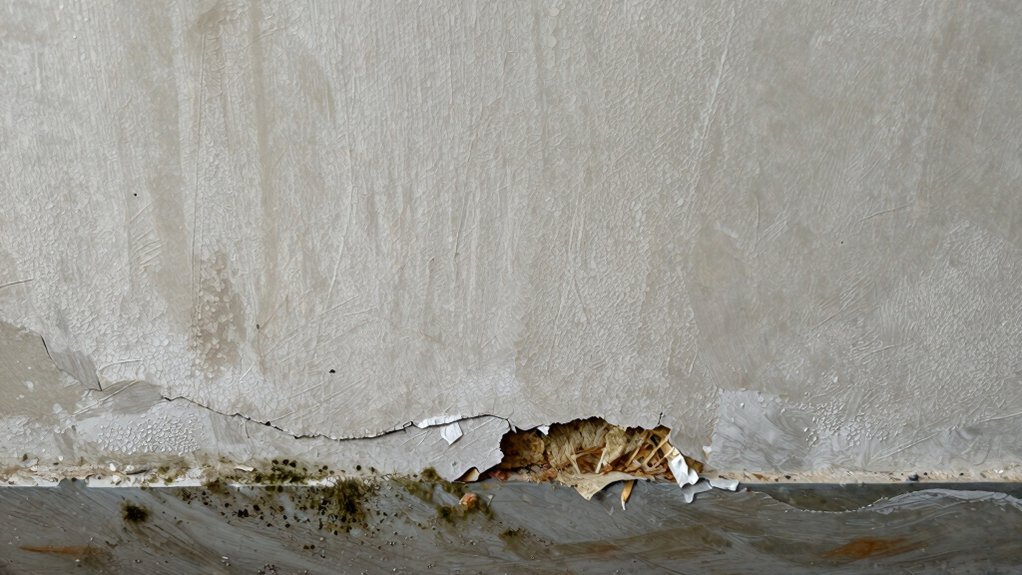
Damp and mould in walls signal moisture problems that can undermine structural integrity and indoor air quality. You’ll see discoloured patches, peeling plaster, and a musty odour that persists despite ventilation.
Moisture buildup concentrates salts and compounds within masonry, accelerating wall deterioration and reducing insulation effectiveness. In cavities, humidity promotes mould colonies that feed on organic binders, weakening plaster and reducing load-bearing capacity over time.
You should quantify moisture with a hygrometer reading and monitor for recurring cycles after rainfall or rapid temperature shifts. Visual evidence of efflorescence, spalling bricks, or softened substrates indicates ongoing deterioration requiring assessment.
Address underlying causes—condensation, leaks, or compromised barrier layers—before remediation to prevent repeated moisture ingress and to protect indoor air quality and long‑term wall stability.
Air Leaks and Drafts: Detecting Inefficiency
You’ll start by identifying air pathways that let heat escape and cool air in, mapping where insulation fails to seal.
Next, you’ll spot draft hotspots using tests and simple checks to pinpoint where gaps concentrate.
Detect Air Pathways
Are you sure your home’s insulation is doing its job? Detecting air pathways means tracing how leaks form and where insulation gaps let in drafts. You’ll inspect through-wall junctions, electrical penetrations, and around windows to locate unintended air movement.
Use a systematic approach: compare thermal imaging results with blower-door measurements to identify weak spots, then verify with smoke pencils or incense to confirm flow paths.
Be precise: note how convection currents connect exterior temps to interior surfaces, and consider how moisture migration can accompany drafts, signaling insulation compromise.
Record pressure differentials and map each pathway to its likely causative defect, such as missing sealant, displaced batt, or compressed insulation.
Prioritize repairs that reduce heat loss and prevent condensation-driven damage.
Spot Draft Hotspots
Air leaks and drafts create visible and subtle hotspots that reveal insulation inefficiency. You’ll spot them where cold air pulls between interior and exterior, especially along switches, outlets, and seams.
Focus on suspicious temperature differentials around exterior cladding and near areas with thermal bridging, where framing conducts heat more readily than surrounding material. Run a careful hand test along baseboards, cornices, and window perimeter; drafts often tunnel through gaps behind siding or brick veneer.
Use a smoke pencil or incense to confirm leaks, watching for gusts that carry scent or particles. Note that exterior cladding joints, sealant failures, and missing or compressed insulation can create persistent hotspots.
Address these leaks methodically to improve overall thermal performance and reduce heat loss.
Condensation vs. Penetration: Diagnosing the Issue
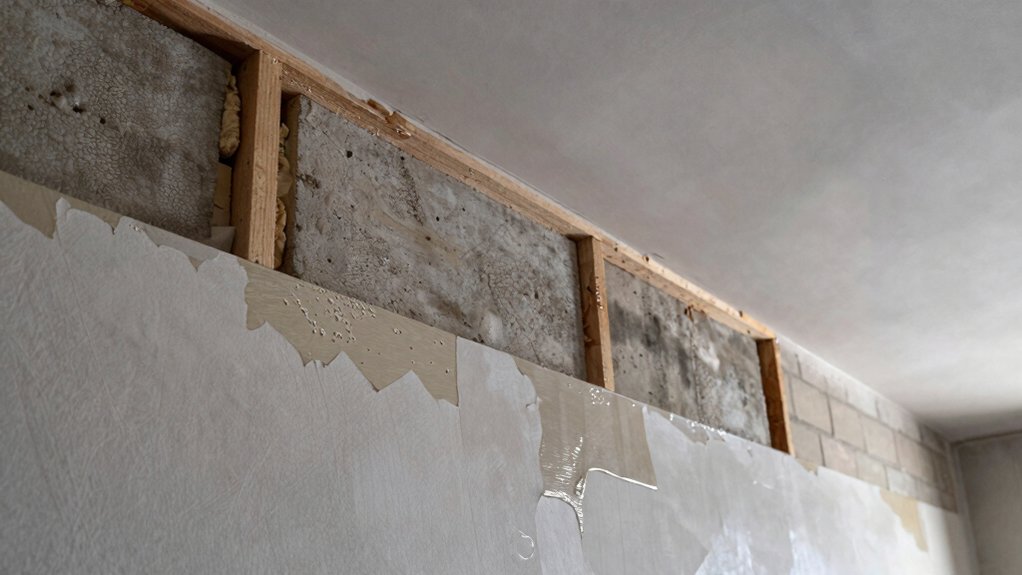
Condensation and penetration are two distinct causes of dampness in cavity walls, and misdiagnosing them leads to ineffective fixes. You’ll distinguish moisture patterns: condensation forms where humidity is high and surfaces are cold, often near windows or poorly ventilated rooms. Look for crystalline deposits, mist on internal panes, and uniform damp bands that develop with seasonal humidity shifts.
Penetration shows as active water ingress from exterior joins, damaged brickwork, or failed flashing, typically following rain events and toward lower elevations. Track the moisture source with surface testing and thermal imaging to reveal thermal bridging points where heat loss concentrates damp air.
Ensure moisture barriers exist where needed, and avoid sealing issues that trap moisture. Correct diagnosis prevents wasted repairs and supports lasting insulation performance.
When to Inspect Your Cavity Insulation
You should start checks when you notice early signs of moisture or drafts near walls, since timely inspection helps prevent worsening issues.
Schedule routine reviews at key intervals and after related weather events to catch problems before they escalate.
Focus on documenting any changing conditions so you can act promptly if signs of insulation degradation appear.
Inspecting Signs Early
Cavity wall insulation rarely shows its faults at first, so early inspection is essential to catch signs before they worsen. You should conduct regular, methodical checks focused on performance indicators rather than appearance alone.
Look for inconsistent wall temperatures, frontline cold spots, or drafts in repaired sections, which can signal thermal bridging where insulation gaps or voids exist. Pay attention to rising utility use that doesn’t align with weather changes, suggesting heat loss through weak seals or moisture pathways.
Inspect accessible cavities for signs of moisture barriers breakdown, such as damp patches, efflorescence on brick, or mildew near internal reveals. Document anomalies with dates and locations, then compare across seasons.
Early, targeted observations help prioritize remedial testing and preserve insulation effectiveness.
Timing for Checks
Plan inspections to match seasonal and operational changes: schedule a baseline survey after installation, then repeat at least twice a year, with additional checks after extreme weather, repairs, or noticeable performance shifts. You should time checks to align with heating and cooling cycles, since thermal bridging can worsen when seasonal loads shift.
Use a concise protocol: verify insulation thickness against design specs, then assess gaps, compression, or settling that alter performance. Record moisture indicators, air leakage, and visible cracks near openings, as these signals imply compromised continuity.
Prioritize inspections after re-plastering, repointing, or door and window work, when cavities might be disturbed. Maintain a log with dates, findings, and corrective actions to guide future interventions and guarantee sustained thermal efficiency.
Costs to Remove Cavity Wall Insulation
What’re the typical costs to remove cavity wall insulation, and what factors drive those expenses? You assess removal as a structured process, not a single event. Labor hours, access complexity, and the extent of insulation influence price, while material handling and waste disposal add modest fixed charges.
If your walls require partial or complete debonding, expect higher costs than routine extraction. Local regulations and supplier requirements can introduce variances in permits and compliance fees.
Expect potential dehumidification or drying measures if moisture issues exist, which can add days to the project. You’ll want to account for testing and verification to confirm insulation removal effectiveness.
Plan for contingencies like incidental damage repairs. Consider thermal bridging and moisture barriers when evaluating overall remediation needs.
Factors That Influence Removal Prices
You’ll see removal prices influenced by the cost drivers, including how material and labor mix affects overall billing.
The project scope factors—size, access, and complexity—shape both time and required protection measures, which in turn drive price.
Understanding these elements helps you compare quotes accurately and anticipate how each component contributes to the total removal cost.
Cost Drivers Overview
Understanding cost drivers for removing cavity wall insulation requires breaking down how material choice, installation method, accessibility, and labor rates interact to shape price.
You examine material properties, since different types demand distinct disposal and reclamation steps, affecting skip sizes, containment, and waste handling.
Installation method influences coaxing out or cutting through layers, which changes the labor intensity and risk profile.
Accessibility—cavity length, reach from exterior or interior access points, and presence of resident activities—dictates time and safety measures.
Labor rates vary by region, contractor expertise, and urgency of service.
You’ll also consider how thermal performance and moisture management concerns drive precautionary testing, sealing repairs, and post-removal assessments.
Each factor compounds, yielding a price range that reflects complexity, risk, and compliance requirements.
Material and Labor Mix
Material and labor mix drives removal prices by balancing the material type and the work required to extract it. You’ll see cost shifts from denser fills, complex formulations, or multi-material blends that demand extra handling.
Labor time hinges on access, safe-disposal steps, and debris containment, so quicker removals aren’t always cheaper.
Thermal bridging patterns influence removal difficulty: areas with rigid insulation or bridging cranks the effort, raising labor hours and specialized tools needs.
Moisture barriers complicate extraction when damp pockets exist, increasing protective measures and monitoring.
You’ll also encounter disposal costs tied to material classification and potential contamination. Coordination with waste streams, access restrictions, and sequential removal stages can alter the price curve.
Project Scope Factors
Project scope factors set the boundaries for removal pricing by defining what’s included and what’s excluded. You assess material condition, access constraints, and system complexity to determine labor hours and equipment needs.
The presence of thermal bridging can increase demolition effort, require targeted insulation removal, and affect disposal strategies. Moisture barriers, if damaged or atypical, may demand additional diagnostics and remediation steps beyond standard cavity access.
You’ll consider wall construction, existing finishes, and any embedded services that constrain routing or safety procedures. Scope decisions influence permit requirements, waste handling, and potential need for moisture testing or mold remediation.
Is Removal Always the Best Option?
Is removal always the best option when dealing with cavity wall insulation issues? Not necessarily. You should assess performance, damage, and retrofit feasibility before deciding.
Removal is warranted if moisture intrusion, mold growth, or persistent cold spots persist despite other interventions. However, if the insulation layer remains intact and diagnostic tests show no significant thermal bridging, you may upgrade seals or adjust ventilation without full extraction.
Consider the impact on exterior cladding: removal can disturb parapets, render, or brickwork, creating additional costs and risk. Lifecycle costs matter: disposal, waste, and local regulations add to the bill.
You’ll benefit from a targeted assessment, including moisture mapping and heat loss analysis, to determine whether partial remediation, reinstatement, or selective removal yields the best overall performance.
Alternatives to Cavity Wall Insulation You Might Consider
If you’re weighing options beyond full cavity-wall insulation removal, several approaches can improve performance without disrupting the exterior fabric. You’ll assess targeted upgrades that tackle heat loss directly, rather than wholesale replacement.
Thermal bridging remains a key factor; addressing it with continuous insulation at junctions and around openings can reduce heat transfer without altering wall aesthetics.
Consider using insulation materials with high apparent density and low thermal conductivity for retrofit inserts, along with intelligent cavity fillers that minimize air leakage.
Air-tightness improvements, such as improved seals around services and upgraded damp-proof courses, can yield measurable gains.
You may also explore exterior or interior reflective barriers to reduce radiant heat gain.
Prioritize compatibility with existing materials to avoid moisture traps and ensure long-term durability.


