You’ll make open-plan living work by mapping your daily activities first, then assigning must-have zones and protecting a clear 36–42 inch circulation path. Define each area with intentional “edges”: float the sofa with a 36-inch walkway behind it, center the dining table under a pendant, and use a low console or open shelving as a permeable divider. “Draw” zones with correctly sized rugs and reinforce them with layered, dimmable 2700–3000K lighting. Next, you’ll fine-tune kitchens, work zones, and the most common layout traps.
Key Takeaways
- Map daily activities first, then assign must-have zones; sketch circulation routes that don’t block entry, kitchen work areas, or seating.
- Keep pathways consistent: 36–42 inches on main routes, never under 30 inches, measuring from furthest protrusions like chair backs.
- Define zones with rugs and lighting pools; size rugs to furniture footprints and use layered, dimmable lighting per zone.
- Float furniture to create “rooms,” leaving a 36-inch path behind sofas and 24 inches behind dining chairs for pull-back clearance.
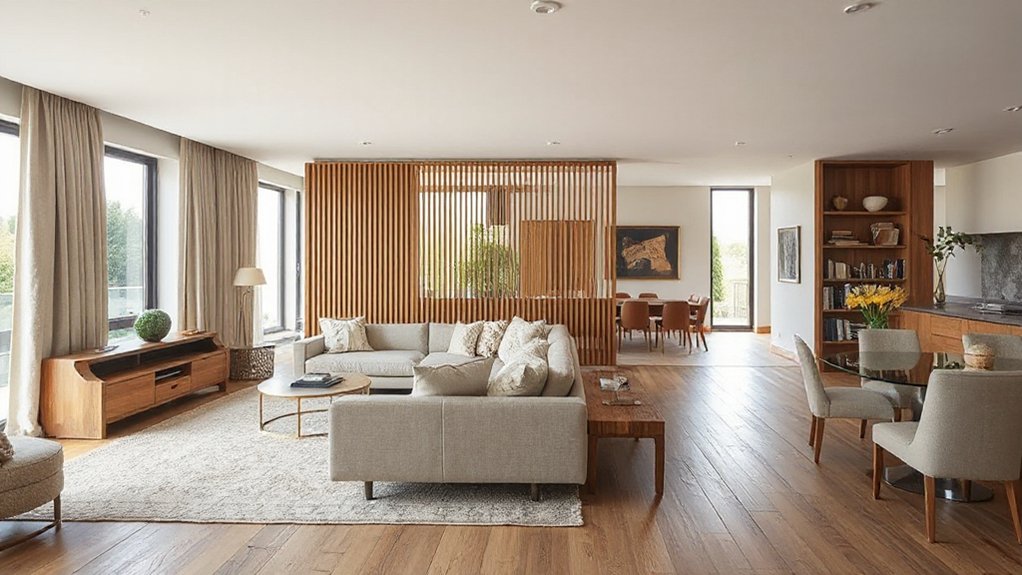
- Use permeable dividers—consoles, low bookcases, slatted partitions, or screens—placed perpendicular to traffic with 900mm clearance to maintain sightlines.
Map Your Open-Plan Zones and Priorities
Before you move a single piece of furniture, map your open-plan zones and set clear priorities for how you’ll actually use the space. List your daily activities—cooking, dining, working, kids’ play, lounging—and rank them by frequency and noise tolerance.
Measure the footprint each task truly needs, including pull-out chairs, traffic clearance, and door swings. Then sketch a simple plan and draw circulation paths you won’t block, especially between entry, kitchen, and seating.
Assign “must-have” zones first, then “nice-to-have” ones. Build zone flexibility by defining overlap areas where one activity can borrow space temporarily.
Finally, mark visual boundaries: rug edges, lighting pools, ceiling lines, or low storage, so zones read clearly without adding walls.
Choose a Layout: Small, Long, or Great Room
Where your open-plan space sits on the spectrum—small, long-and-narrow, or true great room—should dictate the layout you choose, because each shape needs different rules for circulation, sightlines, and furniture scale.
In a small plan, keep a single clear spine from entry to windows, and choose compact, multi-use pieces that don’t block daylight. Use unified color schemes to prevent visual chopping, but add subtle wall textures to signal shifts without adding partitions.
In a long room, plan two parallel routes: a main walkway and a quieter edge for activities. Keep focal points at the ends to pull the eye through.
In a great room, think in thirds, align lighting and rugs to each zone, and scale up artwork and ceiling fixtures for balance.
Use Furniture Placement to Define Open-Plan Living
Once you’ve matched the layout to your room’s shape, let furniture do the zoning work that walls used to handle. Your furniture arrangement should create clear edges while preserving walkways, sightlines, and conversation distance. Aim for zone contrast by changing orientation, height, and function, not by blocking movement.
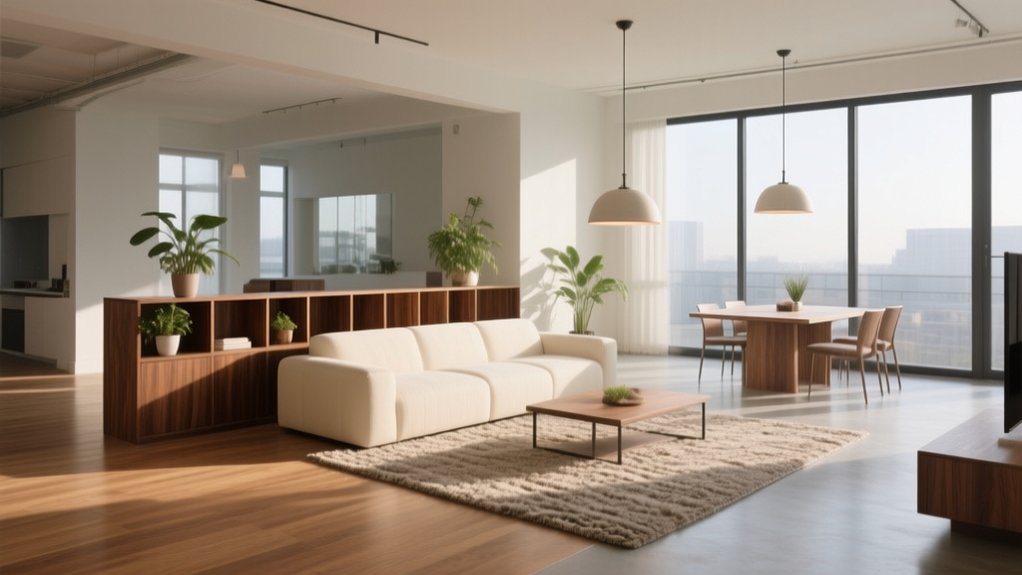
- Float the sofa to face the living area, leaving a 36-inch path behind it.
- Anchor dining with a table centered under a light, chairs tucked for clearance.
- Use a console or low bookcase as a permeable divider between zones.
- Angle accent chairs to “close” the seating group without forming a barrier.
- Align key pieces with architectural cues (windows, columns) to keep flow logical.
Keep circulation routes straight, and let open corners breathe so zones feel intentional.
Size Rugs to “Draw” Each Zone Clearly
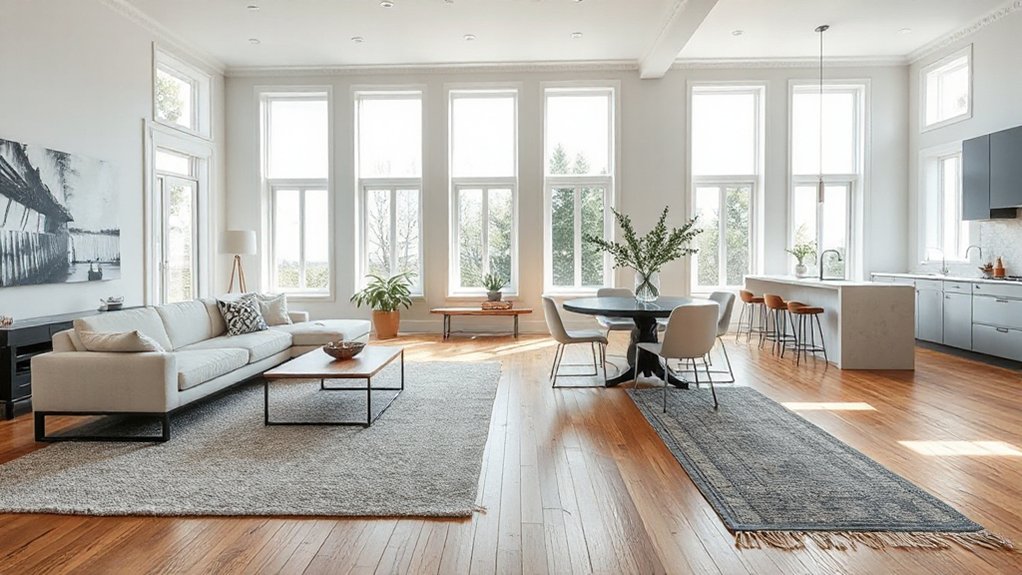
Size rugs like you’re outlining each function on a floor plan: pick dimensions that let key furniture legs sit on the rug and leave a consistent border to signal the zone.
You’ll get cleaner “edges” when you align rug sides with major furniture lines—sofas, media consoles, dining tables—rather than floating them at odd angles.
Keep those placement lines parallel across the room to make separate areas read as intentional, not accidental.
Choose Correct Rug Dimensions
Although an open-plan layout looks seamless, you’ll only get clear, functional zones if your rug dimensions deliberately “draw” each area on the floor. Start with Area rug selection based on furniture footprint, not room size: the rug must catch key legs so pieces read as a unit. Then use rug pattern coordination to reinforce the zone’s purpose without visual noise.
- Living: choose a rug that fits all front sofa/chair legs, with 8–12 inches of border to walls.
- Dining: size it so chairs stay on-rug when pulled out (add 24 inches past table edges).
- Kitchen: run a 2–3 foot wide runner along primary prep paths.
- Entry: cover the door swing and allow two steps inside.
- Office: fit desk and chair movement fully on-rug.
Coordinate Rug Placement Lines
Because open-plan rooms lack walls, your rug edges have to act like your floorplan—so align each rug’s “placement lines” with real architectural cues (sofa face, table centerline, island edge, doorway) to make zones read instantly.
Square the rug to the main sightline from the entry, then keep parallel edges consistent across the room so nothing feels skewed.
In the living zone, run the front legs of seating on the rug and match its long edge to the sofa.
Under dining, center the rug on the table and keep equal reveal on all sides when chairs slide out.
For kitchen, stop at the island edge and maintain a clean walkway strip.
Use color coordination and rug textures to separate functions without breaking flow.
Use Lighting to Signal Each Open-Plan Zone
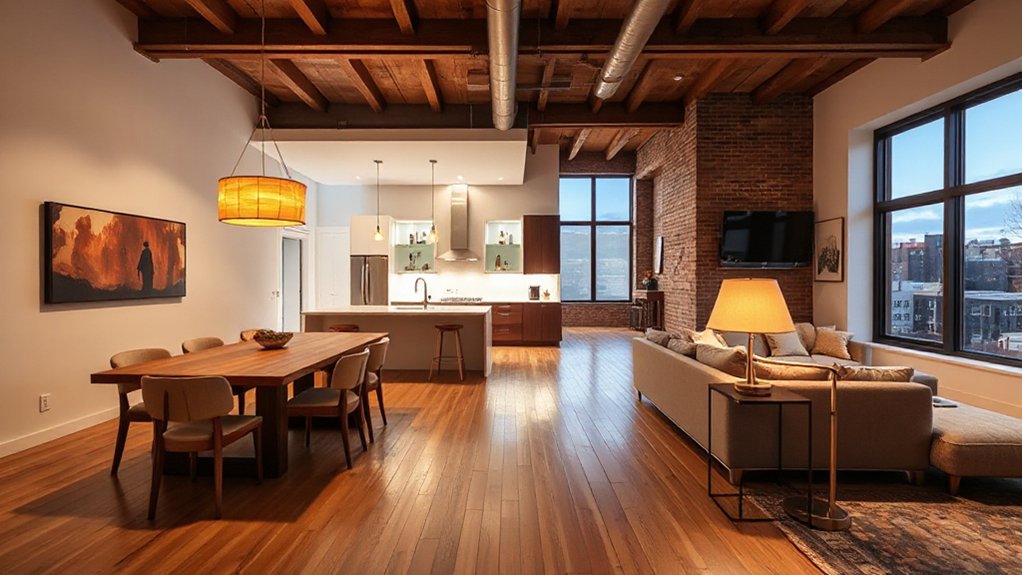
When you light each area with intent, an open-plan room stops feeling like one big, undefined space and starts reading as distinct zones. Start with layered ambient lighting, then add task and accent fixtures to create visual cues that separate functions without adding walls.
Keep color temperature consistent (around 2700–3000K) so the room still feels cohesive, and control each zone independently with dimmers.
- Hang a pendant over the dining table to anchor meals and gatherings.
- Use under-cabinet strips to define the kitchen work surface.
- Place a floor lamp beside the sofa to mark the lounge zone.
- Add a directional spotlight to highlight art or shelving as a boundary.
- Install dimmers or smart scenes to switch moods by zone.
Keep Clear Walking Paths Through the Open Plan
Start by defining your primary circulation routes from entry to kitchen, dining, and seating so you’re not cutting through activity zones. Place sofas, chairs, and tables outside those paths, and pull back any corners that snag traffic.
Keep walkway widths consistent end to end so movement stays smooth and the open plan feels orderly.
Establish Primary Circulation Routes
Although open-plan layouts feel flexible, they only work well if you establish primary circulation routes that stay consistently clear from entry points to key zones like the kitchen, dining area, and main seating.
Map your traffic flow first, then reinforce it with a clear spatial hierarchy: primary paths read as “streets,” while secondary movement reads as “lanes.” You’ll reduce bottlenecks and make every zone feel intentional without adding walls.
Use these tactics:
- Trace the most frequent trips (door-to-kitchen, sofa-to-bath)
- Set a consistent path width (about 36–42 inches)
- Keep sightlines open so routes feel obvious
- Align routes with natural anchors (island edge, rug border)
- Confirm turning space at corners and progressions
Recheck routes after adding lighting or décor, so circulation stays reliable.
Position Furniture Outside Paths
Once you’ve defined your main “street” routes, protect them by pushing furniture fully outside those lines so people can move through the open plan without weaving or sidestepping. Treat paths as no-furniture zones: no chair backs, cabinet corners, or console edges should intrude into them.
For reliable furniture placement, anchor seating with a rug, then align the sofa’s back edge to the rug boundary rather than letting it float into circulation. Rotate occasional chairs inward so their legs don’t project into movement lines.
Keep side tables tight to seating, not “in-between” zones. Use low, closed storage against walls to absorb clutter and support obstacle avoidance. If a piece can’t sit fully outside the route, relocate it or replace it.
Maintain Consistent Walkway Widths
Where do open plans break down fastest? In the walkways. If widths pinch and expand, you’ll feel bottlenecks, furniture creep, and constant sidestepping.
Aim for path consistency by choosing a standard clear width and holding it from entry to kitchen to seating. You’ll also reinforce walkway symmetry, so circulation reads intentional, not accidental.
Measure from the furthest protrusion—chair backs when pulled out, cabinet handles, sofa arms—then lock the line with rugs, lighting, and placement.
- Set a 36–42 in main route; don’t dip below 30 in anywhere
- Keep dining pull-back clearance at 24 in behind chairs
- Align rug edges to define edges of travel
- Avoid angled pieces that steal inches mid-path
- Recheck after accessories; baskets and plants often invade paths
Add One Bridge Piece to Connect Zones
Even when your furniture layout feels “separate enough,” a single bridge piece can deliberately connect two open-plan zones without blurring their functions. Choose one transition piece that touches both areas: a narrow console behind the sofa that also serves the dining side, a bench that aligns with the entry and living room, or a slim rug runner that starts at the kitchen and ends at the table.
Make it a visual connector through consistent material, finish, and height. Match wood tone to your dining chairs, repeat metal from your lighting, or echo upholstery color in a single cushion set.
Keep the bridge piece low-profile so it doesn’t block sightlines or pinch circulation. Anchor it with precise alignment, not extra decor.
Add Airy Dividers (Screens, Shelves, Slats)
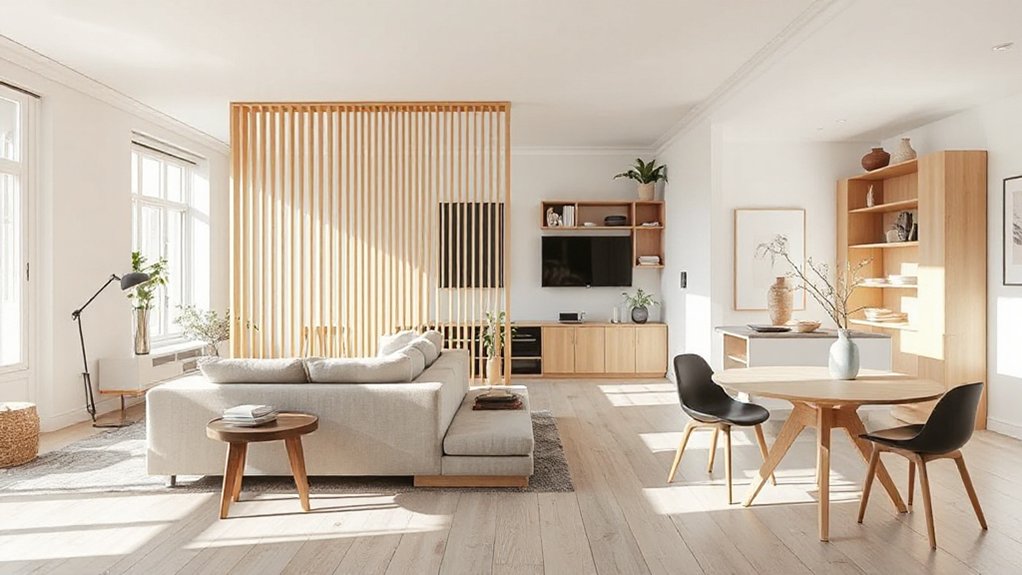
Use airy dividers to define each zone without blocking light or sightlines. You can shift lightweight screens as needs change, or anchor the layout with open shelving that adds storage while keeping views open.
For a cleaner, built-in look, install slatted partitions to create separation and rhythm while still letting air and daylight move through.
Lightweight Screens For Flexibility
Although open-plan layouts feel spacious, you’ll get better day-to-day function when you can subtly define zones with lightweight, airy dividers. Use screens you can fold, roll, or lift to shift boundaries as routines change. Choose modular partitions with stable feet so they won’t tip, and prioritize flexible dividers that preserve sightlines while softening noise.
Place them perpendicular to traffic paths to prevent bottlenecks, and keep a 900mm minimum walkway.
- Folding screens to separate dining from lounging
- Curtain tracks for instant, retractable zoning
- Freestanding acoustic panels to cut echo
- Sliding shoji-style screens to filter light
- Plant stands on casters for movable edges
Match height to purpose: 1200–1500mm for definition; full height for privacy.
Open Shelving And Slatted Partitions
Where do you draw a boundary in an open plan without blocking light or killing the sense of space? Use open shelving and slatted partitions to define zones while keeping sightlines.
Place shelving perpendicular to a wall to separate living from dining, and keep it 60–70% open so daylight still travels. Anchor it with a heavier base cabinet or a low plinth to stop wobble, then limit depth to 300–350mm to protect circulation.
For slats, set vertical battens 20–40mm thick with 20–30mm gaps; you’ll screen clutter yet avoid a solid wall. Run slats to the ceiling for stronger zoning, or stop at 2.1m to preserve openness.
Add integrated lighting to mark the boundary at night.
Reduce Noise in Open-Plan Living (Soft + Solid)
Even a beautifully designed open-plan zone can feel stressful if sound ricochets between hard surfaces, so you’ll want to control echo and block transmission at the same time.
Start with Acoustic treatments that absorb mid and high frequencies, then add Soundproofing techniques that add mass and seal gaps so noise can’t leak between zones.
- Lay a dense rug plus felt underlay to cut footfall and soften reflections.
- Hang lined drapery or a fabric Roman shade on large glazing for broadband absorption.
- Install wall panels (PET felt or wool) at first-reflection points near seating and TV.
- Add a slatted wood baffle with mineral wool backing to tame splashy ceilings.
- Upgrade doors with solid cores, perimeter seals, and a drop-down sweep to stop flanking paths.
Control Clutter With Zone-Based Storage Rules
When you define clear storage rules for each activity zone, you stop clutter from migrating across your open-plan layout. Assign every zone a “home base” cabinet, bin, or shelf, and store only what supports that zone’s purpose. Use labels and fixed container sizes so items can’t sprawl. Keep one fast-drop catchall tray per zone, then empty it daily into the correct storage.
For Clutter control, set a one-in/one-out rule for books, toys, and décor, and cap each category to a single container. Place hidden storage at the zone boundary to intercept floaters before they spread. Schedule a weekly five-minute reset, starting from the busiest zone, and you’ll maintain Storage organization without breaking flow.
Make the Kitchen Zone Work in an Open Plan
Although an open-plan kitchen has to look calm from every angle, it still needs to function like a high-efficiency workstation. You’ll get both by tightening the working triangle and giving every task a clear home.
Anchor the zone with a Kitchen island that defines the boundary without blocking circulation, and reserve its surface for prep, not storage.
Prioritize Appliance placement so doors don’t swing into walkways and noise stays away from seating.
Keep frequently used tools within one step of where you use them, and group supplies by task to reduce visual scatter.
- Put prep between sink and cooktop
- Align trash, compost, and cleaning at the sink
- Keep fridge access clear of traffic paths
- Use panels to conceal small appliances
- Light counters evenly with under-cabinet LEDs
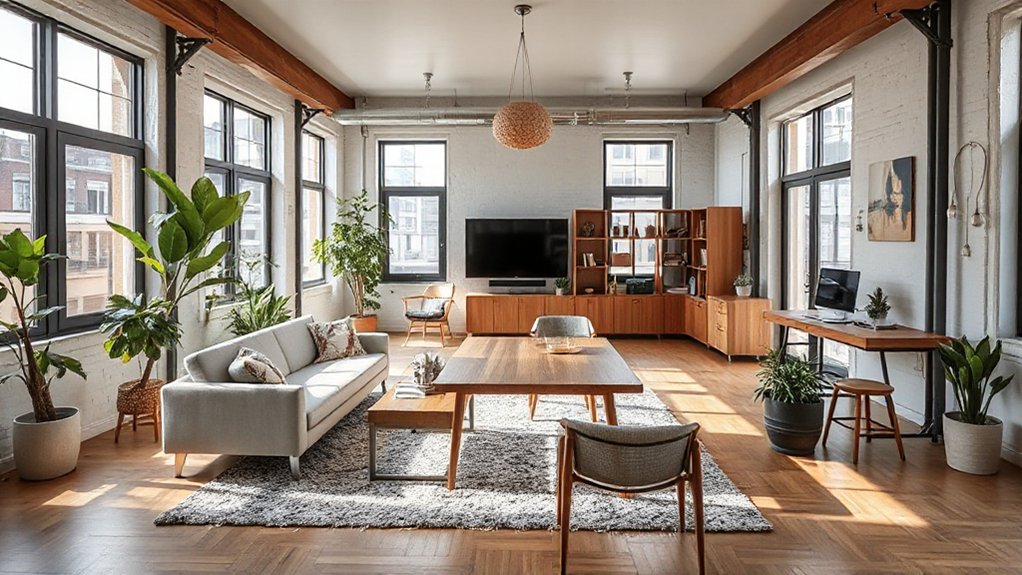
Set Up a Work Zone Without Killing the Vibe
Because open-plan living puts your desk in everyone’s eyeline, you need a work zone that performs like an office but reads like part of the room. Anchor it with a compact desk and a closed base cabinet so supplies disappear fast.
Face the desk toward a wall or shelving, not the sofa, to keep screens and clutter out of sightlines. Use Creative lighting: a dimmable task lamp at 4000K for focus, plus a warm accent sconce to match evening ambience.
Define boundaries with a low bookcase or slatted screen that filters views without blocking flow. Add Acoustic treatments where they matter—felt pinboards, a rug pad, and fabric panels behind you—to cut echo and video-call noise.
Finish with a tray system and one plant to soften edges.
Avoid These Open-Plan Living Layout Mistakes
If you treat one big room like it’s three separate rooms crammed together, you’ll end up with a layout that looks chaotic and functions even worse. Fix flow first: anchor zones with a primary pathway, then scale furniture to the room, not the wish list.
Address Privacy concerns early with sightline breaks, not tall barriers, so you keep openness without feeling exposed. Solve acoustic challenges with soft surfaces and spacing; don’t wait until echo becomes the “design feature.”
Avoid these common mistakes:
- Blocking walkways with sofa backs or islands
- Floating rugs that don’t fit the seating footprint
- Using mismatched lighting temperatures across zones
- Skipping layered sound control (rugs, drapery, upholstery)
- Overloading walls, leaving no negative space for calm
Frequently Asked Questions
Do Open-Plan Homes Hurt Resale Value Compared to Traditional Layouts?
Open-plan homes usually don’t hurt resale value, but they can if buyers want separation. You’ll protect value with smart furniture arrangement, defined traffic paths, and privacy solutions like doors, screens, or acoustic panels.
How Can I Make Open-Plan Living Accessible for Wheelchair Users?
Want open-plan living that works for wheelchair users? You’ll apply Accessible design: keep wheelchair pathways 36–42 inches wide, maintain clear turning circles, choose low-pile flooring, add lever handles, reachable switches, and under-counter knee space.
What Are the Best Paint Sheens for Durable Open-Plan Walls?
Choose eggshell or satin for most walls; they balance Paint durability with easy cleaning. Use semi-gloss in high-touch zones like corridors. Your Sheen selection should match traffic: flatter hides flaws, glossier resists scuffs and stains.
How Do I Manage Cooking Smells in an Open-Plan Kitchen?
You manage cooking smells by using ventilation strategies: run a high-CFM, vented range hood early and after cooking, crack windows, and add odor absorbing materials like activated charcoal, baking soda, and washable curtains.
Can I Retrofit Underfloor Heating in an Open-Plan Space?
Yes, you can retrofit underfloor heating, like slipping a warm blanket beneath your floor. You’ll need insulation strategies, low-profile systems, and revised radiator placement. Check floor height, manifold location, heat-loss calculations, and controls.
Conclusion
You don’t have to choose between openness and order. Map your zones, then lock them in with furniture sightlines, properly sized rugs, and layered lighting. Treat storage like a boundary line: what doesn’t serve a zone doesn’t stay there. Make the kitchen efficient, keep work areas visually quiet, and protect clear walk paths. When each zone has a purpose, your open plan flows like a well-marked river—free, fast, and contained.