You’ll start by mapping your hallway’s true dimensions and proportion cues, then verify existing woodwork, tiles, and iron details before any intervention. Take a measured, methodical approach to material choices, focusing on authentic matches and patina preservation. Plan stair and balustrade work, runner placement, and thresholds with exacting standards, while smoothing modern comforts into discrete, period-appropriate upgrades. The results hinge on disciplined execution; the next steps demand careful comparison of finishes and tolerances before you proceed.
Overview of Victorian Hallway Characteristics
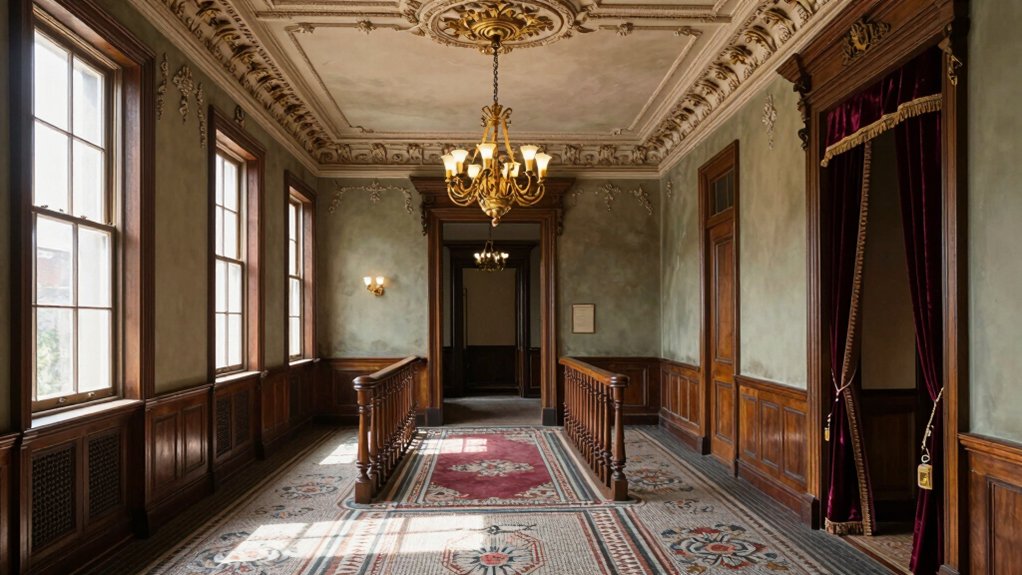
Victorian hallways typically feature narrow, elongated layouts with pronounced symmetry and purposeful circulation. You examine corridor proportions, noting how clear sightlines guide movement and management of natural light.
In Victorian hallway architecture, you’ll observe paneled walls, decorative wainscoting, and frequent molding progressions that reinforce hierarchy and tactility. Operationally, consider floor material continuity, thresholds, and step firmness to minimize trip risk while preserving period aesthetic.
Spatial rhythm emerges from repeatable module lengths and aligned doorways, contributing to a cohesive navigation experience. Historical significance informs material choices, ornament density, and detailing standards, ensuring authenticity without overfurnishing.
You’ll prioritize proportional accuracy, precise joinery, and durable finishes to sustain the corridor’s structural integrity and perceptual clarity across generations.
Assessing Your Space: Measurements and Proportions
You’ll start by recording wall heights to establish baseline clearances and identify any deviations from standard Victorian proportions.
Use concise space-planning metrics to map corridor width, height, and turning radii, then compare against proportion guidelines such as the golden ratio and typical hall widths.
This allows you to set precise measurements for door placements, molding profiles, and lighting layouts before design decisions, ensuring a cohesive, practical plan.
Measuring Wall Heights
When planning a Victorian hallway restoration, start by accurately measuring wall heights from floor to ceiling at multiple points to account for any irregularities. Use a rigid tape or laser measure, pulling verticals in a systematic grid every 2–3 meters along each wall.
Record measurements at floor level, mid-height, and crown contact to detect bowing, sag, or plaster irregularities.
Note plinth blocks, baseboards, and wainscoting as fixed references that affect usable height for fixtures.
Calculate average height and identify the smallest clearances for door transoms and architraves.
This data informs furniture placement and the ideal placement of decorative accessories, ensuring proportions match the space’s true geometry.
Maintain a labeled, dated sheet for comparison during restoration and future projects.
Validate measurements with a cross-check against architectural drawings when available.
Proportion Guidelines
With the measured geometry in hand, apply proportion guidelines to assess how spatial relationships translate to practical design. You’ll compare wall-to-window ratios, ceiling height versus doorway widths, and the floor’s unobstructed run to establish a readable rhythm.
Begin by identifying dominant sightlines and scale anchors, then translate them into usable measurements for furniture placement. Maintain consistent margins around obstructive elements and ensure clear circulation paths of at least 36 inches where possible.
Use modular thinking: repeat implies harmony, contrast emphasizes focal points, and alignment anchors rooms to the Victorian hall’s character. Consider window treatments that respect proportional gaps, avoid visual heaviness, and preserve daylight.
Record all measurements for replication, calibration, and future adjustments. Precision in proportion supports enduring, legible hallway design.
Space Planning Metrics
Start by quantifying foundational dimensions—length, width, and height—then map key spatial relationships such as wall-to-window ratios, doorway widths, and the clear floor area that remains unobstructed.
In space planning metrics, you assess circulation clarity, sightlines, and functional zones within your Victorian hallway. Measure typical furniture footprints and verify that pathways preserve minimum widths for passing pairs without collisions.
Document ceiling height implications for crown molding and lighting suspension. Determine furniture arrangement that prioritizes accessibility, balance, and rhythm, avoiding crowding near radiators or ornamented alcoves.
Plan lighting placement to enhance depth and hierarchy, aligning sconces, pendants, or cove lighting with focal features. Use precise measurements, mark tolerances, and verify scale against period detailing to ensure cohesive integration.
Continuous reevaluation maintains proportional accuracy and practicality.
Authentic Materials: Wood, Tile, and Iron Details
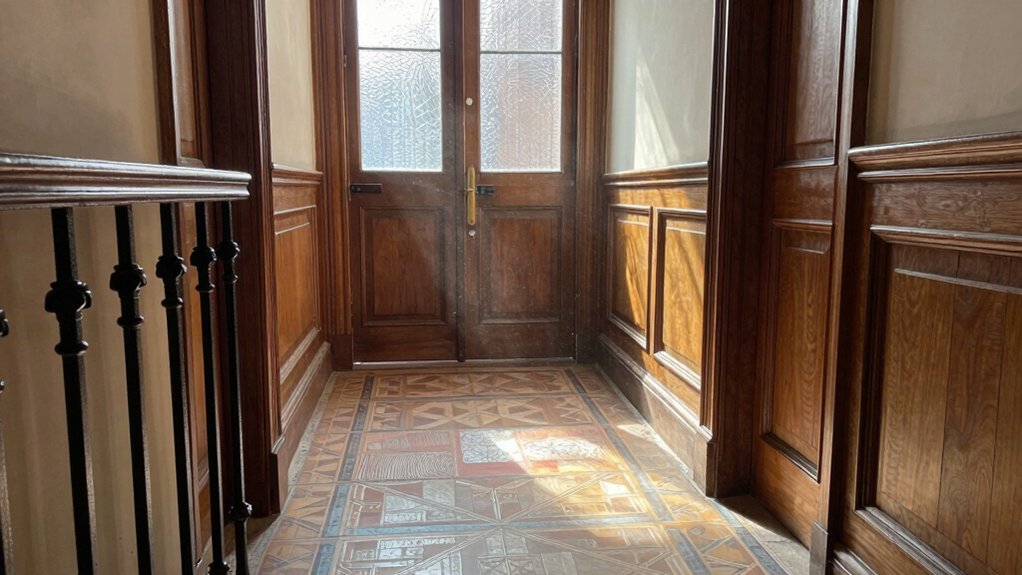
Wood patina authenticity informs allowable refinishing approaches without obscuring era-character.
Tile pattern integrity requires exact matching of motifs, spacing, and wear to maintain historical reading of the hallway.
Iron detailing reflects craftsmanship through joint accuracy, surface treatments, and restraint in replications to preserve structural and aesthetic honesty.
Wood Patina Authenticity
In Victorian restoration, authentic wood patina matters as much as the structural framework, because aged surface character informs both visual fidelity and material performance. You assess patina by cross‑checking grain depth, tool marks, and wear patterns against era benchmarks, ensuring consistency with adjacent surfaces.
Aim for a controlled, authentic evolution rather than a masked finish; this preserves long‑term stability and reveals historical craft. When selecting finishes, prioritize a vintage finish that respects density, porosity, and UV susceptibility, then document friction and abrasion resistance under typical hallway traffic.
Treat patina as data: measure gloss levels, micro‑etching, and color drift to guide repairs. Ensure maintenance routines preserve authenticity, using cleaners and sealants compatible with original resinous or oil‑based substrates. Avoid over‑refinishing that erases informative patina indicators.
Tile Pattern Integrity
How can you safeguard the Tile Pattern Integrity when restoring Victorian hallways? You assess original layouts, documenting pattern repeats, margins, and edge progressions before any removal.
Maintain authentic tile sizes and hues; replace damaged units with exact equivalents, not approximate substitutes.
Establish a controlled workflow: dry-fit tiles, verify alignment with reference lines, then set with mortar that matches era-specific workability.
Use a consistent grout line width and joint depth to preserve the pattern’s rhythm, avoiding over-wraught joints that would read as modern.
Color-match grout to the original palette, ensuring grout color coordination supports the pattern rather than distracting from it.
Clean with non-damaging agents, cure fully, and re-check high-traffic areas for settling.
Finally, photograph the completed pattern for archival accuracy.
Iron Detailing Craftsmanship
Iron detailing craftsmanship combines authentic material handling with precise fabrication to guarantee period-accurate results. You approach ironwork with measured steps, inspecting profiles, thicknesses, and bend radii before any cut.
You apply reliable craftsmanship techniques to form, join, and finish components that align with Victorian proportions and tolerances. Ornamental ironwork is planned from a structural and decorative perspective, ensuring decorative elements don’t compromise load paths or accessibility.
You specify forged versus cast sections, surface textures, and patina compatibility with wood and tile interfaces. Tight tolerances prevent misalignments at railings, grilles, and escutcheons, while fasteners are selected for corrosion resistance and relative expansion.
You document fabrication logs, verify fit on site, and preserve original patinas, confirming authenticity through controlled detailing and careful dry-fitting.
Stairs and Balustrades: Restoration Techniques
Restoring stairs and balustrades starts with a precise assessment of original materials and construction methods. You identify wood species, joinery styles, and fastener types, documenting dimensions and grain orientation.
Next, you evaluate deterioration patterns: cracking, splitting, due to humidity, or insect activity, and note surface finishes, patina, and prior restorations.
Develop a treatment plan that prioritizes conservation over replacement; whenever possible, reuse original parts with minimal intervention. Use steam or gentle mechanical methods to clean, then stabilize joints with historically appropriate fasteners.
For stair components, check stringers, treads, and risers for movement and levelness, correcting with shims or braces as needed.
Address staircase lighting integration and ensure electrical safety, while scheduling balustrade maintenance to preserve rail integrity and decorative profiles.
Period-Appropriate Runners and Stair Carpets
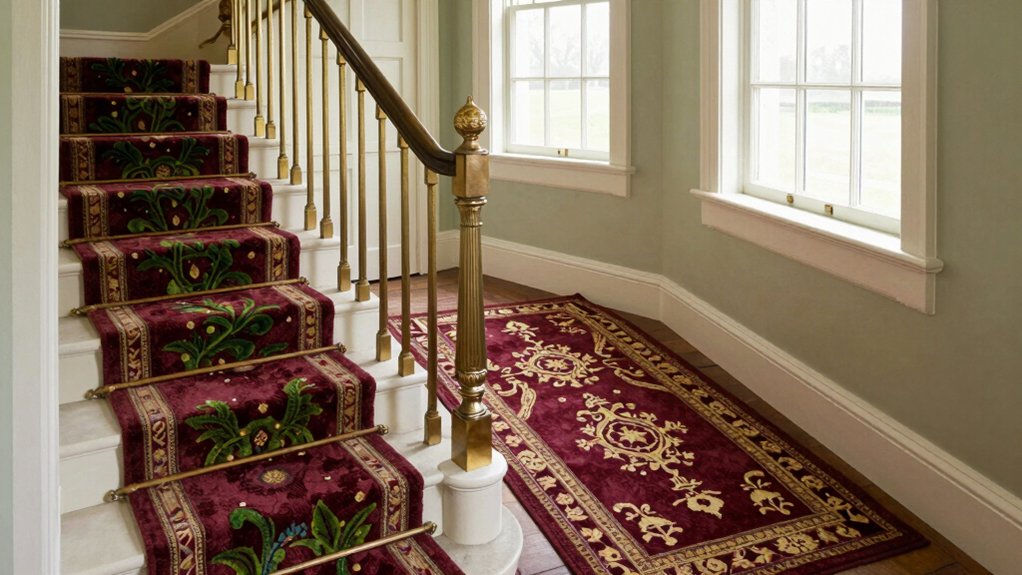
Period-appropriate runners and stair carpets should be selected with a precise eye toward era, fabric weight, and damage resistance. You assess weave structure, pile height, and nap direction to guarantee durability under high-traffic use.
Choose wool blends or synthetic equivalents that mimic 19th-century textures while resisting wear, staining, and brooming. Measure stair width, tread depth, and landing transitions to determine run length, center alignment, and eased edges that reduce curling.
Secure with purpose-made gripper pads or hidden fasteners to maintain clean sightlines and minimize trip hazards. Consider color and pattern that complement existing balustrades and preserve room rhythm without overpowering Victorian staircase details.
Plan hallway lighting to avoid glare on reflective fibers, and guarantee consistent illumination from top to bottom for safe, practical navigation.
Wall Treatments: Wallpaper and Paint Schemes
You’ll evaluate wallpaper patterns for period accuracy, comparing motifs like damask, flocked textures, and restrained geometric repeats to the hallway’s scale. Consider paint schemes that honor Victorian tonal guidelines—soft neutrals with restrained accents, and selective use of high-contrast trim to define architectural features.
This discussion should balance durability, washability, and historical authenticity while outlining practical selection criteria for both surfaces.
Wallpaper Patterns
When selecting wallpaper patterns for a Victorian hallway, prioritize scale, motif, and heritage accuracy to guarantee a balanced, authentic look. You should assess repeat length, proportion to wall height, and alignment with architectural features, like architraves and cornices.
Choose floral motifs for softer, organic accents that echo period parlor interiors, but match scale to adjacent paneling to avoid visual overload. In hallways with strong natural light, favor lighter grounds and restrained contrasts to preserve depth without glare.
Geometric designs work well as counterpoints to ornate woodwork, offering rhythm without competing for attention. Verify printer color accuracy against sample panels, then factor wear resistance and cleanability for high-traffic zones.
Document chosen patterns for future restoration, ensuring consistency across comparable hallways.
Paint Schemes Choices
Color selection for hallway walls should start from the architectural character and light levels, then converge on a paint strategy that complements wallpaper options and trim. You assess adjacent rooms and natural illumination to determine base tones, then choose accent colors that preserve historical rhythm.
Use muted neutrals for larger areas to reduce glare, pairing them with deeper, period-appropriate hues on doors and dados to emphasize verticality. Consider sheen carefully: satin or eggshell minimizes reflection while preserving archival detail.
Plan for lighting design in tone selection, ensuring bulbs render colors faithfully and layers read at eye level. Coordinate furniture placement with wall color to enhance sightlines and focal points, avoiding overcrowding.
Finally, document finish schedules and maintenance steps to sustain accuracy over time.
Lighting to Highlight Architectural Features
To highlight architectural features in a Victorian hallway, place lighting strategically to create depth and emphasize detailing without glare. You’ll balance ambient, task, and accent layers to reveal crown moldings, architraves, and paneling.
Use a dimmable main fixture at a low, even wash to prevent hot spots, then layer with targeted accents. For ceiling illumination, opt for softly diffused sources that avoid reflections on polished surfaces; position fixtures to minimize shadows along central sightlines.
Implement chandelier installation on key nodes where your ceiling height and proportion allow, ensuring even drop and proportional scale. For wall features, refine wall sconce placement to flank artwork and architectural niches, maintaining symmetry.
Prioritize continuous color temperature around 2700–3000K to preserve period warmth and reduce glare.
Flooring Transitions and Thresholds
Smooth flooring shifts and well-defined thresholds are critical to maintain the Victorian hallway’s flow and visual coherence. You select crossings that match both flooring materials and subflooring tolerances, ensuring even height differentials are minimized across rooms.
Use matching profiles for stair landings and corridor runs, with micro-gleams where light catches the edge. Precision in installation prevents trip hazards while preserving clean sightlines.
Consider threshold heights that respect doorway clearances and add plinth-level support for stability. For aesthetic consistency, coordinate molding styles with baseboards and casing, so progressions read as intentional details rather than repairs.
Integrate window treatments and adjacent trim to reinforce rhythm, avoiding clutter at thresholds. Document material specs and tolerances for future maintenance and refinishing.
Color Layering and Pattern Combos
Careful color layering and pattern combinations define the hallway’s depth and rhythm, guiding how light travels and how viewers move visually from room to room. You select a base tone with high durability and subtle sheen, then layering introduces depth without glare.
Apply a midtone as a visual bridge between surfaces, using consistent saturation to maintain balance. Pattern combos should reinforce architectural rhythm: consider a restrained, linear motif on walls paired with a geometric floor accent to echo door surrounds.
Limit contrasts to avoid visual fatigue; rotate subtle hues along successive walls to imply continuation. Use matte finishes for walls and satin for trims to reduce glare.
Test samples under different lighting, and document perceived warmth, texture, and legibility of transitions to guarantee cohesive navigation.
Storage Solutions That Respect the Era
Storage solutions that respect the era prioritize built-in efficiency, discreet hardware, and period-appropriate materials. You plan storage as a system, not a collection of cabinets, to avoid visual clutter and preserve sightlines. Implement integrated shelving where possible, aligning with crown moldings and supporting arches to minimize breaks in rhythm.
Choose solid-wood doors with lug hinges and brass detailing that blend with tobacco finishes. Concealed compartments provide practical concealment for valuables and small essentials without interrupting panelled surfaces. Install push-to-open mechanisms or magnet catches to maintain clean frontages.
Ensure hardware tolerances match traditional methods, yet maintain functional accessibility. Label storage zones subtly with carved or inlaid initials. Prioritize symmetry, proportion, and durability to sustain authenticity while meeting daily use demands.
Modern Comforts Without Compromising Style
Modern comforts can be woven into Victorian hallways without sacrificing the period’s discipline of line and material. You pursue a disciplined approach, integrating utilities with minimal visual disruption.
Begin with discreet, high-quality wiring plans and concealed fixtures to preserve sightlines and Victorian ornamentation. Choose modern lighting that complements symmetry and color temperature, favoring LEDs in warm tones, dimmable controls, and selective placement to enhance architectural features without glare.
Heating and cooling should be zoned and quiet, using low-profile diffusers that blend with plaster, not obstructing cornices or moldings. For acoustics, apply sound-absorbing panels behind existing surfaces instead of replacing historic materials.
Storage remains practical: slim cabinets and recessed niches preserve floor area while maintaining elegant proportions. Ensure finishes reflect authentic palette, harmonizing modern systems with historical restraint.
Frequently Asked Questions
How to Restore Original Plaster Medallions Without Damage?
To restore original plaster medallions without damage, you perform plaster medallion repair using noninvasive methods and reversible materials, always documenting steps. You apply historical preservation techniques, stabilize substrate, and test compatibility before any gentle restoration or repainting.
What Are Safe Modern Wiring Options for Hall Lighting?
You can install LED lighting with smart wiring, ensuring safe modern hall illumination; use low-voltage drivers, grounded circuits, and dimmable controls. Verify wiring compliance, add surge protection, and schedule professional inspection to maintain reliable, code-compliant performance.
Which Non-Toxic Finishes Preserve Period Authenticity?
You should use eco friendly paints and natural wax finishes to preserve period authenticity, avoiding modern glossy lacquers; apply thin coats, test compatibility with wood substrates, and maintain ventilation during curing for durable, non-toxic protection.
How to Conserve Historically Sourced Wood With Humidity Control?
To conserve historically sourced wood with humidity control, you monitor humidity, then apply wood treatment and sealants as needed. You monitor humidity continuously, adjust ventilation, and maintain stable conditions to prevent warping, cracking, and mold growth inside the hallway.
Can Micro-Sprayed Paint Replicate Aged Patina Effectively?
Yes, micro-sprayed paint can mimic aged patina, but you’ll need controlled layering and timing to match paint aging, while preserving surface texture; adjust formulas for translucency and micro-spray patterning to achieve authentic results.
Conclusion
You’ve seen how meticulous measurement, authentic materials, and careful detailing fuse Victorian integrity with modern comfort. If a theory claims that small, accurate restorations can resurrect a space’s true character, test it: document patina, test grain matching, and preview progressions before changes. When in doubt, draft a precise plan, then execute in controlled stages. The result should feel inevitable—crafted, durable, and timeless—proof that faithful restoration, not shortcuts, preserves the hallway’s enduring elegance.