Transform your small walk‑in pantry into a calm, efficient command center by zoning for staples, groceries, and specialties. Measure doorway clearance, shelf depth, and height, then choose adaptable, modular shelves and clear, uniform containers. Use pull-out bins for visibility, labeled edges for quick access, and under-shelf lighting to brighten tasks. Maximize vertical space with tall cans and corner solutions like lazy Susans. With smart labeling and budget upgrades, you’ll reclaim order—and discover how much more you can fit if you keep exploring.
Foundational Principles for Small Walk-In Pantries

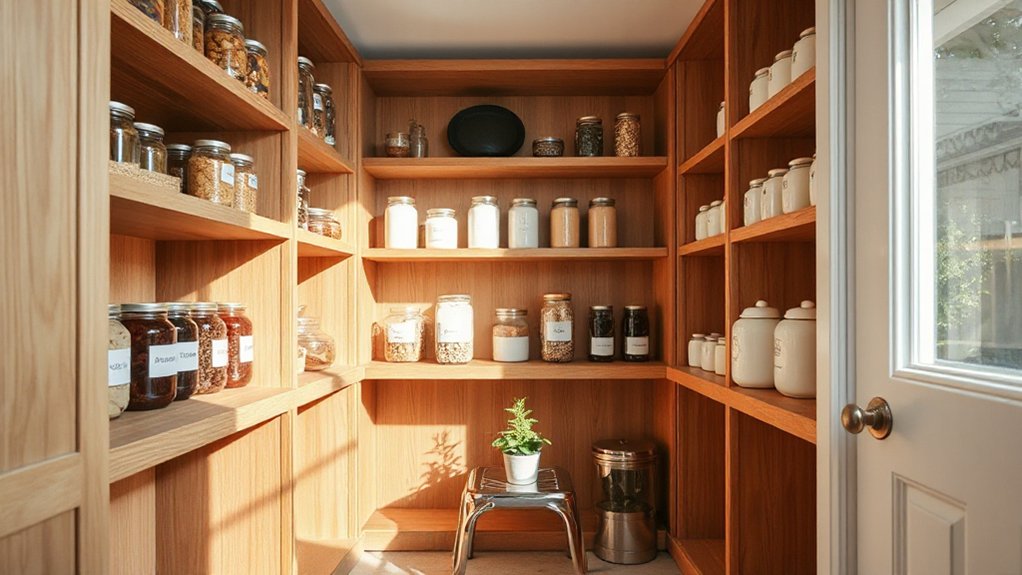
Small walk-in pantries start with a simple premise: organization saves time, money, and headaches. You design around efficiency, not excess, so you map zones for groceries, appliances, and daily use.
Start with sturdy shelves and adjustable dividers to flex with your needs. Prioritize vertical space, then rotate items to prevent waste.
You choose color schemes that calm or energize, aligning lighting and finishes with your vibe. Custom lighting isn’t just for ambience; it highlights pull-out bins and labels, reducing rummage time.
Labeling remains deliberate and legible, helping you maintain order without second guesses. Keep a dedicated area for bulk staples, snacks, and quick-grab dinners.
With intentional layout, you create a pantry that refines routines, saves steps, and minimizes clutter.
Measure Your Space: How to Set Realistic Pantry Goals
Take accurate measurements of your space first, then translate them into realistic pantry goals. You’ll map what you can fit, not what you wish for, so your plan feels doable. Note doorway clearance, shelf depth, and vertical height to avoid awkward access.
Define zones: everyday items front and center, infrequently used extras tucked away. When you set goals, think in concrete quantities—five coffee tins, three snack baskets, two cereal boxes—so you don’t overfill.
Consider custom shelf configurations that adapt as needs change, rather than rigid systems you’ll abandon. Pair your layout with pantry color schemes that keep things visible and calm, aiding quick finds.
Revisit goals after a few weeks and adjust, keeping realism at the core of everything you install.
Space-Saving Shelving That Doubles Storage
Smart, space-saving shelving can double your pantry’s storage without cluttering the doorway. You’ll maximize vertical efficiency with carefully arranged vertical dividers that keep cans, boxes, and jars upright and easy to scan.
Choose modular units that snap together or stack, so you can customize height and depth as your needs change. Install staggered shelves to create sightlines and prevent wasted space above and below items.
Use narrow, deep shelves for tall containers and shallow tiers for frequently used staples. Label edges at a glance, so you grab what you need without rummaging.
Leave room for a small step stool or a tray for frequent under-shelf tasks. This approach delivers tidy organization, quick access, and a cleaner workflow in your walk-in pantry.
Pull-Out Bins and Baskets for Clear Visibility
You’ll love pull-out bins that keep every item in sight with crisp, clear visibility.
Smooth pull mechanisms make grabbing what you need instant and effortless.
This setup trims clutter and speeds meal prep, so you stay organized with zero fuss.
Clear Bin Visibility
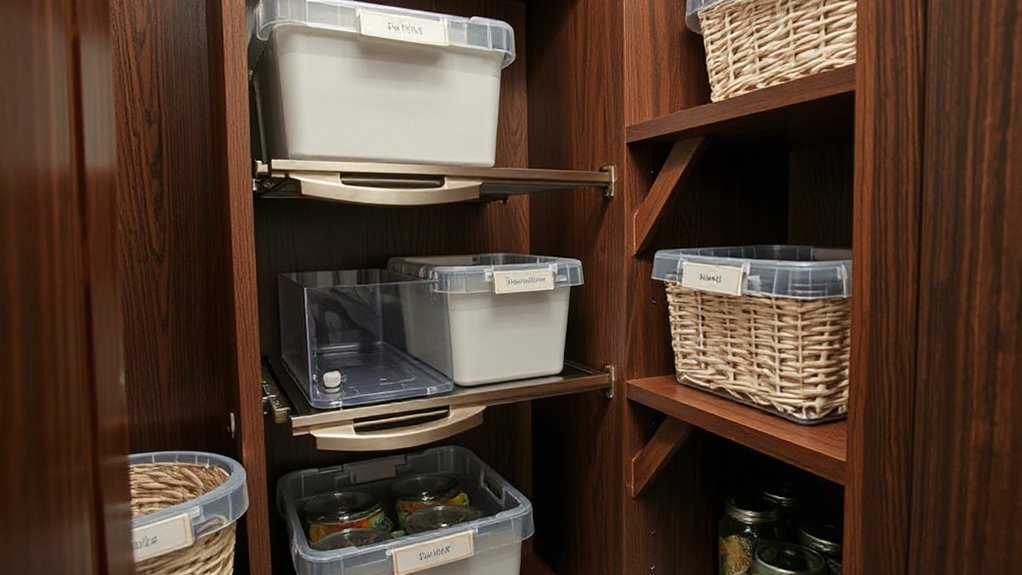
Clear bin visibility is key for quick, organized pantry days. You’ll love pull-out bins and baskets that keep contents visible without digging. Choose clear, labeled containers in uniform sizes to maximize shelf depth and readability.
Group items by category, then arrange by frequency—daily staples surfaced front, infrequently used ingredients toward the back. Add decorative accents that elevate the look without compromising function, like slim color markers or minimalist labels.
Seasonal organization helps you rotate supplies as the weather changes, so you’re never hunting for flavors that don’t belong. Keep lids attached or stackable options ready to minimize space wasted on unused tops.
With this setup, you grab what you need in moments, maintain order, and enjoy a streamlined, stylish pantry routine.
Smooth Pull Mechanisms
Smooth pull mechanisms make every reach effortless. When you install pull-out bins and baskets, you gain instant visibility for all items, from snacks to spices. Choose slim, full-extension slides that glide smoothly and stop precisely where you need them.
The right mechanism keeps contents level, even when you pull from the far side, so you won’t spill or search. For a clean look, match door hardware to your cabinet finish, and select a frame that mirrors your shelf material for cohesion.
Labeling is optional but helpful if you store similar items together. Prioritize soft-close options to reduce noise and wear. Enable easy cleaning by using removable baskets and a simple wipe-down routine. Your pantry stays organized, efficient, and stylish at every pull.
Door and Corner Layouts That Maximize Access

Think about door access first: a swing or sliding door can transform how you reach every shelf without stepping into the path.
In corners, optimize by staggering shelving and using L-shaped layouts to keep everything reachable. This approach makes tight spaces feel open and every item easy to grab.
Door Access Maximization
Door access in a small walk-in pantry should feel effortless, so prioritize layouts that keep the doorway clear and the shelves reachable from multiple angles. You’ll maximize flow by aligning doors with main work zones and selecting open-shelving that doesn’t crowd entry paths.
Place frequently used items within arm’s reach and near access points, reducing detours. Use shallow, tall cabinets on one side and freestanding units on the other to preserve sightlines.
Implement a dedicated door organization zone near the entrance for labels, baskets, and pull-out bins, so everything has a defined home. Favor magnetic or slimline organizers on the door itself to free shelf space.
Keep corners unblocked and progression smooth, ensuring you can move quickly without edge interference or clutter buildup.
Corner Space Utilization
Corner space in a small pantry can feel wasted if you don’t optimize both the door swing and the corner nooks. You’ll reclaim access by tailoring door layouts: install a pocket or bi-fold door to free floor space and keep aisles clear.
For corners, use lazy Susans, angled corner shelves, or pull-out baskets that reach stubborn depths without clutter. Group items by how often you reach them, placing daily staples within easy reach and infrequently used goods in high or low zones.
Choose storage containers that stack neatly and breathe, like clear BPA-free bins for visibility. Pair practical layouts with a cohesive color schemes approach: neutral bases with bold accents to visually widen the space and simplify organization.
Lighting Tricks for Easy Access and Ambience
Smart lighting makes a small pantry feel bigger and more usable: add under-chelf LEDs to banish shadows, install motion-activated taps for hands-full moments, and choose warm, color-consistent bulbs so spices and jars look true-to-life at a glance.
You’ll keep pathways clear with bright, evenly distributed light and avoid glare on glass canisters. Use LED accents to highlight rows of tins and heighten contrast between labels and colors, making retrieval fast.
Dimmable fixtures give you mood options for late-evening recipe reads or bright daylight meal prep. Place task lights above zones you access most, and tuck ambient strips along shelves for depth.
With thoughtful layering, accessibility improves without visual clutter or overcrowding.
Zoning the Pantry: Staples, Groceries, and Specialties
Zoning the pantry starts with clarity: separate staples, groceries, and specialties so you can grab what you need in a snap. When you organize, you’ll define zones that streamline daily rituals, not clutter them.
Staples belong in cabinet-friendly bins or labeled pullouts, so you’re not digging for salt or oil mid-cook. Groceries go on adjustable shelves or clear totes, letting you spot cans and boxes at a glance.
Specialties—seasonings, snacks, and specialty flours—fit into dedicated racks or shallow drawers, keeping them visible but contained. This approach supports pantry organization by reducing search time and waste.
Pair zones with smart labeling and consistent placement, and you’ll enjoy cleaner surfaces and seamless storage solutions that feel deliberate, intentional, and invigoratingly simple.
Budget-Friendly Upgrades That Really Pay Off
If you’ve already sorted zones for staples, groceries, and specialties, you’ve laid the groundwork for real savings. Budget-friendly upgrades prove you don’t need a remodel to gain function or style.
Start with decorative accents that pull the space together: a cohesive color, a slim rail system, and labeled bins that feel intentional. Prioritize visibility: clear containers, stackable trays, and rotating shelves for easy access.
Add organizational labels on doors and shelves to guide quick finds, reducing impulse buys. Install adjustable shelves to grow with your needs, and use inexpensive pull-out baskets for snacks and grab-and-go items.
Don’t overlook lighting: bright, daylight LEDs make items pop and reduce waste. Small changes yield big payoff in efficiency and serenity.
Maintenance Habits to Keep It Showroom-Worthy
Maintenance habits keep the space looking showroom-new between deep cleans. You’ll maintain order by committing to quick daily checks: wipe spills, return items to their zones, and rotate pantry staples so the oldest stay front.
Set simple maintenance routines that fit your rhythm—a 5-minute reset before bed or after meals keeps clutter at bay without breaking momentum. Use clear labels and uniform containers to reduce visual noise, boosting pantry organization at a glance.
Schedule a weekly inventory to catch duplicates, expired items, or mismatched lids, then adjust purchases accordingly. Keep shelves dry and breathable, and consider moisture-absorbing products for open-air spaces.
Minimal, intentional care maintains a polished, ready-for-show appearance between deeper cleans.
Frequently Asked Questions
How Long Can Pantry Staples Stay Fresh in a Small Space?
Pantry staples stay fresh as long as you rotate them properly and store them in a cool, dry spot. Use shelf organization and labeling systems to track dates, minimize waste, and keep your small space efficient and stylish.
What Is the Best Humidity Level for a Walk-In Pantry?
Aim for around 50–60% humidity for a walk-in pantry to balance freshness and mold prevention. You’ll maintain humidity control, curb condensation, and actively prevent mold; monitor with a hygrometer and adjust airflow as needed.
Can I Install a Pantry in a Non-Traditional Area?
Yes, you can install a pantry in non traditional areas with creative installations. You’re limited by space and ventilation, so plan carefully; think shelves, doors, and airflow. You’ll transform awkward nooks into stylish, functional storage—basically, magic.
How Often Should I Rotate Stored Items for Freshness?
You should rotate stored items every 3–6 months for freshness. Check expiration dates and use earliest first. Follow storage tips like airtight containers and cool, dark shelves to keep pantry staples organized and extend their shelf life.
Do Smart Organizers Add Measurable Space in Tiny Pantries?
Smart storage helps, but it doesn’t magically create space; you optimize what you have, yet you still measure and plan. You’ll notice measurable gains with space optimization tactics, plus tidy labeling and easy-access layouts.
Conclusion
You’ve got a compact pantry with big potential. A well-planned layout, smart shelves, and clear bins make every inch count. Fun fact: households with organized pantries waste 15% less food monthly, because nothing hides in the back. Keep zones distinct, doors open for light, and pull-out bins eye-level for quick grabs. A few budget upgrades—labels, baskets, and good lighting—make it showroom-worthy without breaking the bank. Start small, finish strong, and savor the simplicity.