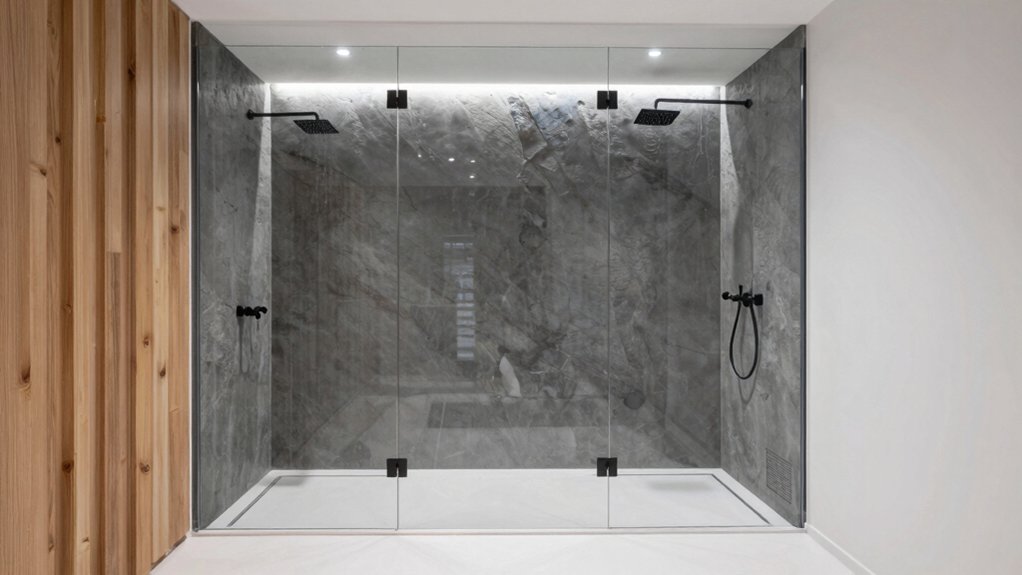

Wet room design invites you to create open shower zones with frameless glass and seamless flow, while smart ventilation keeps humidity in check and floors quiet underfoot. Use reflective finishes and light colors to heighten space, or bring in warm woods and moisture-smart materials for durability. Consider rain showers, wall jets, and integrated dry zones for balance, then test real-world layouts that prioritize accessibility and storage. If you want a practical roadmap, you’ll want to explore further.
Open-Plan Shower Zones for Seamless Flow
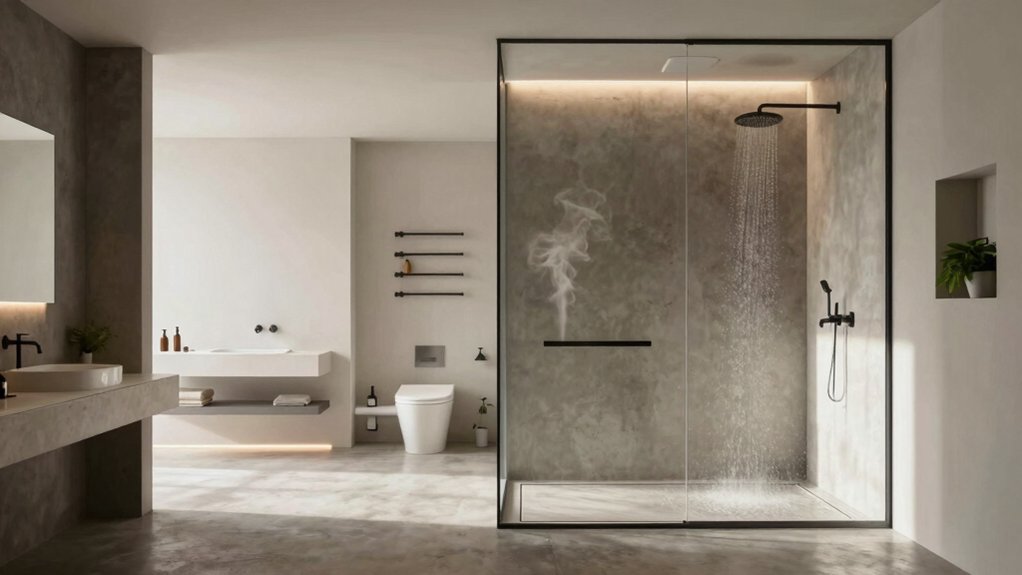
Open-plan shower zones create a seamless bathroom flow by eliminating borders and visually enlarging the space. You design with intent, sizing zones to maintain clear drainage, airflow, and water containment while preserving openness.
Measure boundary lines using a single, continuous floor plane and a cohesive ceiling height to minimize visual clutter. Emphasize spa-inspired aesthetics through neutral tones, tactile materials, and controlled lighting that boosts perceived space.
Implement minimalist partitioning with low-profile screens or none at all, ensuring sightlines stay uninterrupted and cleaning remains straightforward. Include non-slip, rated floors and linear drains aligned with run-off directions.
Control moisture with targeted extraction, and use warm, diffused lighting to enhance perceived depth. Plan curbless junctions, but prioritize safety, maintenance, and consistent material continuity.
Glass-to-Wall Concepts That Blur Boundaries
Glass-to-wall concepts extend the open-plan mindset by blending transparent boundaries with solid, wipe-clean surfaces. You’ll leverage clear, frameless panels to define zones while maintaining visual flow. Then reinforce function with precise thicknesses and install tolerances.
Measure glass heights against ceiling coves to minimize glare, and specify anti-scratch coatings for longevity in wet rooms. Color contrast between panels and tile or stone enhances legibility, guiding users through wet areas without confinement.
Balance openness with privacy screens where needed—slatted screens, frosted bands, or diffusers provide discretion without breaking the line. Guarantee hardware is recessed and corrosion-resistant, aiding easy cleaning.
Document fall protection, drainage alignment, and seismic tolerances in your spec, so maintenance remains straightforward and boundaries stay deliberately blurred, not ambiguous.
Humidity-Smart Ventilation Solutions
Humidity-smart ventilation solutions optimize comfort and performance by pairing fast-response sensors with variable-speed exhausts and balanced make-up air. You’ll prioritize humidity control through continuous monitoring, not intermittent remediation.
Use a smart controller that correlates dampness, occupancy, and activity, then adjusts airflow in real time. Aim for ventilation efficiency around 60–80% during peak moisture events, with a baseline of steady low-speed operation to prevent stale air.
Choose fans with auto-regulation, humidity setpoints, and cross-vent pathways that avoid drafts while exhausting moisture. Install discreet sensors at shower zones and near drains to minimize lag.
Combine with well-sealed, moisture-resistant ducts to reduce leaks. Track performance via hourly humidity trends and energy use, then tune setpoints for consistent comfort and long-term durability.
Light-Driven Materials: Reflective Surfaces and Bright Finishes
Light-driven materials rely on reflective surfaces and bright finishes to maximize perceived space and energy efficiency in a wet room. You’ll choose reflectivity ratings of at least 80% for walls and shower enclosures to halve lighting needs during daytime use.
Opt for glossy or semi-gloss tiles in pale tones, ensuring uniform reflections that reduce shadowed corners. Use bright finishes on fixtures—chromed, brushed nickel, or polished chrome—because they bounce light without increasing heat.
Install recessed lighting with dimmable controls to adjust ambience while preserving reflectivity. Position mirrors and glass partitions to double the apparent area, maintaining moisture resistance and easy cleaning.
Measure cost per square meter and expected energy savings over a year to validate ROI. Prioritize durability, maintenance cycles, and consistent butcher-block-free zones.
Warm-Toned Woods in Wet Areas
You’ll evaluate warm wood grains for wet areas, prioritizing durability and moisture resistance to maintain long-term warmth.
Consider how wet-area warmth plays with tone by selecting timbers and finishes that show color stability and low water absorption. Then measure performance against your humidity and splash zones.
Use toned timber accents as deliberate focal points, balancing practicality with a cohesive, inviting feel.
Warm Wood Grains
Warm-toned woods bring natural warmth and texture to wet rooms, but their success hinges on selecting durable species and treating surfaces for moisture exposure. You’ll prioritize rot resistance, decay resistance, and low water absorption, choosing teak, thermally modified oak, or sapele for durability.
Apply waterproof sealants with a dedicated marine-grade finish used per manufacturer guidelines, reapplying every 1–2 years based on humidity cycles. Prefinished panels simplify maintenance, while engineered boards reduce warping risk.
For installation, maintain consistent panel thickness and use moisture-rated carriers to prevent flex. Pair warm grains with natural textures like matte stone or ceramic tiles to balance scale and sheen. This approach creates cozy atmospheres without compromising longevity.
Regular humidity monitoring and ventilation optimization guarantee lasting performance in daily use.
Wet Area Warmth
Wet Area Warmth: to maximize comfort and resilience, select warm-toned woods that combine visual coziness with proven moisture resistance, such as teak, thermally modified oak, or sapele, and treat all surfaces with marine-grade finishes designed for bathroom cycles.
You’ll want boards with tight grain, stabilized moisture content, and proven dimensional stability under humidity swings. Install solid wood where it won’t encounter direct spray, using waterproofed substrates and concealed fasteners to minimize gaps.
Pair warm timber with underfloor heating for consistent warmth, ensuring electronic controls are rated for bathrooms. Include towel warmers for rapid drying and to reduce fogging on glass.
Regularly reapply seals on edges and joints every 2–3 years, and monitor humidity to prevent warping. Optimize airflow with a balanced vent to sustain warmth without condensation.
Toned Timber Accents
Leaning on the warmth of well-chosen timber can elevate a wet room without sacrificing moisture performance. In this subtopic, you’ll balance aesthetics with durability by selecting timber accents that tolerate humidity.
Choose species known for stability, such as sapele or teak, and pair with low-porosity finishes to slow moisture ingress. Opt for vertical grain patterns to minimize surface swelling and ensure consistent color over time.
Use warm woods for vanities, shelves, and trim, keeping them recessed from direct water jets where possible. Combine timber accents with ceramic or porcelain tiles in cool tones to maintain contrast.
Seal transitions between wood and wet zones with profiles that prevent water pooling. Regularly inspect sealants; reapply every 1–2 years to sustain performance and visual appeal.
Slip-Resistant Textures for Safety and Style
You’ll evaluate slip-resistant textures by quantifying grip, wear, and maintenance needs to meet both safety and style goals. Start with measurable benchmarks—PTV tests for traction, slip resistance ratings, and cleanability—to inform material choices.
Consider how texture depth, tile grout patterns, and surface finishes pair with your wet-room aesthetic while staying practical and easy to care for.
Slip-Resistant Textures
Slip-resistant textures are essential for safety and style in a wet room, providing reliable grip without sacrificing aesthetics. You should select surface textures that balance traction with clean lines, prioritizing measurable performance over impression alone.
Texture depth, measured by slip resistance ratings, guides you toward options that meet or exceed local codes for wet environments. In practice, textured tiles offer predictable underfoot feedback, especially when integrated with directional patterns that channel water flow.
Anti slip coatings add a layer of protection on smooth substrates without altering the base design. Combine these textures with consistent grout lines and a slip-safe slope to maintain performance over time.
Regular maintenance confirms continued effectiveness, ensuring ongoing safety without compromising contemporary styling.
Safety-Driven Aesthetics
In wet rooms, safety and style go hand in hand, so choose slip-resistant textures that deliver measurable performance without compromising design. You’ll evaluate tread depth, texture grade, and surface coefficients to ensure true slip resistance under wet conditions.
Prioritize textures that hide drizzle while providing reliable grip, such as micro-etched porcelains or treated stone with consistent roughness ratings. Pair these with durable, non-slip grouts and seamless transitions to reduce trip hazards.
For aesthetics, balance function with luxury fixtures that resist wear, and align with ambient lighting to highlight texture without glare. Track performance metrics over time, noting cleaning impact and slip-resistance drop.
This data informs future selections, keeps safety front‑of‑mind, and preserves a refined, practical bathroom experience.
Floating Vanities and Minimal Hardware
Floating vanities create a clean, uncluttered look while maximizing floor space, which is essential in compact wet rooms. You’ll appreciate how the wall-mount frees the footprint, simplifies cleaning, and enhances perceived room size.
Choose a depth around 18 inches to balance storage and legibility in tight layouts. Prioritize floating units with integrated drawers or soft-close doors to minimize visual heft while preserving function.
For hardware, select minimal profiles and consistent hardware finishes across the space to create cohesion; matte nickel or brushed brass are strong, durable options.
Guarantee vanity lighting is task-focused, with dimmable fixtures that reduce glare on mirrors and wet surfaces.
Measure under-sink clearance for accessibility, and confirm plumb lines align with the vanity for a seamless, high-precision installation.
Monochrome Palettes With Natural Accents
Monochrome palettes provide a clean, timeless base for wet rooms, while natural accents soften the look and add organic texture. You’ll balance matte blacks, cool grays, and crisp whites with warm woods, stone, or rattan for subtle contrast. Implement a restrained color scheme and let texture drive interest.
Measure twice, choose lighting fixtures that emphasize depth without glare, and keep finishes satin or matte to reduce shine on wet surfaces. Use natural materials as tactile focal points, such as a stone bench or timber accents, to break monotony while remaining cohesive.
Plan plumbing configurations for symmetry and ease of maintenance, ensuring accessible connections behind panels. Prioritize diffuse light layers, anti-slip surfaces, and grout with low maintenance to sustain the monochrome base.
Niche Storage and Recessed Shelving Ideas
In wet rooms, prioritize niche storage tactics that keep essentials within easy reach without crowding the space.
Consider recessed shelving ideas that align with showering zones and tile lines for a cohesive, water-safe finish.
Measure for accessibility, guarantee drainage-compatible materials, and test loading to confirm the setup meets daily use needs.
Niche Storage Tactics
Niche storage and recessed shelving are practical, space-saving solutions that keep wet rooms organized without sacrificing style. You’ll maximize every square inch by selecting wall-anchored units that tolerate humidity and simplify cleaning routines.
Measure alcove depths before install; aim for 2–3 inches of clearance behind stored items to prevent moisture buildup. Group similar items together: towel storage near the shower, cleaning accessories within easy reach of the vanity, and spare towels in a lower niche to free floor space.
Use adjustable compartments to accommodate bulkier bottles and seasonal gear. Seal edges with silicone to prevent leaks, and choose matte, non-slip finishes for safety. Label bins for fast retrieval, and rotate contents seasonally to maintain order and hygiene.
Recessed Shelving Ideas
Recessed shelving offers a quick win for wet rooms, turning awkward alcoves into organized storage that stays out of the way and out of sight. You’ll gain measurable benefits by planning precise depths, ensuring waterproof seals, and detailing load limits for each shelf.
Use recessed units to create targeted zones: body wash, towels, and cleaning supplies all within arm’s reach while keeping floor space open. Opt for materials and finishes with proven moisture resistance, and align joints to minimize grout failure.
This approach delivers minimalist storage that reduces clutter and visual busyness. Consider hidden compartments for value-adding organization, such as shallow pull-outs for small items and labeled sections to speed retrieval.
Implement standardized dimensions to simplify installation and maintenance across the wet room.
Rain Showerheads and Wall-Mounted Jets
Rain showerheads and wall-mounted jets can transform a wet room into a spa-like experience by delivering broad, evenly distributed spray patterns and targeted body jets. You’ll optimize layout to guarantee balanced coverage, using a minimum of two showerheads for uniform flow and one or two body jets positioned at shoulder and hip heights.
Measure water flow with flow restrictors and calibrated thermostatic valves to maintain consistent temperature across all outlets. Focus on steam technology compatibility to boost perceived warmth without extra water use, and verify drainage capacity supports simultaneous outlets.
Prioritize water conservation by selecting low-flow heads and programmable timers. Install wall-mounted jets at ergonomic angles, allowing full-body contact without crowding. Track performance with measurable metrics: spray reach, flow rate, and temperature stability.
Integrated Wet Zones With Dry Zones
Integrated wet zones with dry zones streamline movement and maintenance while preserving comfort. You design zones that segregate splashes from drying areas, using clear sightlines and measured distances to optimize flow.
In practice, plan a wet core—shower, tub, or spa—and position dry functions—toilets, vanities, storage—out of direct splash zones. Use partial barriers, like low-height walls or glass partitions, to retain openness without trapping humidity. Incorporate privacy screens where edge shifts occur, maintaining discretion while letting light travel.
Lighting integrations should be recessed and zoned, with dimmable scenarios for morning routines or unwinding evenings. Install non-slip floor textures and grippy transition areas between zones. Make certain ventilation targets humide pockets and easy maintenance access, delivering predictable performance and durable aesthetics.
Waterproof Flooring That’s Durable and Quiet
A durable, waterproof flooring choice is essential in wet rooms, where moisture and foot traffic collide. You’ll want a surface that resists water, cushions impact, and minimizes sound transmission. Look for materials with tested slip resistance and low noise ratings, ideally under 20 dB impact.
Composite vinyl planks or porcelain tiles with integral grout systems offer consistent waterproof performance and easy maintenance. If you prioritize quiet underfoot feel, choose flooring with built-in acoustic underlayment or added mass to dampen footsteps.
For compatibility with radiant systems, ensure underfloor heating is compatible and installed with proper isolation to prevent thermal bridging. Consider coating options like waterproof paint only where approved by the manufacturer, strictly over suitable substrates.
Document tested load ratings and warranty terms for durable, quiet performance.
Real-World Layouts: Case Studies and Inspirations
Case studies reveal how real-world wet rooms balance function and aesthetics, translating core principles into usable layouts. You’ll see compact modules that maximize drainage efficiency, with linear drains and step-free thresholds guiding traffic flow.
In practice, you measure space by dedicated zones: shower, dry bench, and towel storage, each tuned for accessibility and cleanup ease. A real room uses luxury fixtures to elevate perception without wasted steps; fixtures are mounted at consistent heights, USB charging nearby, and controls placed for single-handed use.
Eco-friendly materials matter: low-VOC tiles, recycled glass accents, and sealed timber look-alikes withstand moisture while reducing embodied energy. These layouts demonstrate scalable patterns—linear showers for small footprints, corner nooks for larger baths, and configurable panels that adapt to family needs, guests, and future tech upgrades.
Frequently Asked Questions
How Do I Prevent Water Splash Beyond a Wet Zone?
To prevent water splash beyond the wet zone, install splash guards and apply waterproof paint on surrounding walls; guarantee seals are tight, test with a spray bottle, and maintain proper slope and drainage for measurable, practical protection.
What Lighting Works Best for Humid Bathroom Areas?
You should choose recessed, moisture-rated LED fixtures with damp-rated IP protection and seal every junction. For humidity control, install dimmable, low-heat lighting and ventilation. Use moisture resistant fixtures, plan airflow, and measure lumen needs for comfort.
Can Underfloor Heating Be Integrated With Waterproof Flooring?
“Yes, you can.” You’ll find heating compatibility with waterproof flooring when you choose the right underfloor system and moisture-rated products. You’ll assess flooring installation details, add a vapor barrier, and verify insulation, controls, and professional wiring. Measurable, practical outcomes.
Are There Eco-Friendly Waterproofing Options for Walls?
Yes, you can choose eco-friendly waterproofing options. Use eco friendly membranes and recycled waterproofing blends, ensuring installers verify compatibility with your walls. Measure performance with leakage tests, warranty coverages, and material thickness to confirm long-term durability.
How Do I Maintain Glass Shower Enclosures Efficiently?
Use a daily shower cleaning routine and apply glass treatment after each wipe-down; this reduces spots, speeds drying, and extends enclosure life. Maintain glass by inspecting seals monthly and using a squeegee or microfiber cloth.
Conclusion
As you implement these ideas, you’ll feel the space breathe with fluid progressions and practical clarity. Picture a glass sink, warm woods, and rain gleam across waterproof floors—each element measured for safety and durability. You optimize layout, ventilation, and lighting to keep moisture in check while maximizing flow. A single, cohesive system emerges—visible openness with discreet storage. This is design that works: resilient, luminous, and precisely tuned to modern living.