You’ll start by evaluating your current driveway and nearby landscaping for safety and harmony, then pick durable, stylish materials like textured concrete or permeable pavers that suit your home’s architectural style. Plan drainage, grading, and lighting upfront, and pair them with purposeful landscaping to create a calm, inviting approach. A cohesive design saves time and money later, but you’ll want a clear sequence and measured steps to keep the project on track. Let’s outline the path forward.
Key Takeaways
- Assess and address surface condition, drainage, and safety features to enhance curb appeal and accessibility from approach points.
- Choose durable, aesthetically aligned materials with textures and patterns that complement the home’s architecture.
- Plan for proper grading, permeable options, edge restraints, and integrated drainage to manage water efficiently.
- Develop a clear, phased budget and timeline, detailing milestones, contingencies, and documentation for progress.
- Integrate cohesive landscaping, lighting, and signage with the driveway to create inviting, secure, and visually balanced entry.
Assess Your Driveway’s Curb Appeal: Quick Diagnostics
Start with a quick, objective scan of your driveway’s condition. You’ll note surface cracks, stains, and weed intrusion, plus edges where grass encroaches.
Check drainage: puddles signal slope issues, while standing water indicates drainage gaps.
Assess boundaries—curbs, fencing, and visible signs of wear influence curb appeal and security.
Inspect lighting, cameras, and gate mechanisms for minor faults that undermine driveway security.
Evaluate garden embellishments near the pavement: overgrowth, loose ornaments, or pressed-in soil can trap moisture and create trip hazards.
Document any efflorescence or oil residues, then prioritize repairs by impact on safety and aesthetics.
Compile a simple action list: fix cracks, clean stains, trim adjacent vegetation, and upgrade lighting if needed.
Your results improve both function and visual impact.
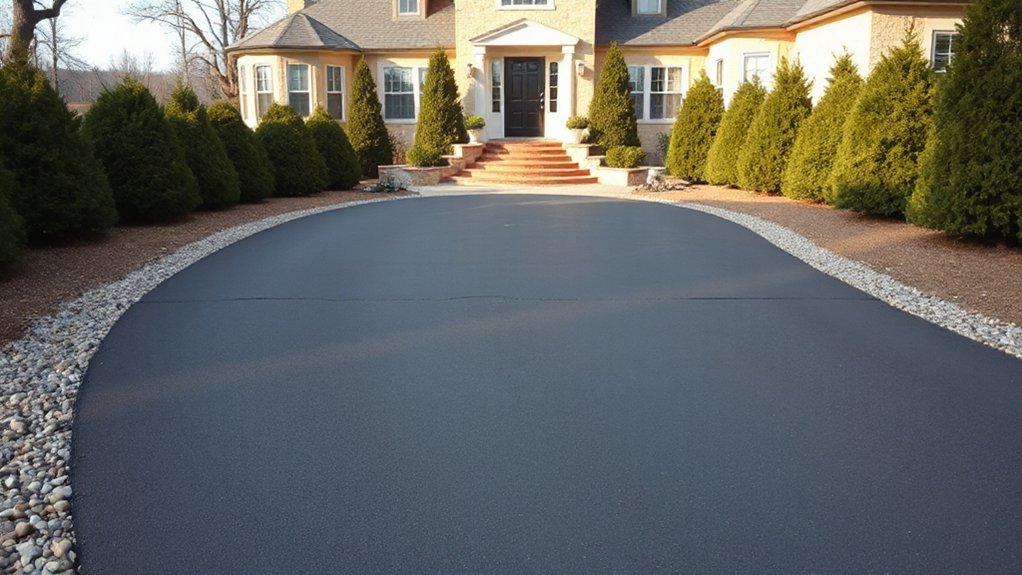
Choose a Surface: Materials for Style and Durability
When you pick a surface, you’ll weigh material durability against aesthetics and texture to match your home style. Consider how maintenance affects longevity, from cleaning needs to resistance to cracking in your climate.
Align your choice with performance goals—durability, look, and low upkeep—to guarantee lasting kerb appeal.
Material Durability Choices
Choosing the right surface for durability and style starts with understanding how materials resist wear, weather, and heavy traffic. You’ll compare load-bearing capacity, crack resistance, and long-term performance under freeze-thaw conditions, photographing potential failure modes before committing.
Concrete pavers offer predictable strength, while asphalt delivers smooth maintenance advantages; porous options reduce runoff and improve drainage. For longevity, prioritize materials with low water absorption and high flexural strength, then assess maintenance needs and lifecycle costs.
Factor in material sustainability to minimize environmental impact without compromising resilience, and weigh installation techniques that ensure proper compaction, joint spacing, and edge support. Document warranty terms and expected service intervals, so you can schedule timely resealing or resecuring.
Your goal is a durable, low-maintenance surface that holds value and withstands seasonal stress.
Aesthetics and Texture
Aesthetic choices shape curb appeal as much as durability, so pick a surface that blends style with performance. You’ll evaluate texture, color, and grain to assure the surface reads as a cohesive element with your home. Consider exposed aggregate for subtle variation or smooth concrete for a modern, low-maintenance look.
Surface scale matters: larger panels reduce joints, smaller gaps heighten texture. For durability, verify load rating and freeze–thaw tolerance, then test slip resistance in wet conditions.
Use contrasting driveway borders to anchor the entry and create crisp lines that guide traffic. Integrate garden accents to soften edges without compromising firmness.
Choose pavers or slabs with consistent edging to minimize weed growth and maintenance. Finalize your choice by confirming installation flushness, slope, and a uniform finish for lasting appeal.
Maintenance and Longevity
Choose surfaces that resist cracking, fading, and weed intrusion, then plan for drainage to prevent pooling. Garden pathways should integrate with driveways using cohesive color and texture to reduce maintenance and extend life.
For longevity, install proper edging and joint systems that deter movement and staining. Consider outdoor furniture placement to avoid constant abrasion on adjacent surfaces.
Regular sealing, cleaning, and timely repairs curb deterioration and preserve curb appeal over years.
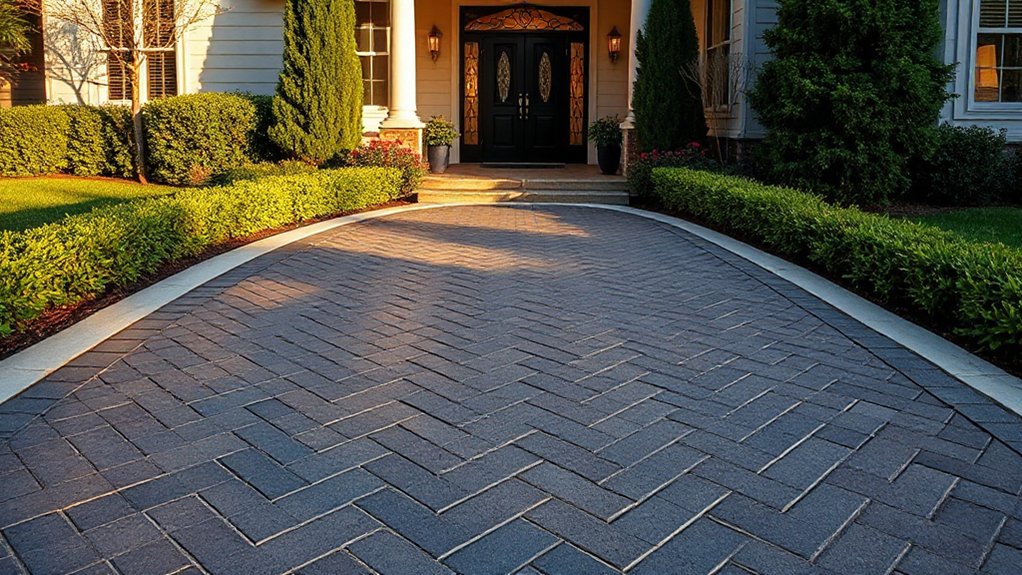
Color, Texture, and Pattern: Elevate the Look
Color, texture, and pattern play essential roles in elevating curb appeal: choose materials and configurations that contrast and complement your home’s architecture, then test combinations before committing.
You’ll select color schemes that enhance architectural accents and lighting, balancing darks with neutrals to avoid harsh contrasts.
Texture adds tactile interest; pair smooth pavers with textured aggregates or chiseled surfaces for depth.
Pattern designs should guide the eye without overwhelming the façade—use repeating grids, Herringbone, or run courses aligned to entry points.
Evaluate grout or seam lines as part of the visual rhythm, ensuring consistent joints.
Preview samples in natural light at different times of day, then finalize the layout and material mix.
Precision here yields cohesive, durable curb appeal that anchors your home’s first impression.
Drainage and Grading: Prevent Water and Damage
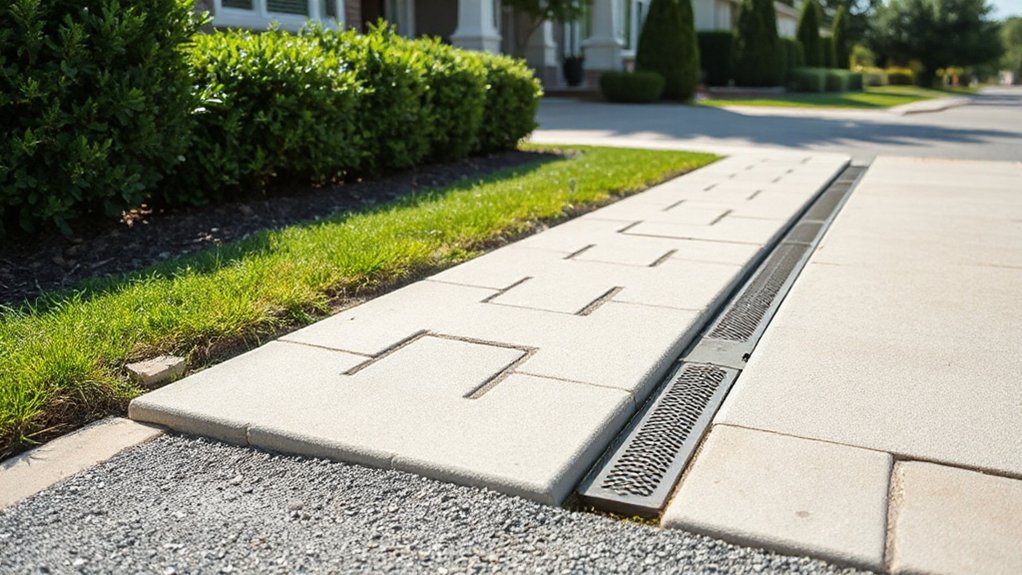
After selecting materials and patterns, you must guarantee the driveway drains properly to protect your home. Proper grading guides water away from foundations, while permeable solutions reduce runoff and soil erosion.
Assess slope: aim 1-2% away from structures, and test with a simple bucket flow to confirm drainage paths. Use permeable pavers or open-graded aggregates where appropriate to form efficient stormwater management systems.
Install edge restraints to prevent washout and ensure consistent flow. Schedule regular maintenance to remove debris and inspect joints for settlement.
- Ensure slope directs water away from doors and walls
- Choose permeable solutions for subbase and surface layering
- Plan stormwater management with collection or infiltration zones
- Inspect and clean drainage channels and outlets seasonally
Lighting and Landscaping: Tie It All Together
By coordinating lighting harmony with landscape integration, you create a cohesive curb appeal that guides the eye and enhances safety.
Plan fixtures that emphasize pathways and plantings, using consistent color temperature and scale to unify hardscape and softscape elements.
Focus on subtle, low-maintenance choices that deliver lasting nighttime drama and year-round structure.
Lighting Harmony
Lighting isn’t an afterthought in a curb-appealing driveway; it’s the bridge that ties landscape textures, architectural details, and pathways into a cohesive, welcoming nightscape.
- Use solar pathways to guide movement softly, avoiding harsh glare.
- Position ambient fixtures at entry points for immediate perimeter definition.
- Align lights with architectural lines to emphasize form, not clutter.
- Dim zones strategically to create contrast and depth without zones of shadow.
You’ll achieve harmony by layering: structural accents, low-level ground lighting, and utilitarian task lighting that’s invisible until needed.
Check color temperature (2700–3000K) for warmth that flatters stone, brick, and foliage.
Calibrate brightness to scale—smaller yards demand subtler illumination.
Test paths from multiple angles, ensuring even glow without hot spots.
Replace dated fixtures with compact, glare-minimizing designs.
Regularly clean lenses and adjust covers to maintain consistent, welcoming illumination all year.
Landscape Integration
In landscape integration, lighting should reinforce masonry joints, plant textures, and hardscape layouts, so the driveway reads as a cohesive, navigable space from curb to door. You’ll align luminance levels with material colors to guide gaze along garden pathways, avoiding glare at *progressions*.
Layer lighting of steps, edges, and focal plants to reveal depth without clutter. Position fixtures low and shielded to minimize sky glow while highlighting textures, joints, and surface angles. Integrate landscape elements, so outdoor furniture remains legible, inviting, and unobtrusive after dark.
Choose durable, weather-ready pieces that complement the palette and scale of the driveway. Verify sightlines from key approach points, ensuring safety, accessibility, and year-round aesthetics. The result is a unified, functional entrance that welcomes visitors with intentional detail.
Budget and Step-by-Step Implementation Plan
Before you start, map a clear budget and a practical timeline to prevent scope creep and guarantee steady progress. You’ll outline costs, contingencies, and milestones, then lock them in with approvals.
Next, choose a scalable plan: start with essential pavement, layer details, and finish elements that deliver the look you want. Track progress daily, adjusting only when inputs change.
- pricing options: compare upfront vs. phased payments, warranties, and permit costs
- material sourcing: verify supplier reliability, lead times, and compatible aggregate
- step-by-step milestones: excavation, base, paving, edging, and finish touches
- risk controls: weather buffers, soil tests, and quality inspections
Document decisions, keep receipts, and revisit the plan weekly to stay precise and on schedule.
Frequently Asked Questions
How Long Does a Driveway Replacement Typically Take From Start to Finish?
A typical driveway replacement takes about 3 to 5 days, depending on size, materials, and weather. You’ll start with demolition, grading, and sub-base work, then lay the surface and cure.
If you’re incorporating landscaping enhancements or drainage tweaks, add 1–2 days.
Factor in inspections and curing time for asphalt or concrete. You’ll compare driveway design options early to avoid delays, ensuring timing aligns with permits and crew availability.
Plan for contingencies to stay on schedule.
What Permits or Approvals Are Needed Before Installation?
Permit requirements vary, but you’ll usually need local approvals before installation. You should check with your city or county planning department for setback, drainage, and utility easement rules.
The approval process typically involves submitting site plans, driveway dimensions, and permit applications, plus any needed HOA consent.
Expect inspections at key milestones. You’ll obtain permits, schedule review timelines, and address any conditions.
Keep documentation handy to avoid delays and guarantee compliant, smooth execution of your project.
Can I Install a Driveway Myself or Should I Hire a Pro?
You can do it yourself, but consider professional benefits before you commit. DIY tips help you save money and tailor the drive to your site.
Yet pros deliver precise grading, drainage, and code-compliant installation that reduces future repairs. If you’re confident with heavy lifting, formwork, and material handling, you’ll gain control and speed.
Otherwise, hire a pro for reliability, warranty coverage, and polished results that optimize overall curb appeal and long-term durability.
Which Maintenance Tasks Extend a Driveway’s Lifespan the Most?
You should prioritize sealing cracks, proper drainage, and regular cleaning, since those tasks extend a driveway’s lifespan the most.
You’ll also benefit from applying sealant every 2–3 years and addressing erosion promptly.
Use landscape lighting to reduce wear at edges, and keep driveway edging intact to guide water away.
Maintain joints, remove weeds, and schedule professional resurfacing when wear accelerates.
Consistent upkeep yields the strongest, longest-lasting results.
How Do Costs Vary by Material and Region?
Material options and regional costs vary widely: concrete remains cheapest in many regions, asphalt mid-range, and pavers or permeable options often higher upfront but longer life.
Regional costs reflect labor, permits, and material availability, so expect significant swings by state or country. You’ll see price per square meter differ as much as 20–60% between regions.
Factor installation complexity, drainage, and style. Compare Material options against local Regional costs to optimize value and long-term durability.
Conclusion
A new driveway can soften a home’s silhouette yet sharpen its first impression. You’ll trade worn edges for crisp lines, and neglect for poise. Be mindful of contrast: bold color against neutral siding, textured surfacing beside smooth paths. Juxtapose permanence with flexibility—durable pavers that still invite touch and foot traffic. While calculations guard drainage, curb appeal invites delight. In balance, you’ll gain safety and style, function and beauty, a practical upgrade that earns daily compliments.