You expect the charm of a 1990s layout, yet you sense its hidden fragility beneath polished surfaces. Start by prioritizing safety and structure, then upgrade electricals and insulation in tandem with efficient finishes that won’t age badly. You’ll gain usable, modern spaces that adapt over time, but the path requires careful sequencing and cost control—so you’ll want to map out the steps and trade-offs before you commit to a plan.
Key Takeaways
- Prioritize structural safety and comfort upgrades, focusing on seismic/water risks, essential systems, and breathable retrofit plans with clear phasing.
- Modernize electricals with code-compliant panels, AFCI/GFCI protection, water/LED-friendly loads, and thorough circuit labeling.
- Improve insulation and air sealing first, using blower-door or IR surveys to target thermal bridges and leaks for lasting efficiency.
- Update interior layouts and finishes for flexible living, including multi-use spaces, flow-efficient kitchens, and low-maintenance surfaces.
- Enhance exterior curb appeal with native plants, durable hardscapes, energy-efficient lighting, and cohesive exterior aesthetics.
How to Prioritise Modernising a 1990s Home
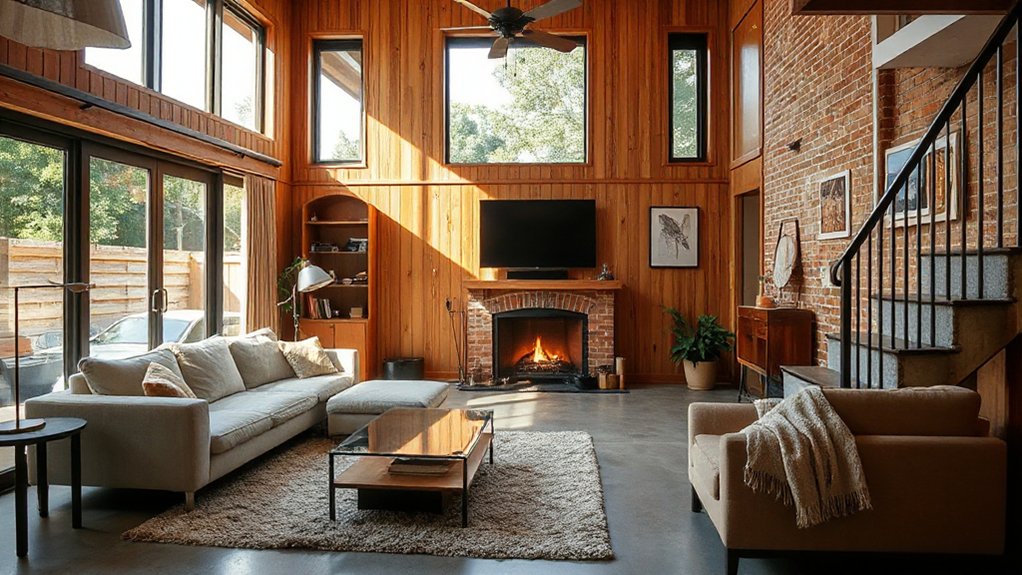
To effectively prioritise modernising a 1990s home, start with a clear assessment of structure, energy efficiency, and layout pain points that impact daily living. You evaluate load paths, moisture risk, and potential retrofit routes, mapping critical fixes against budget, disruption, and timeline.
Historical preservation informs decisions where decorative surfaces or original framing define value; you balance preservation with code-compliant upgrades to avoid future rework. Structural reinforcement takes priority where seismic, wind, or settlement indicators exist, identifying necessary joist, wall, or beam enhancements before cosmetic changes.
You sequence interventions by impact: safety-first, then essential systems, followed by usable space improvements. Document findings with measurements, photos, and references, ensuring all changes maintain future adaptability and align with trend-aware, performance-driven goals.
Improve Warmth and Efficiency With Targeted Insulation
Improving warmth and efficiency starts with targeted insulation that plugs the biggest heat leaks without overloading the budget. You’ll address roof, walls, floors, and service penetrations with a measured approach, prioritising performance over surplus thickness.
Assess thermal bridging and airflow paths using a blower door or infrared survey to identify high-impact fixes. Choose materials with proven R-values and low environmental impact, balancing cost, vapor control, and long-term durability.
Seal gaps with reputable tapes, foams, and acoustical sealants before adding insulation where feasible. Guarantee ventilation remains adequate to preserve indoor air quality, avoiding condensation risk.
Expect enhanced thermal comfort and measurable energy savings, especially in poorly insulated zones. Document improvements for future retrofits and resale value.
Create Flexible Living Spaces for Modern Life
You can design flexible living zones that adapt to daily rhythms, toggling between focused work, family time, and guests with smart zoning and modular furniture.
Multi-use spaces rely on seamless furniture, hidden storage, and scalable layouts that reconfigure without disruption.
This approach prioritizes flow, acoustics, and daylight balance to support varying family needs while preserving style and efficiency.
Flexible Living Zones
Prioritize durable, adaptable furniture that nests, stacks, or folds, preserving flow while enabling segues between activity and relaxation. Use materials and finishes that read cohesively across zones, ensuring sightlines remain clear for safety and supervision.
Integrate embedded tech for lighting scenes, climate control, and AV control within reach of each zone. Reserve flexible surfaces for evolving needs: a wall desk, a foldaway dining extension, and a low-profile media nook.
Maintain scalable zoning without sacrificing acoustics or warmth, aligning with contemporary living metrics.
Multi-Use Spaces
Prioritize modular furniture, hidden storage, and scalable lighting to support work, play, and dining without reconfiguration.
Open plan layouts drive flexible circulation, but define intent with subtle boundaries—area rugs, built-ins, or adjustable screens—so you can concentrate or blend activities as needed.
Material palettes should stay cohesive across functions to reduce visual clutter.
Consider Outdoor retreats as extensions of living areas: weatherproof decks, operable glass, and durable finishes create year‑round flow.
Technology should enable quick scene changes, with centralized controls for climate, lighting, and audio.
Maintain clear egress, safety, and accessibility to sustain long-term adaptability.
Update the Kitchen: Timeless Look, Modern Helpers
To give a kitchen a timeless look while adding practical shortcuts, start with a cohesive palette of neutral base tones accented by restrained, warm woods or metallics.
You’ll prioritize a streamlined kitchen layout that minimizes steps between zones, enhancing workflow without sacrificing style. Choose cabinetry with flat panels or shaker profiles in light-to-medium finishes, paired with complementary countertops that resist staining.
For appliance selection, opt for integrated suites or panel-front models that blend with cabinetry, ensuring a cohesive silhouette. Install task lighting and under-cabinet LEDs for precise visibility, while ceiling fixtures stay unobtrusive.
Use durable, low-maintenance materials and easy-clean surfaces to support daily family use. Finally, maintain a timeless look with restrained hardware and a single accent color for balance.
Refresh the Bathroom Without Reworking Pipes
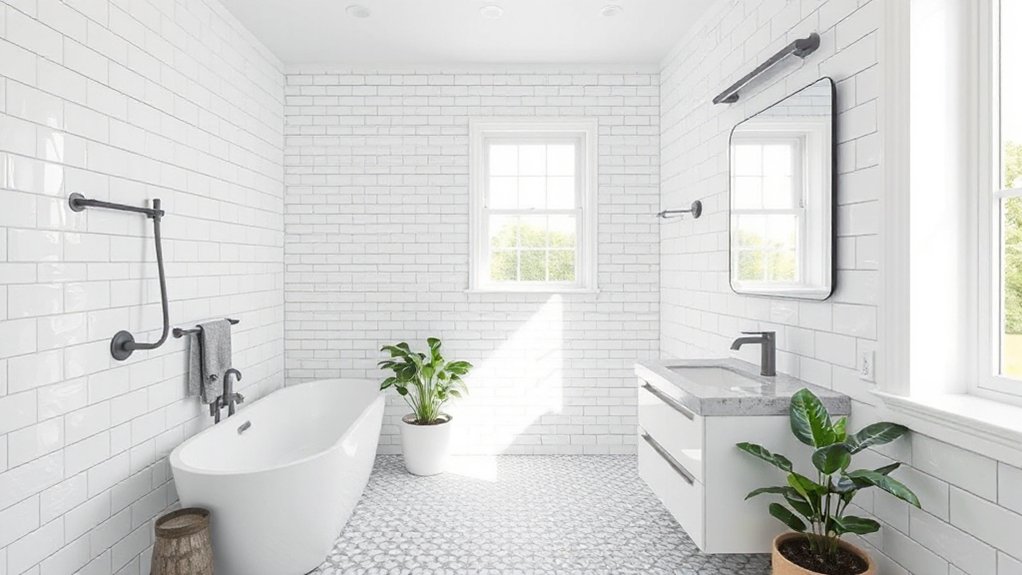
If you can’t reroute pipes, you can still refresh the bathroom by swapping key fixtures and surfaces for a high-impact, low-disruption update. Choose a cohesive kit of bathroom fixtures—compact vanity, modern faucet, and a streamlined showerhead—to quickly elevate proportions and perceived space.
Replace aging tiles with large-format, neutral tones or implement a water-resistant panel system for fast, tidy installation. Prioritize finishes that resist humidity and wipe clean easily, such as matte ceramic, vitrified porcelain, or glass.
For plumbing rerouting limitations, install a concealed cistern or wall-hung components where feasible to reduce visible clutter. Update lighting with task and ambient layers to refine contrast and color rendition.
Seal joints with epoxy or silicone, and maintain proper venting to sustain performance and longevity.
Choose Timeless Interior Finishes That Last
Timeless interior finishes balance longevity with subtle, enduring appeal, so you can avoid frequent refresh cycles. You choose materials and treatments that resist wear while maintaining a refined look.
Prioritize low-maintenance surfaces like matte quartz, engineered timber, and neutral stone; these resist staining, scratches, and fading while retaining formal clarity. Pair classic textures—grain patterns, linen-like textiles, and brushed metals—with subdued palettes to reduce visual noise as trends shift.
Opt for durable wall finishes such as washable paints in pristine neutrals or ceramic wall tiles with consistent grout joints. For textiles, select woven fabrics with tight weaves and high rub counts, ensuring upholstery longevity.
Incorporate vintage charm sparingly, allowing modern construction tolerances to preserve proportion without dated overkill.
Upgrade Lighting and Electrical for Today’s Living
Smart lighting upgrades and safe electrical modernisation set the baseline for today’s living spaces, prioritising energy efficiency, control, and reliability. You’ll evaluate dimming capabilities, scene automation, and load management.
While doing so, ensure code-compliant wiring and future-proof components. This discussion starts with practical, scalable steps that balance comfort, safety, and long-term flexibility.
Smart Lighting Upgrades
Choose central hubs or edge devices that support common standards, enabling seamless integration with existing switches and dimmers. Automation systems should prioritize scenes for activities—work, relaxation, entertainment—and adapt to daylight via ambient sensing.
Wiring plans should accommodate future expansion, including multi-zone control and load balancing for balanced power draw. Prioritize reliability with quality drivers, proper cable management, and surge protection.
Documentation of device IDs, firmware versions, and network credentials guarantees straightforward maintenance and security updates. This approach delivers consistent, scalable illumination aligned with contemporary energy and aesthetic expectations.
Safe Electrical Modernisation
Upgrading your home safely means more than swapping in newer fixtures; it requires a deliberate, code-compliant approach that prioritizes reliability, protection, and future adaptability.
In safe electrical modernisation, plan around a modern load profile, upgraded panels, and AFCI/GFCI protection where required. Prioritize circuit safety by mapping circuits, labeling subpanels, and segregating high-demand loads from lighting.
When upgrading, choose devices rated for continuous duty and compatibility with LED loads to minimize heat and nuisance trips. Install outlet upgrades to meet current spacing, weatherproofing where needed, and child-safety considerations.
Use arc-fault detection and proper grounding to reduce shock risk. Commission performance tests, verify compliance, and document changes for future upgrades and resale value.
Maintain clear, professional communication with a licensed electrician.
Smart Storage Solutions for Small 1990s Layouts
Even in compact 1990s layouts, you can reclaim floor space by rethinking storage around workflow and zones, not just adding cabinets. You’ll implement vertical and underutilized gaps with modular, depth-optimized units that align with daily routines.
Prioritize built-in benches, pull-out organizers, and hidden compartments that preserve walkable areas while sustaining access to essentials.
Use zones to dictate storage logic: near kitchens for utensils, beside entry for outerwear, and adjacent to living zones for media and games.
Choose stackable modules and doorless bays to reduce bulk.
Emphasize Creative storage through multi-use furniture, like ottomans with hollow cores, and desks doubling as filing hubs.
Aim for Space maximization via consistent hardware, soft-close mechanisms, and standardized dimensions to streamline future reconfigurations.
Exterior Comfort and Curb Appeal Improvements
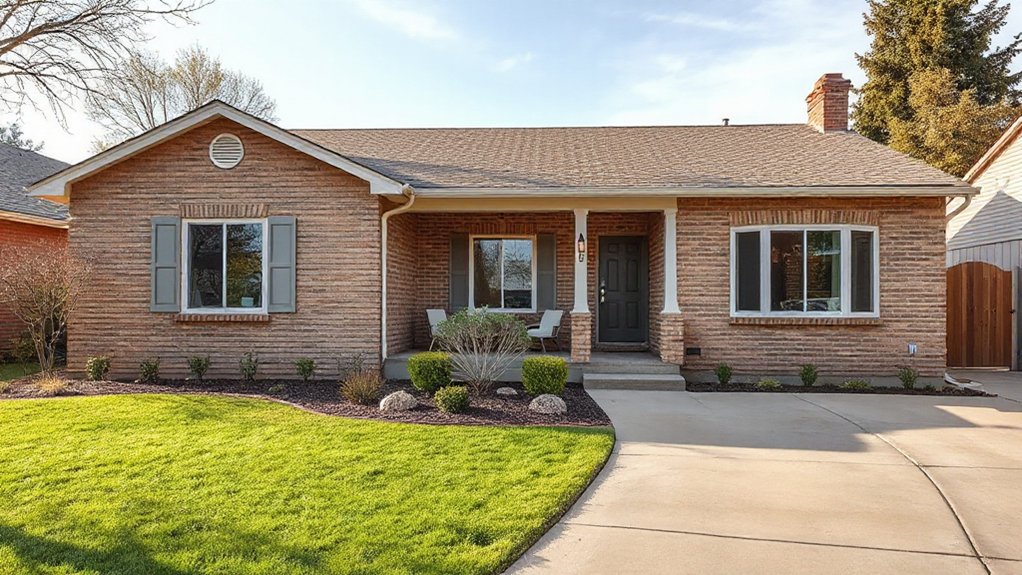
Begin with garden landscaping choices that blend native species, drought tolerance, and seasonal color, reducing irrigation needs while preserving curb presence.
Select hardscape textures and widths that improve integration with interior flow, ensuring slip resistance and accessibility for all family members.
Exterior lighting should emphasize safety, wayfinding, and architectural features, using energy-efficient fixtures and warm color temperatures to avoid harsh contrasts.
Avoid over-saturation; curate focal points such as entry framing and specimen plants.
Tie planting schemes to house lines, materials, and roofline to sustain a cohesive, modern look year-round.
Plan Your Budget and Phasing for a Practical Modernisation
With clear goals from your exterior improvements in mind, you’ll map a practical budget and phased plan that aligns cost, disruption, and long-term value.
Begin with a baseline cost model using current market prices for materials, labour, and permit fees, then identify acceptable contingencies (10–15%).
Prioritise projects by impact on energy efficiency, structural safety, and daily living comfort, plotting them into a logical sequence that minimizes repeated disruption.
Use a phased renovation approach to spread costs and simplify logistics, staging trades to avoid overlaps and scheduling bottlenecks.
Create a transparent tracking method: itemised line entries, responsible parties, and milestone payments.
Regularly reforecast against actuals, adjusting scope or timing as prices shift.
Document decisions to preserve value and guide future upgrades.
Frequently Asked Questions
How Long Does a Typical 1990S Home Modernisation Take?
A typical 1990s home modernisation takes about 2 to 6 weeks, depending on scope and trades availability. You’ll schedule planning, obtain approvals, then install interior lighting upgrades and flooring options in phases.
You might stagger electrical work with ceiling-to-floor finishes to minimize disruption. Expect temporary moves, dust control, and inspections.
If you batch tasks like plaster, cabinetry, and lighting, you’ll shorten downtime. Track milestones, budget buffers, and coordinate with licensed professionals for precise, compliant results.
What Are the Hidden Costs of Updating a 1990S House?
Hidden costs pop up if you don’t plan, so you’ll want to budget for contingencies before you start. You’ll face permits, inspections, and project-management fees that quietly stretch the total.
Budget planning should include overruns, material price volatility, and disposal costs.
Design considerations influence waste, scope, and timing. Expect downtime and temporary accommodations.
Can I Modernise Without Structural Changes or Extensions?
Yes, you can modernise without structural changes or extensions. Focus on interior decor and furniture updates to refresh the look.
Prioritize open layouts by reconfiguring furniture, add neutral palettes with bold accents, and upgrade lighting to LEDs and layered sources.
Choose streamlined, built-in storage and concealed cable management.
Use period-appropriate finishes mixed with contemporary textures, and invest in high-quality upholstery.
This approach updates the feel while preserving the home’s core structure.
Which Trades Should I Hire First for a Renovation?
To front-load your renovation, hire the structural engineer, architect, and interior designer first, then tier in electricians, plumbers, and insulation specialists.
Prioritize architectural preservation while planning updates, so systems upgrade without compromising character. You’ll align the core layout with modern needs, then refine finish choices through interior design guidance.
Coordinate trades early to avoid clashes, confirm permits, and schedule sequential work. This approach minimizes rework, keeps the project on track, and delivers a cohesive, trend-aware result.
How Can I Preserve Character While Adding Modern Tech?
You can preserve character while adding modern tech by treating vintage charm as a design anchor and framing tech as discrete enhancements.
Start with paint and lighting that respect original plaster and wood, then integrate hidden cables and smart controls to avoid clutter.
Embrace Tech integration in kitchens and living spaces with retro-inspired finishes.
You’ll maintain texture and provenance, while gaining efficiency, comfort, and precise, trend-aware automation that supports daily use without overpowering the space.
Conclusion
You’ve laid a solid, safety-first foundation, so finish with precision and purpose. Let the house breathe: retrofit load paths, tighten the envelope, and wire for today’s tech while staying future-ready. Harmonize spaces with flexible design, smart storage, and energy-efficient systems that don’t scream “renovation.” Panache arrives through lighting and finishes, not excess. Phase deliberately, measure outcomes, and preserve value. When you’re done, you’ll own a home that’s resilient, efficient, and quietly stylish—built to adapt as life evolves.